Admin Login
Connect Now
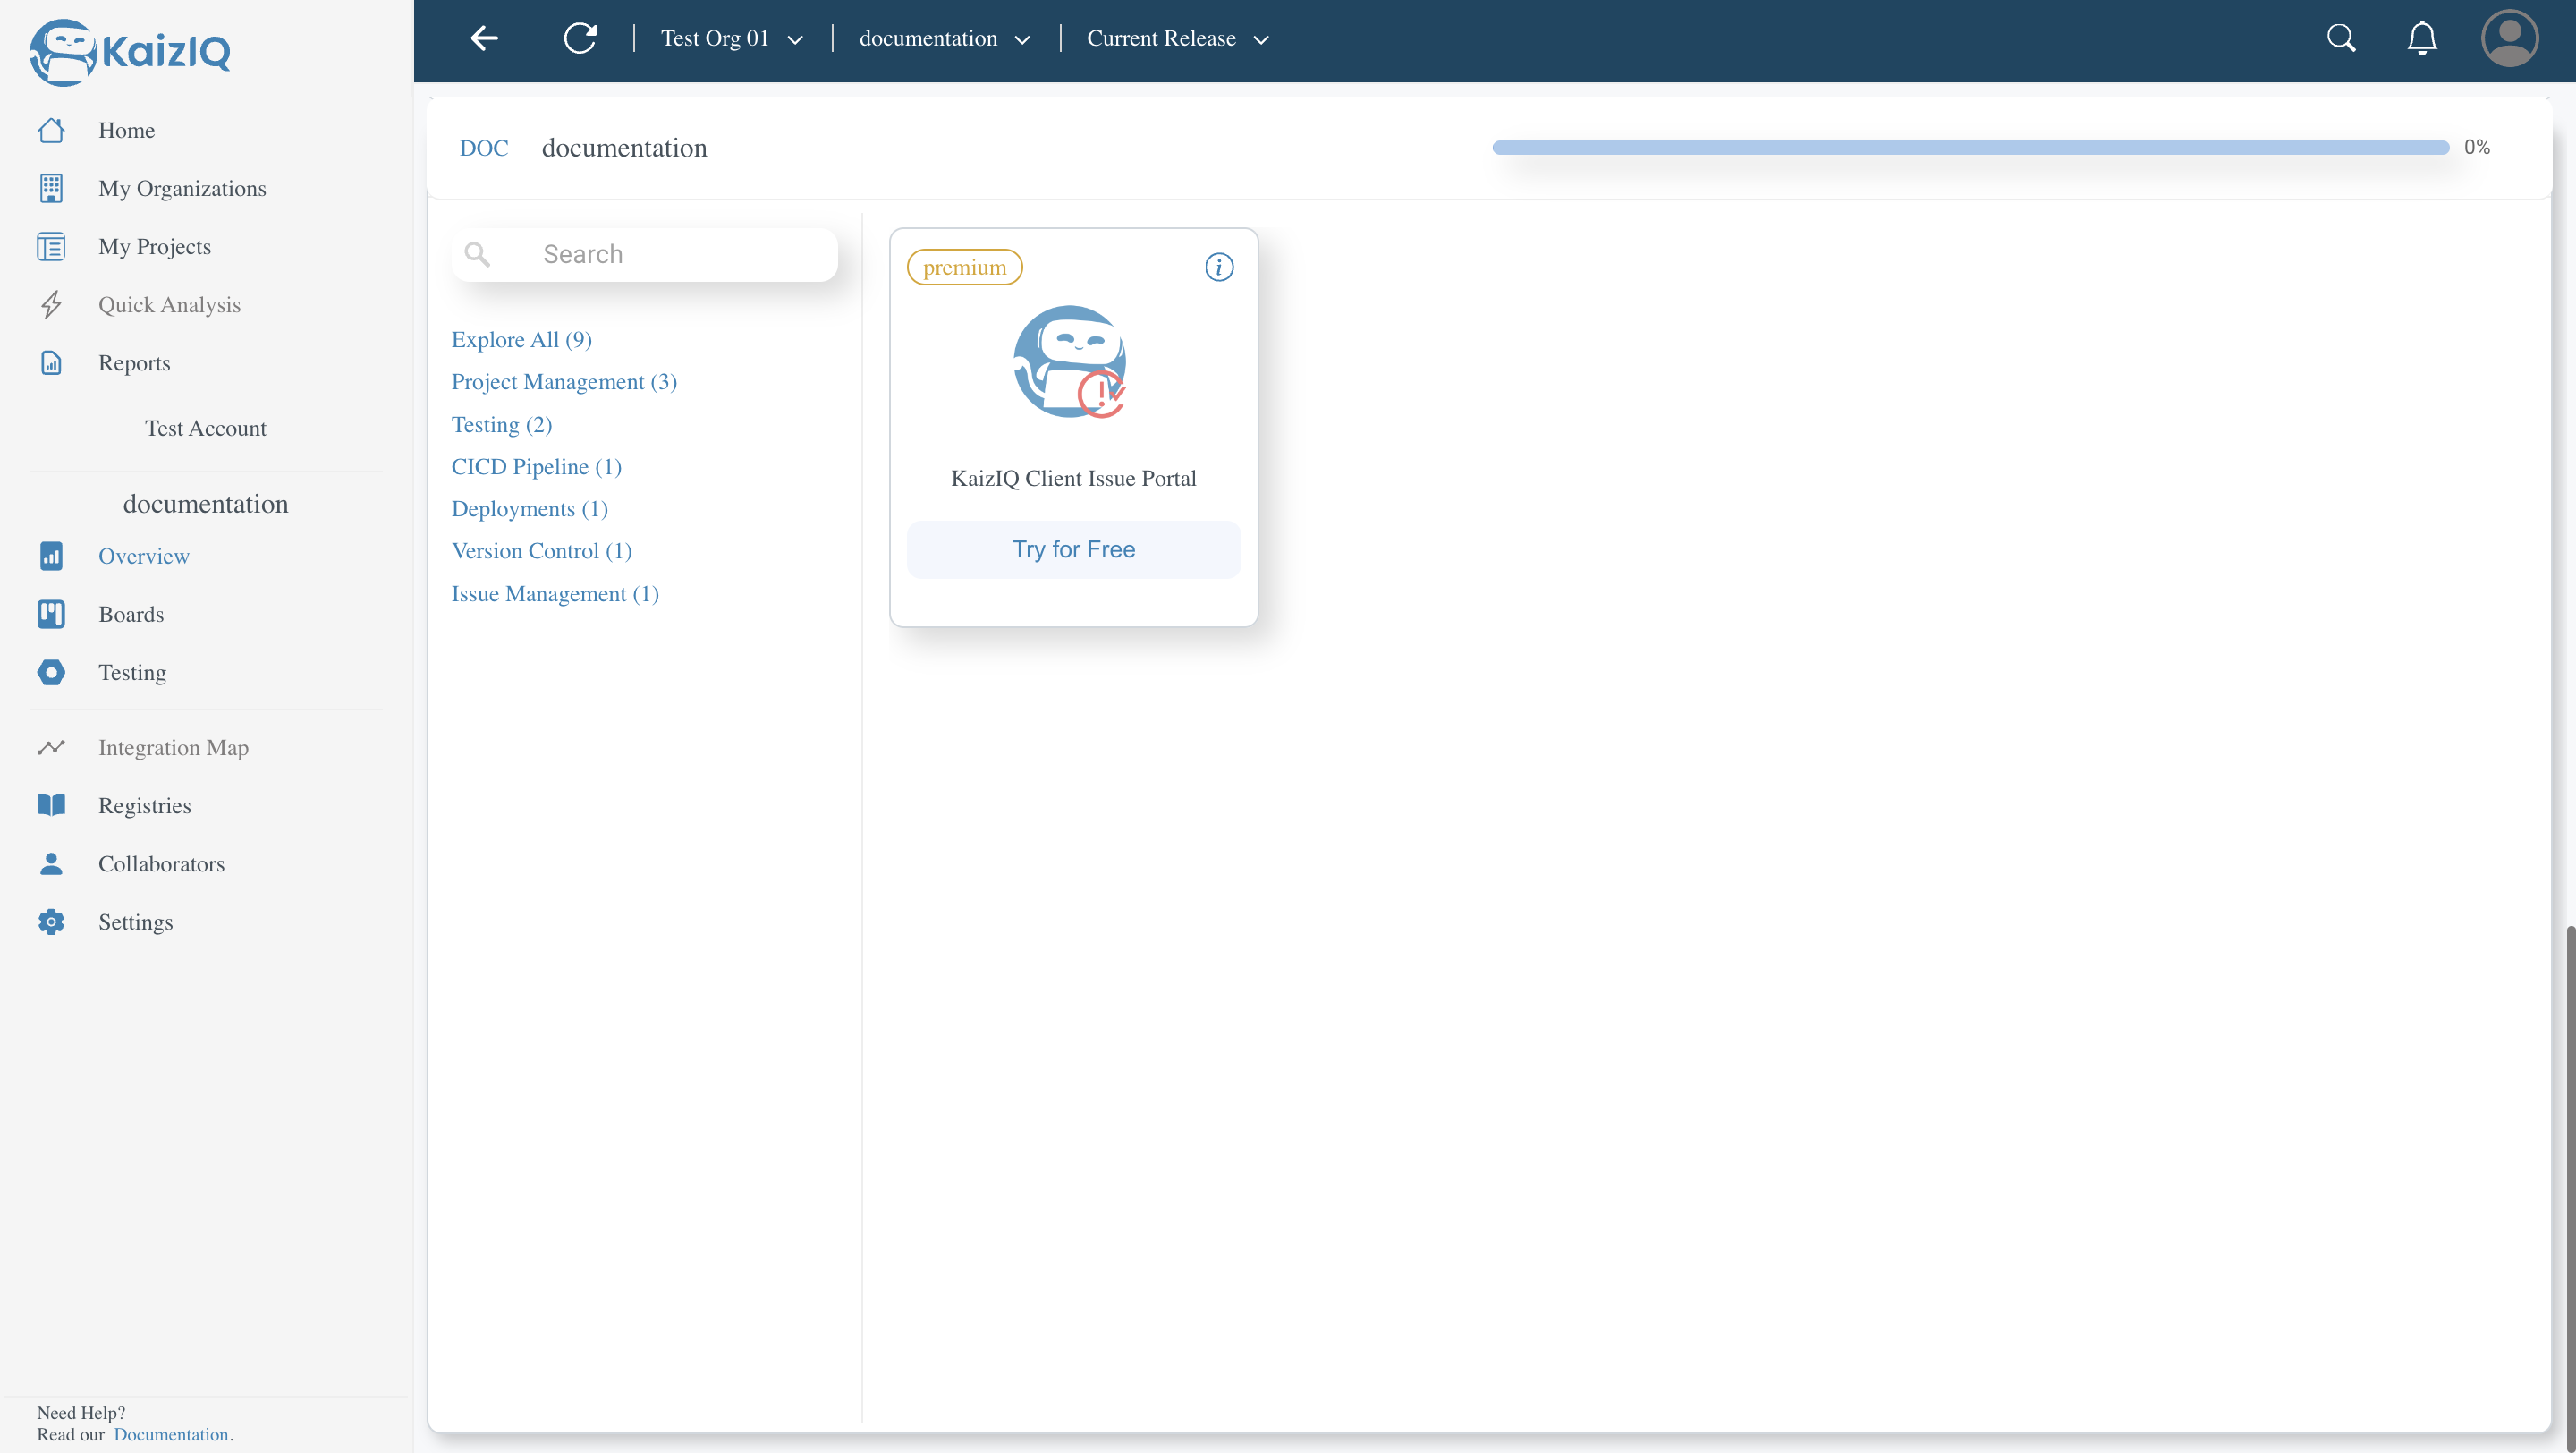
Follow the steps below to get connected with KaizIQ Issues. First, you need to go to the project.Now, go to the overview page, scroll to the bottom click on Issue Management and click on the "Try for free" button.
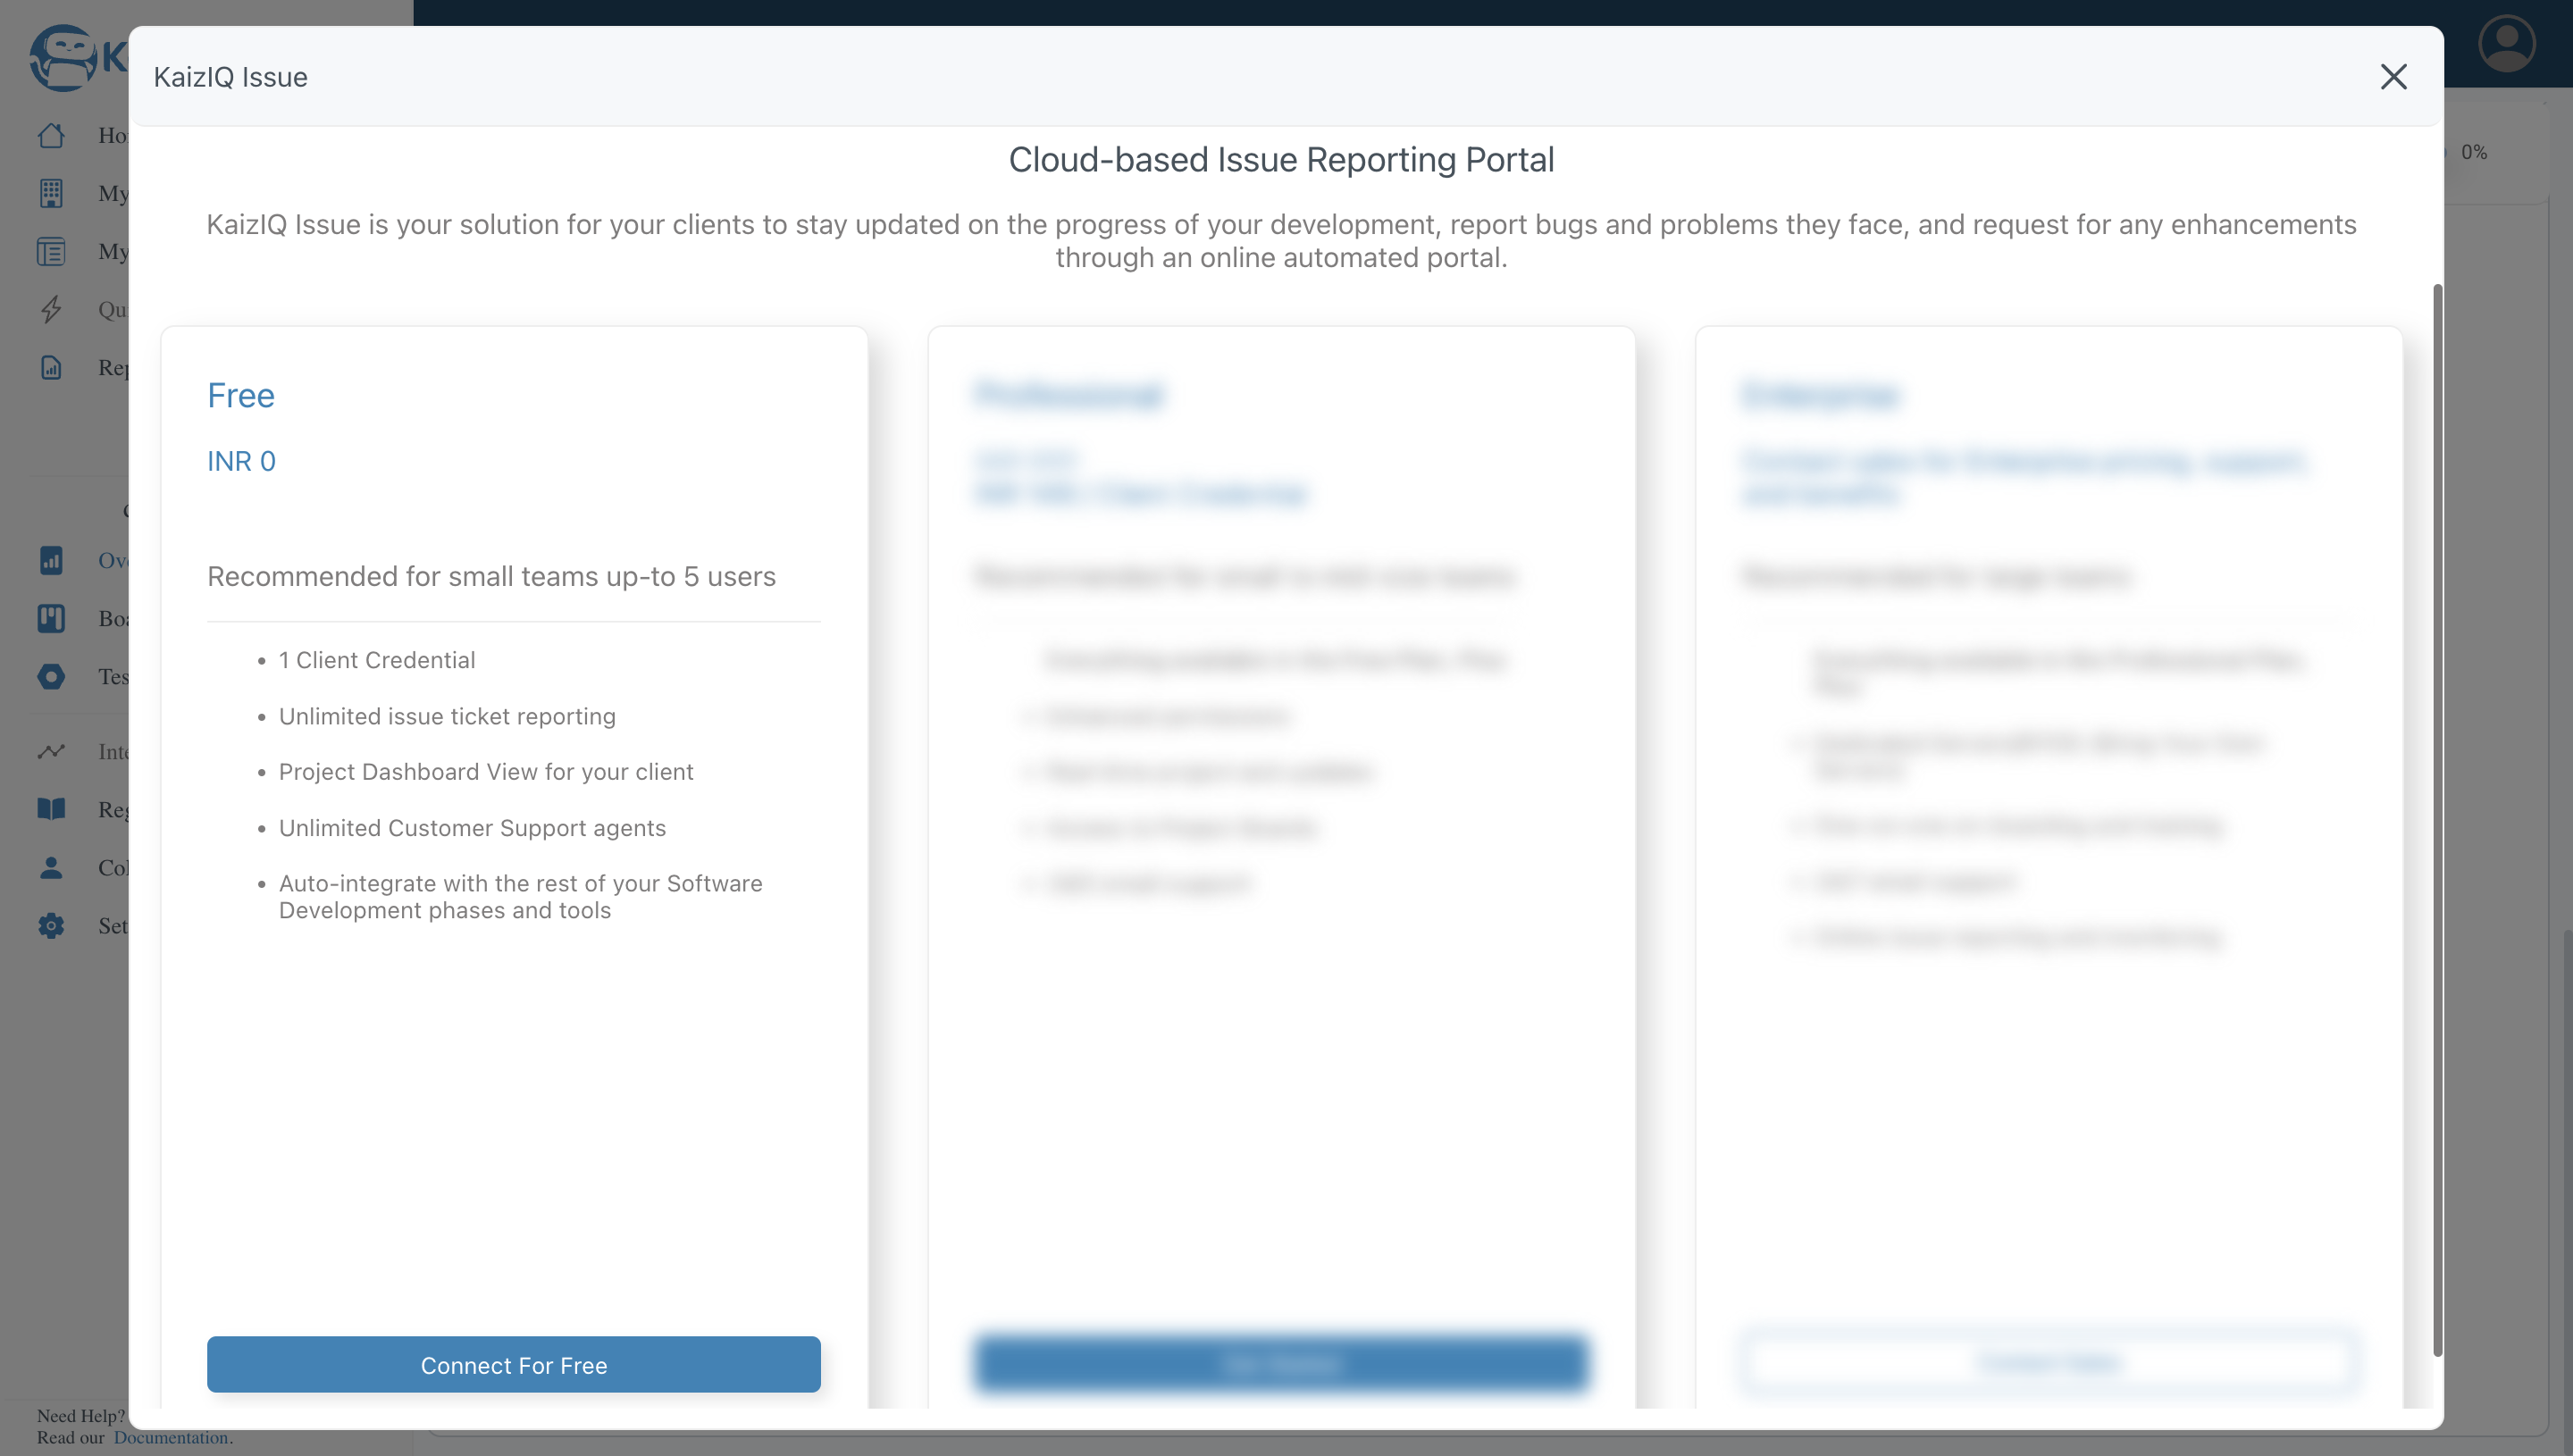
Now, you will be redirected to the KaizIQ Issues page. Click on the "Connect for free" button.
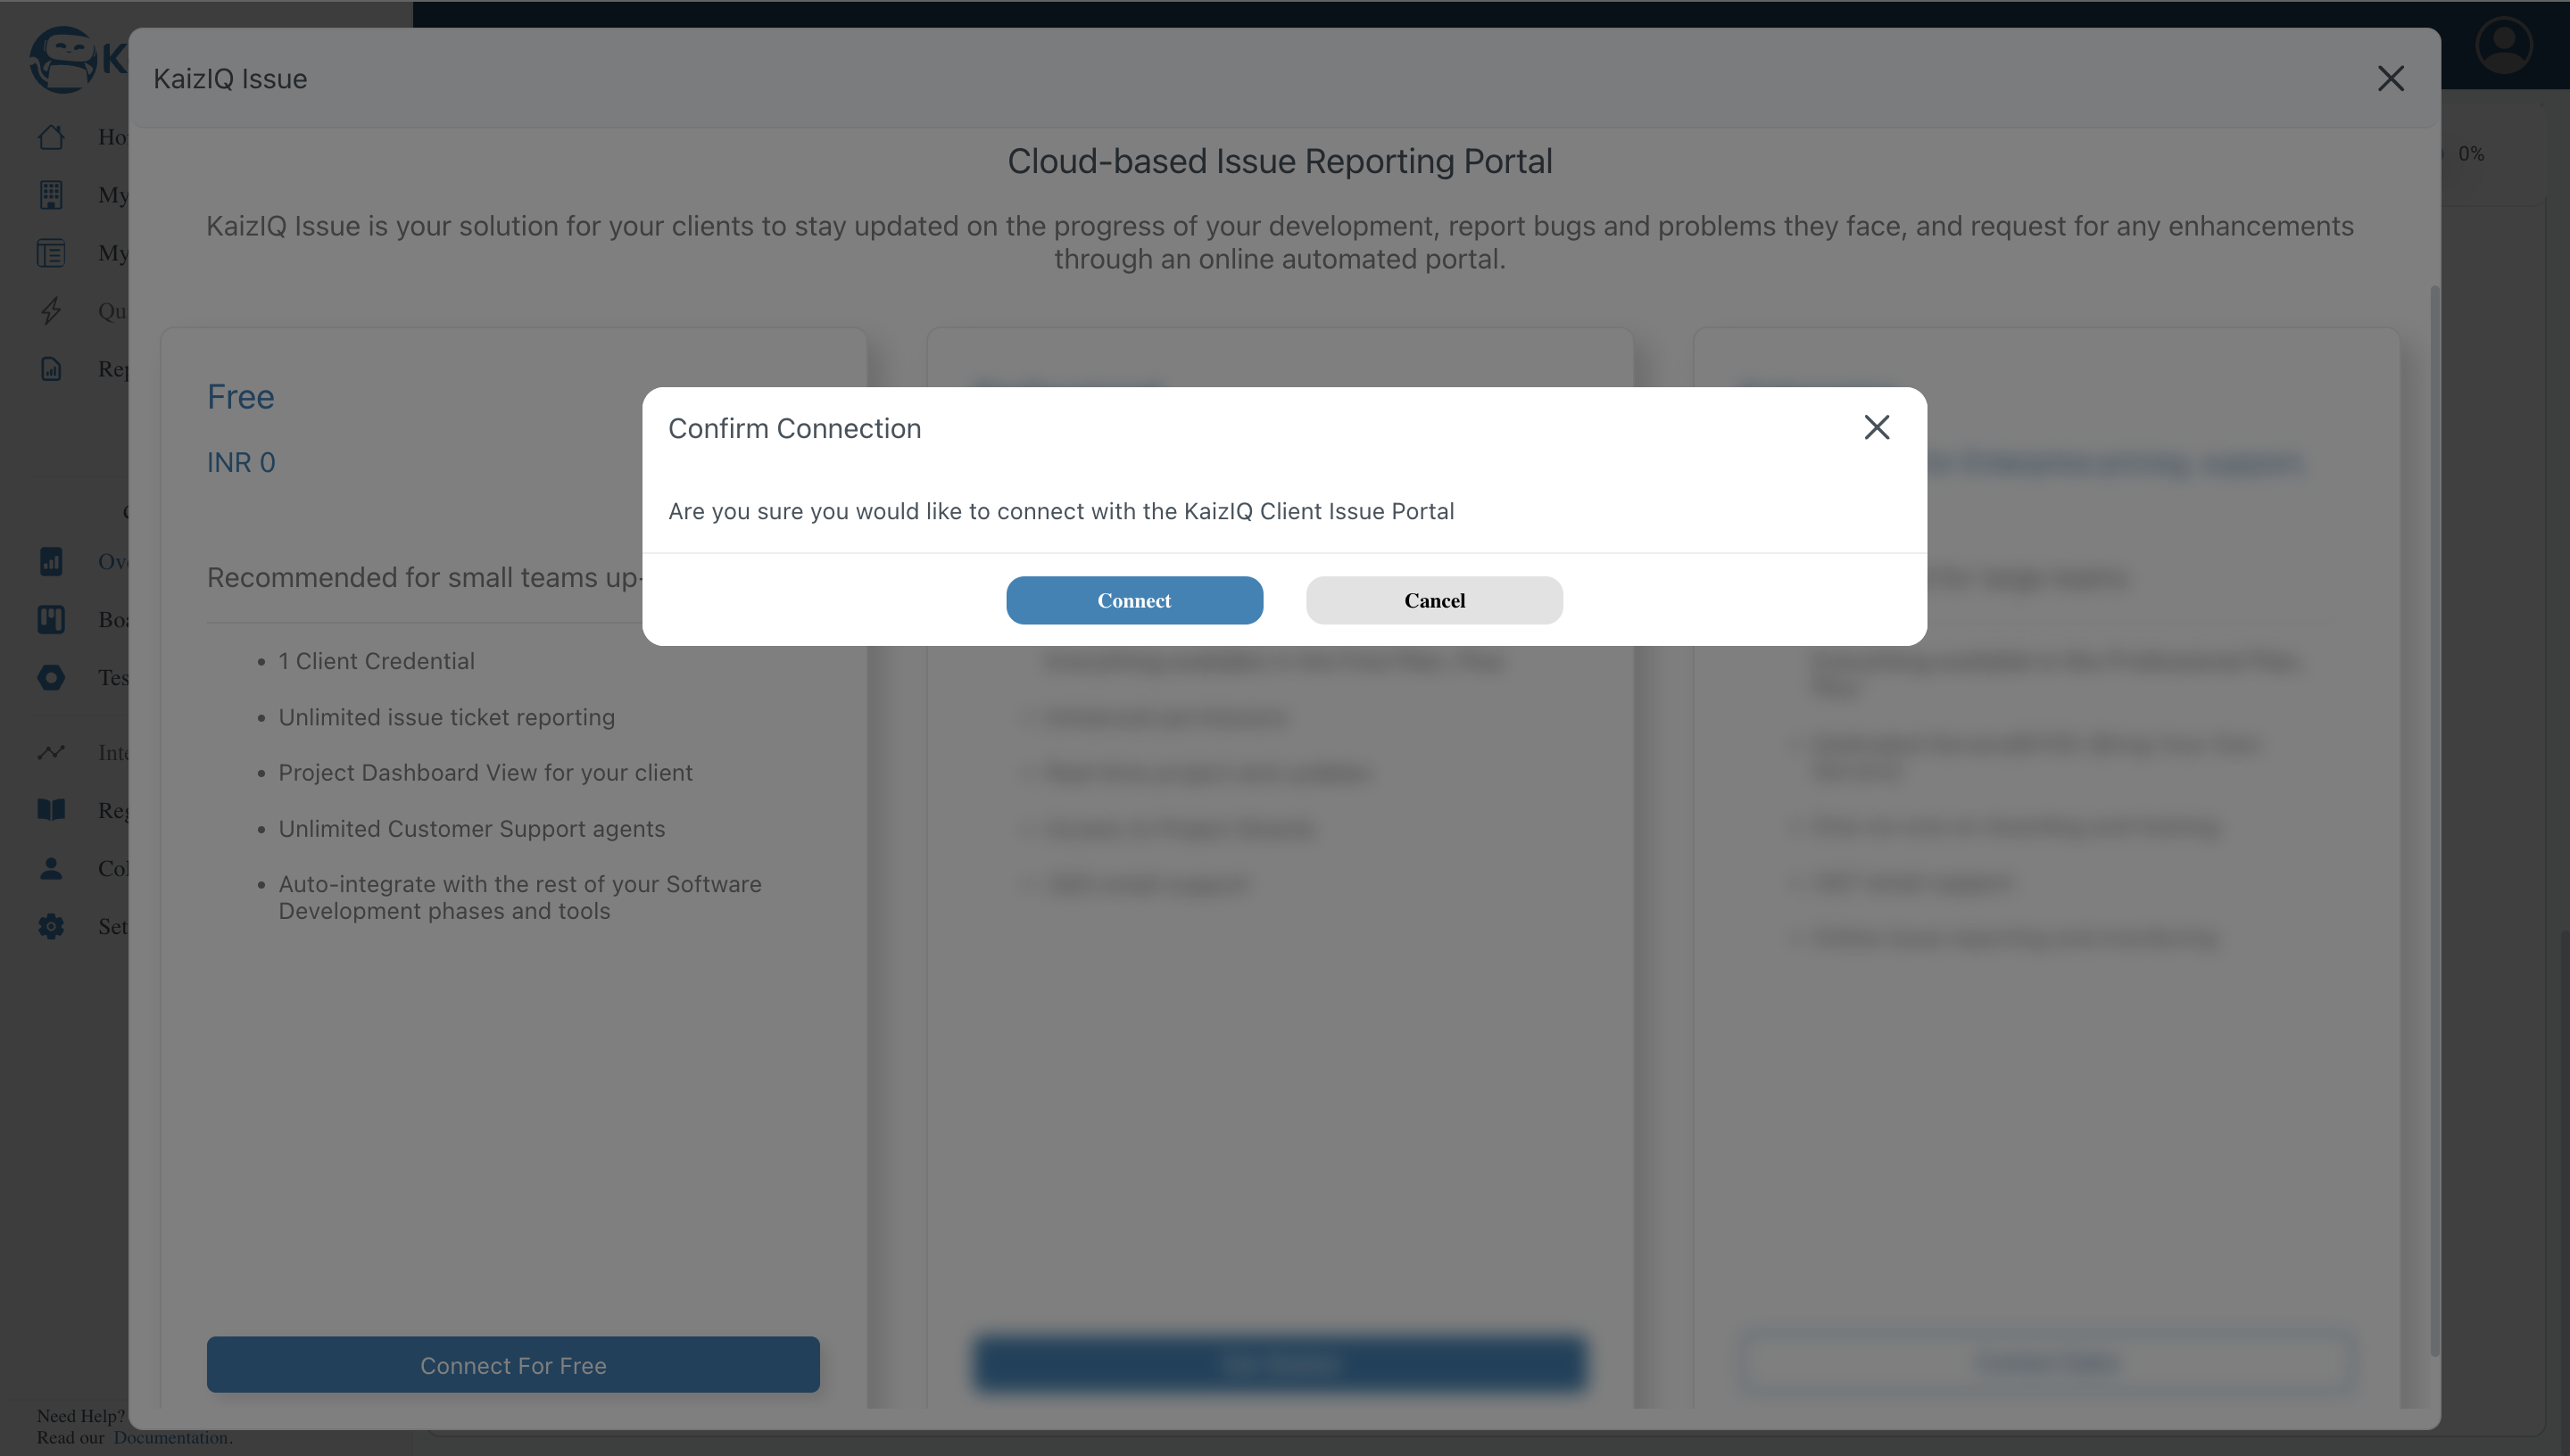
A confirmation popup will appear, click on the "Connect" button.
Then, you will be redirected to the overview page. On the left panel you will see the KaizIQ Issues option, click on it, you will be redirected to the KaizIQ Issues page.
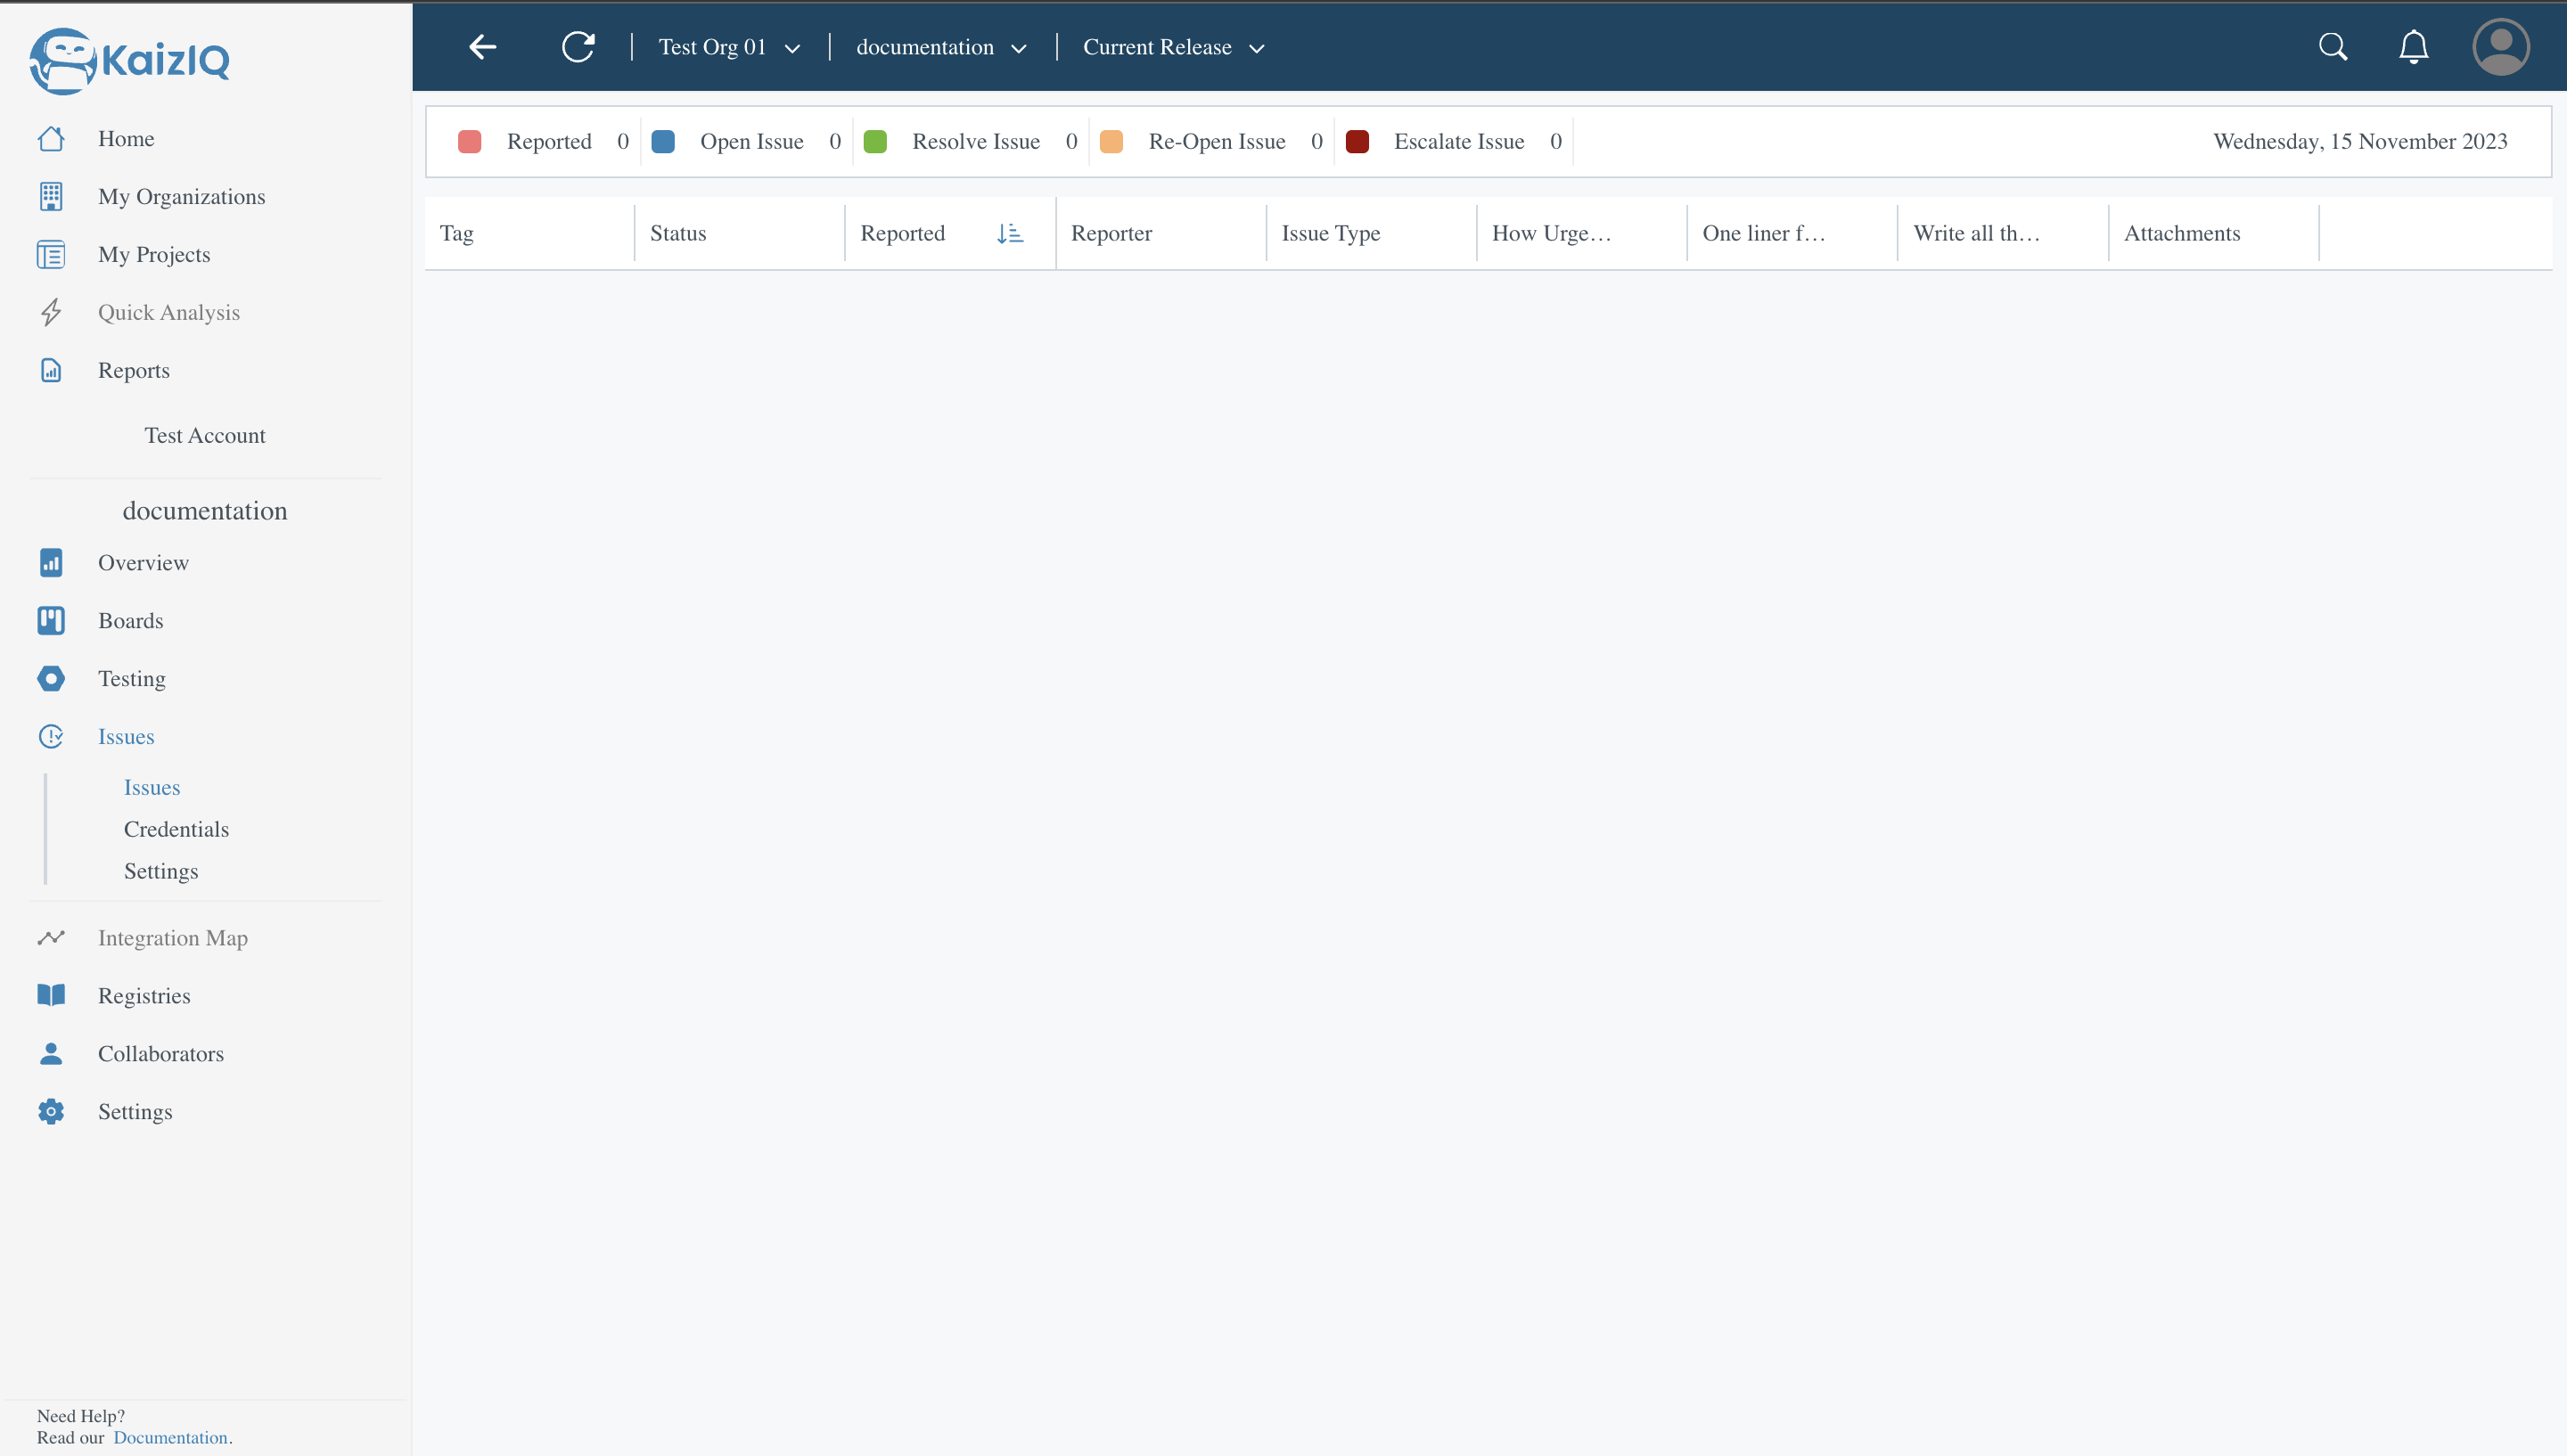
Settings
Add Field
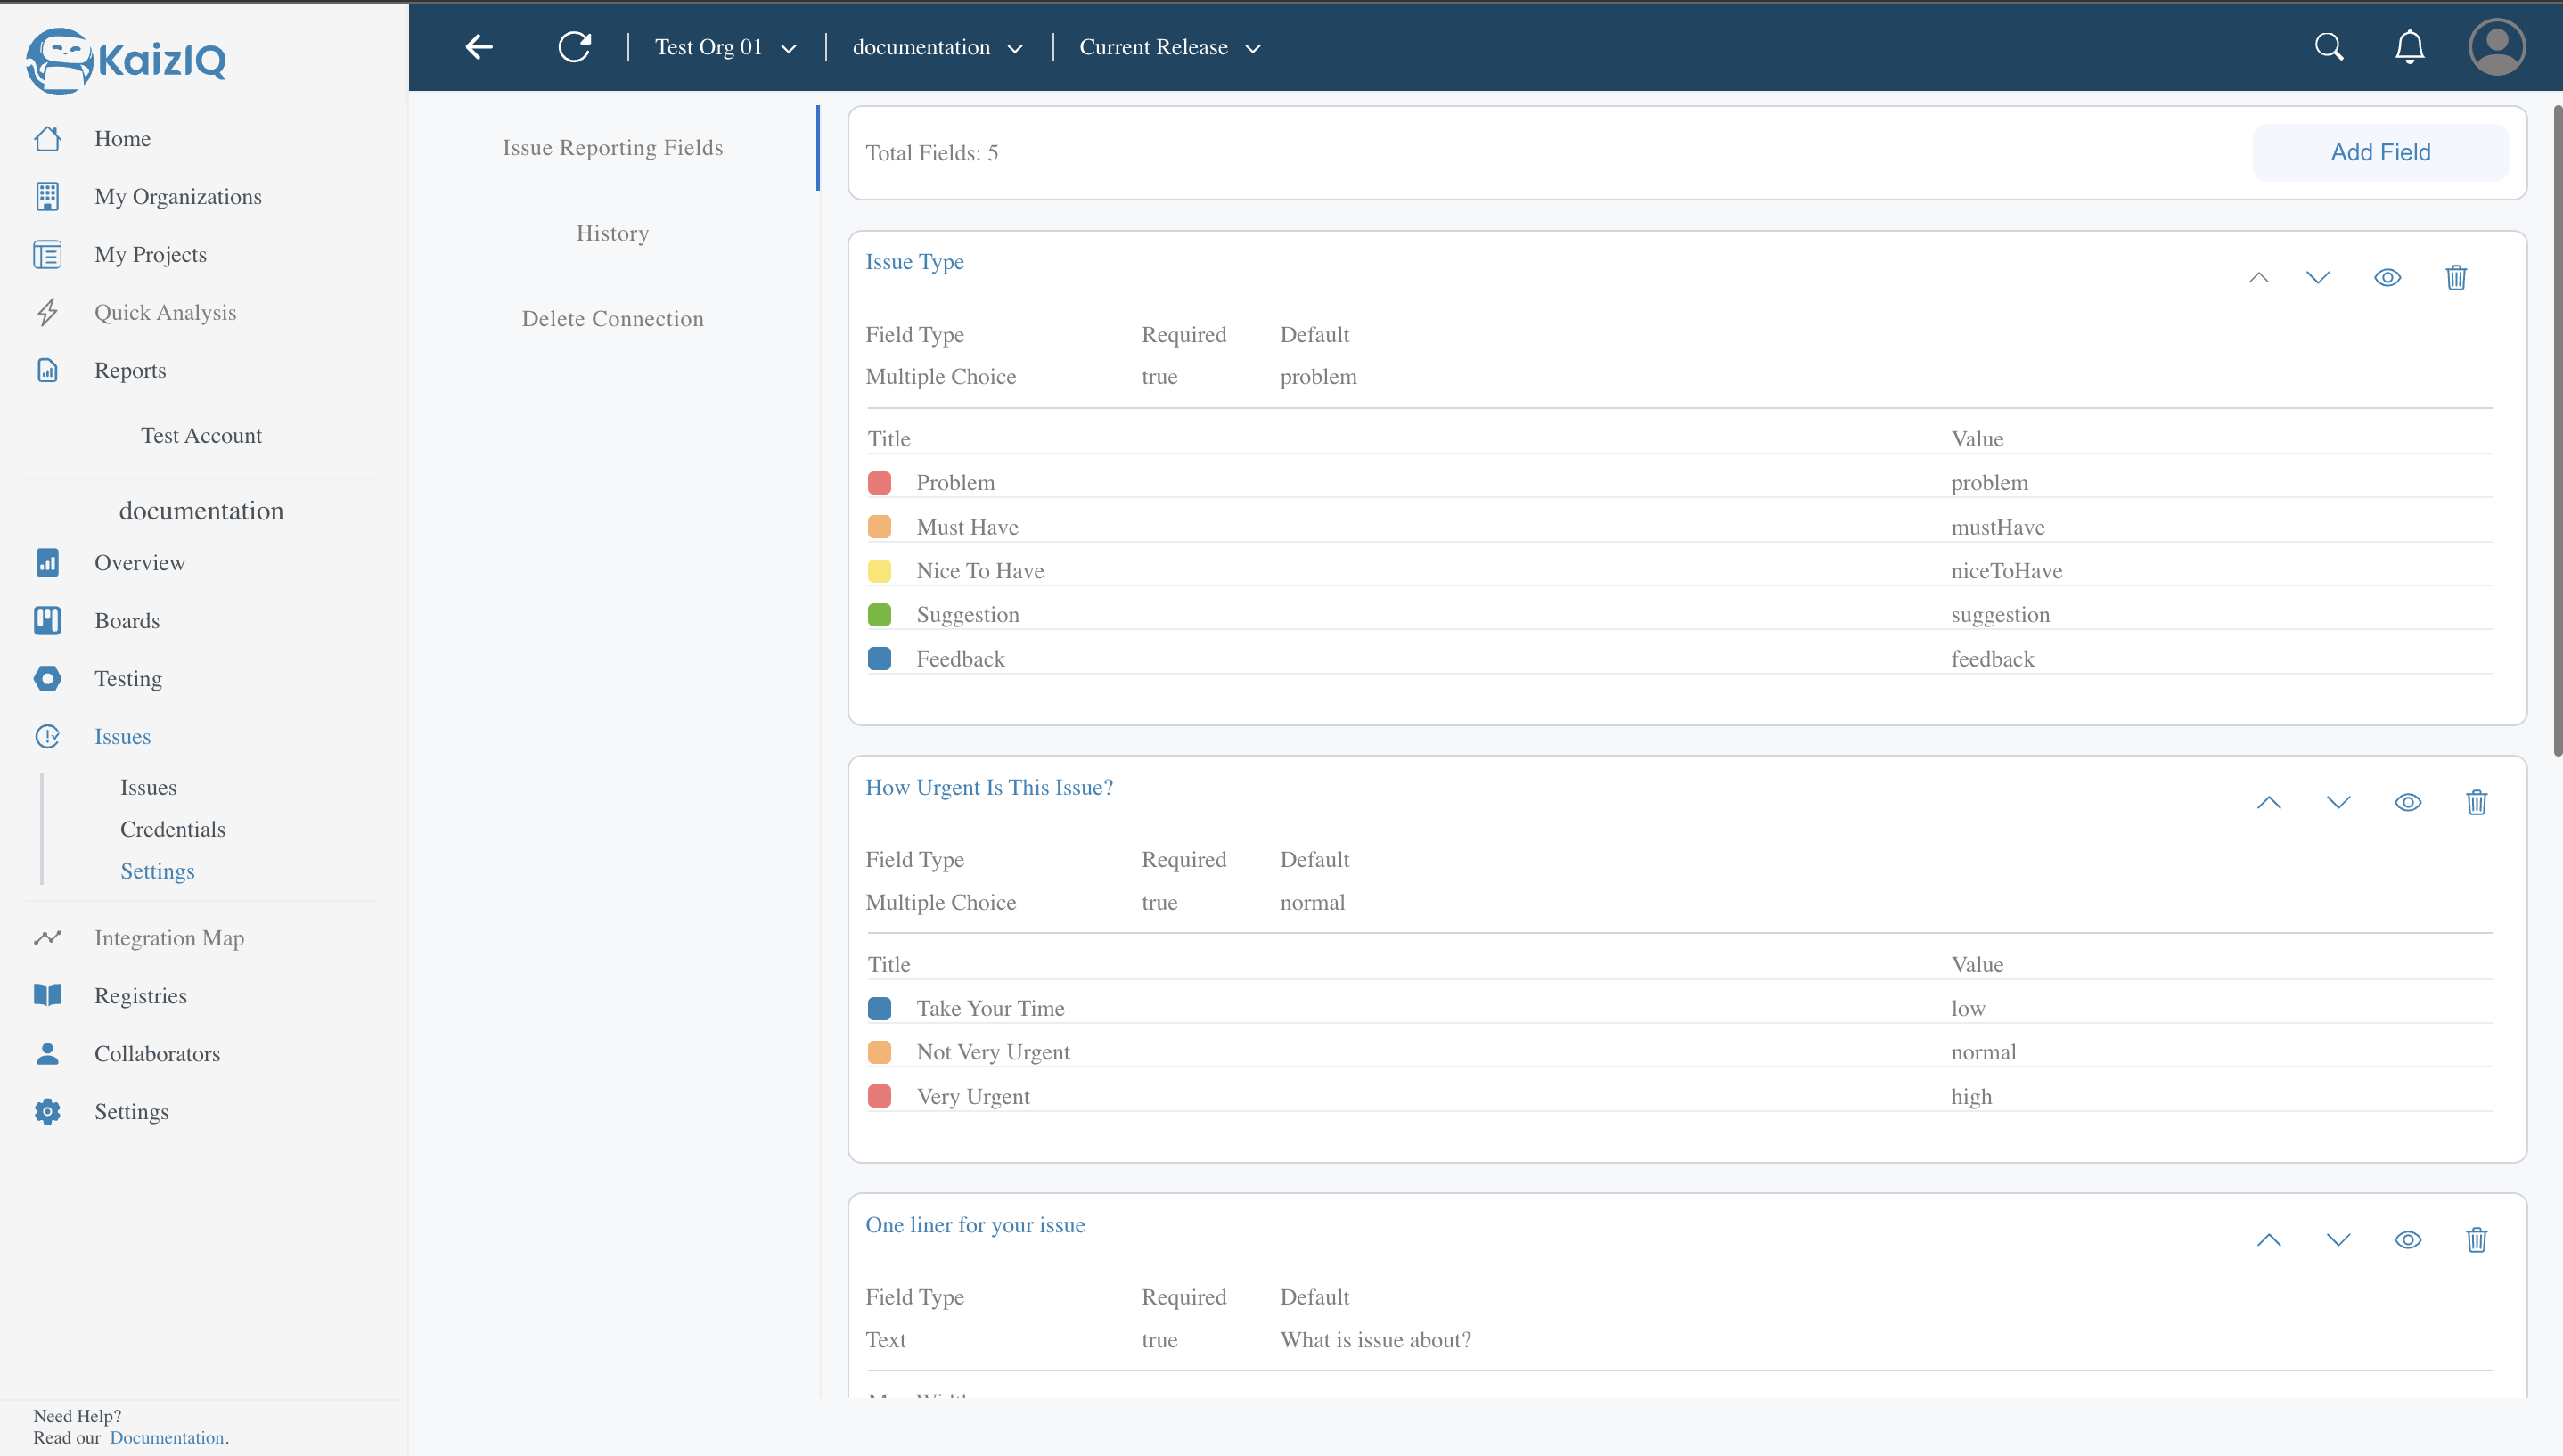
From the left pannel click on settings and you will be redirected to the settings page.Now you can add different fields to your issues by clicking on the "Add Field" button.
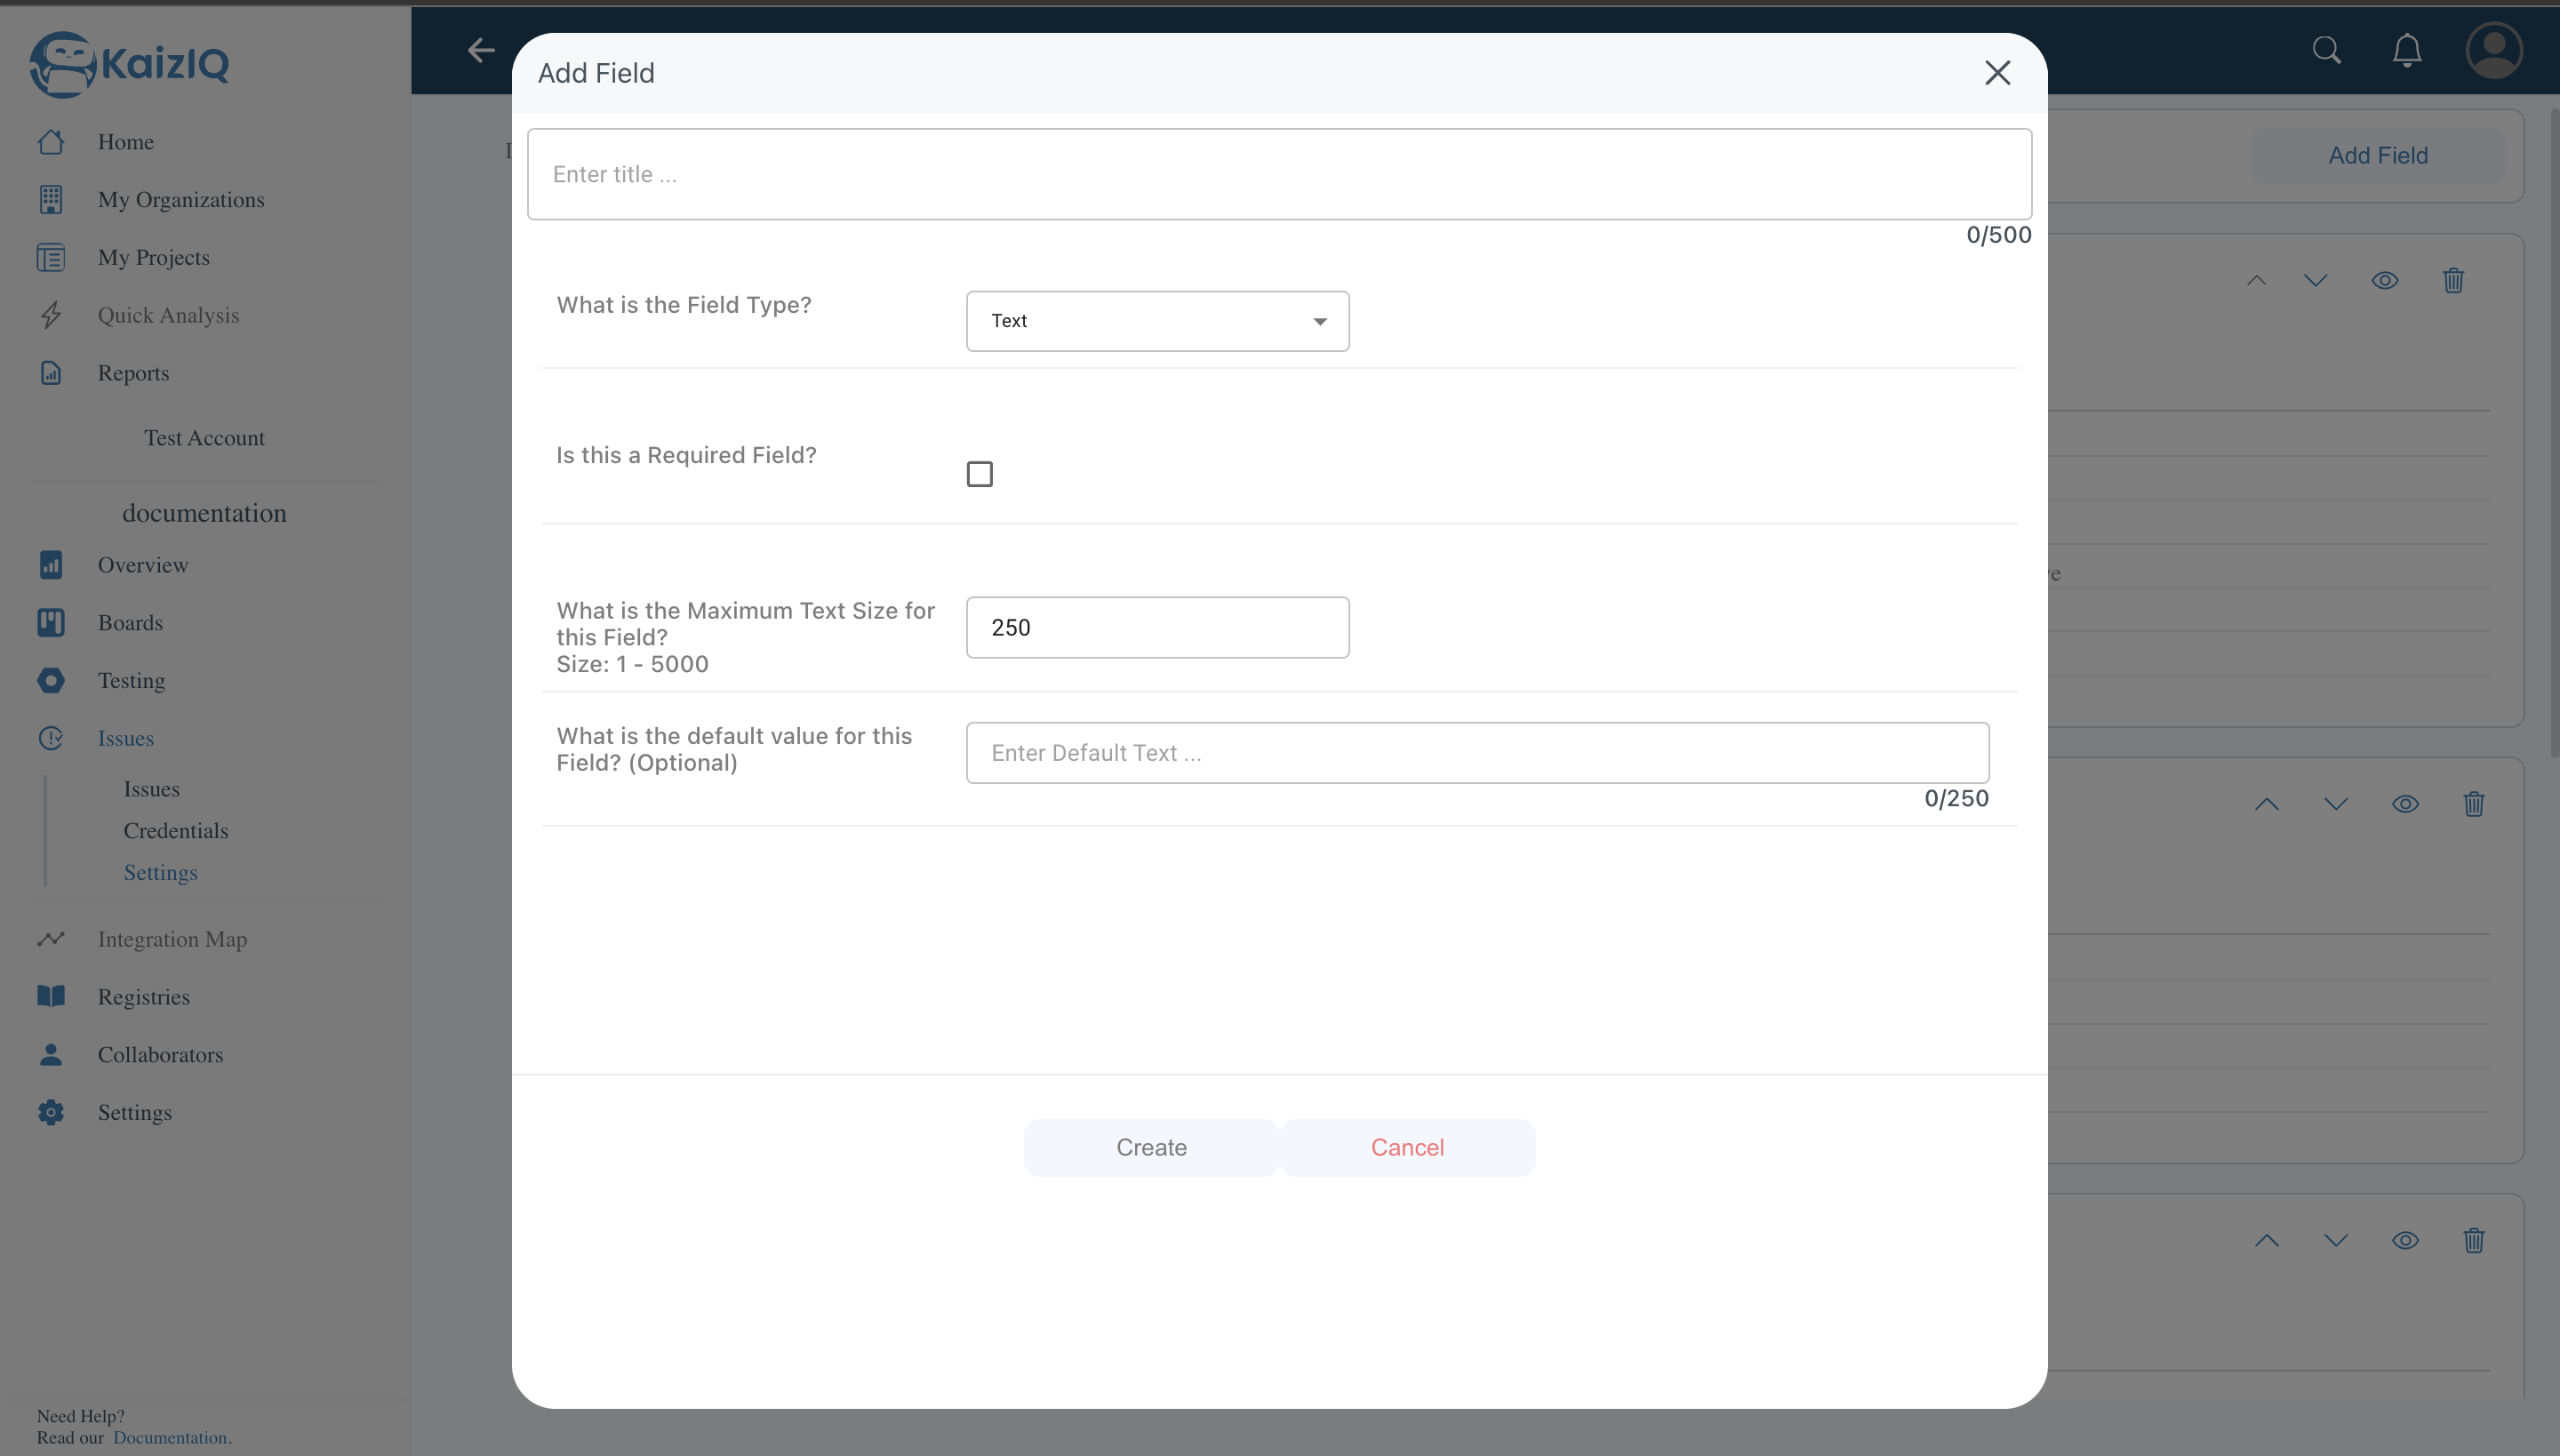
A form will appear, fill up the form.
In the "Field Type" section you can choose the type of field you want to add.
Field Types
Text
In this field you can add text, choose its maximum size, you may choose whether it is required or not and you can set any default text for this field.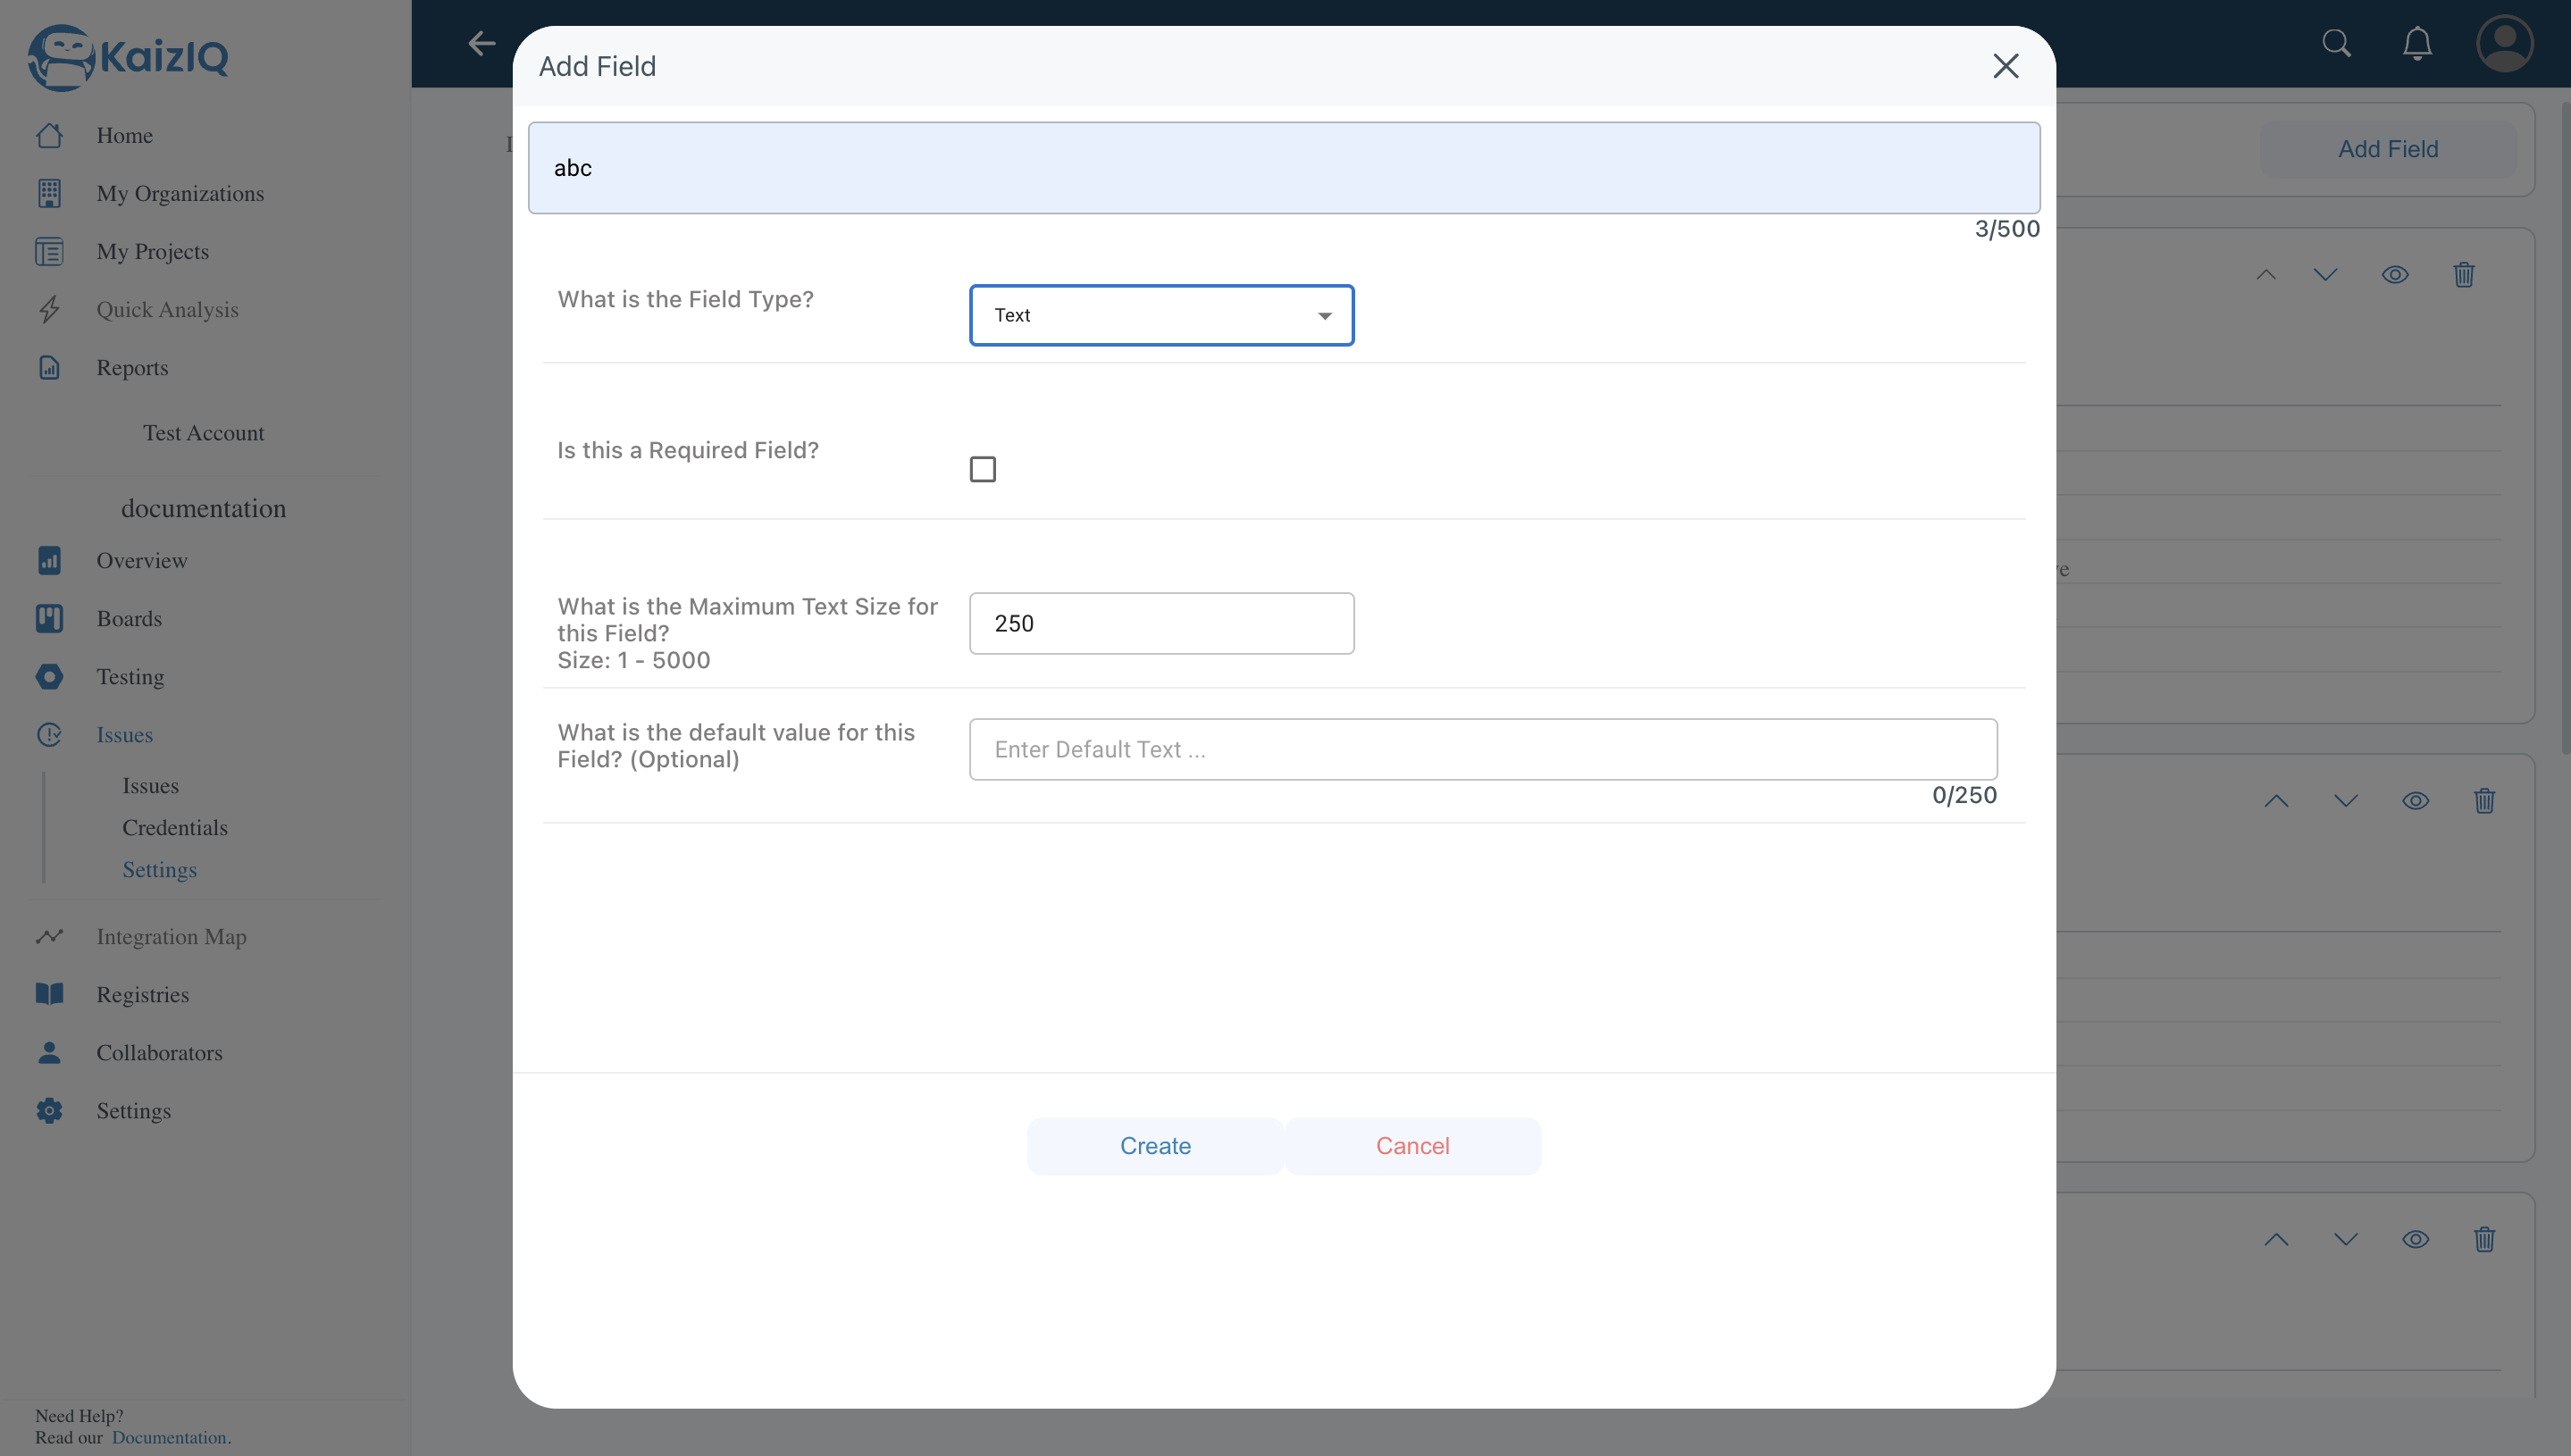
Information Text
In this field you can write any information you want to show in the issues.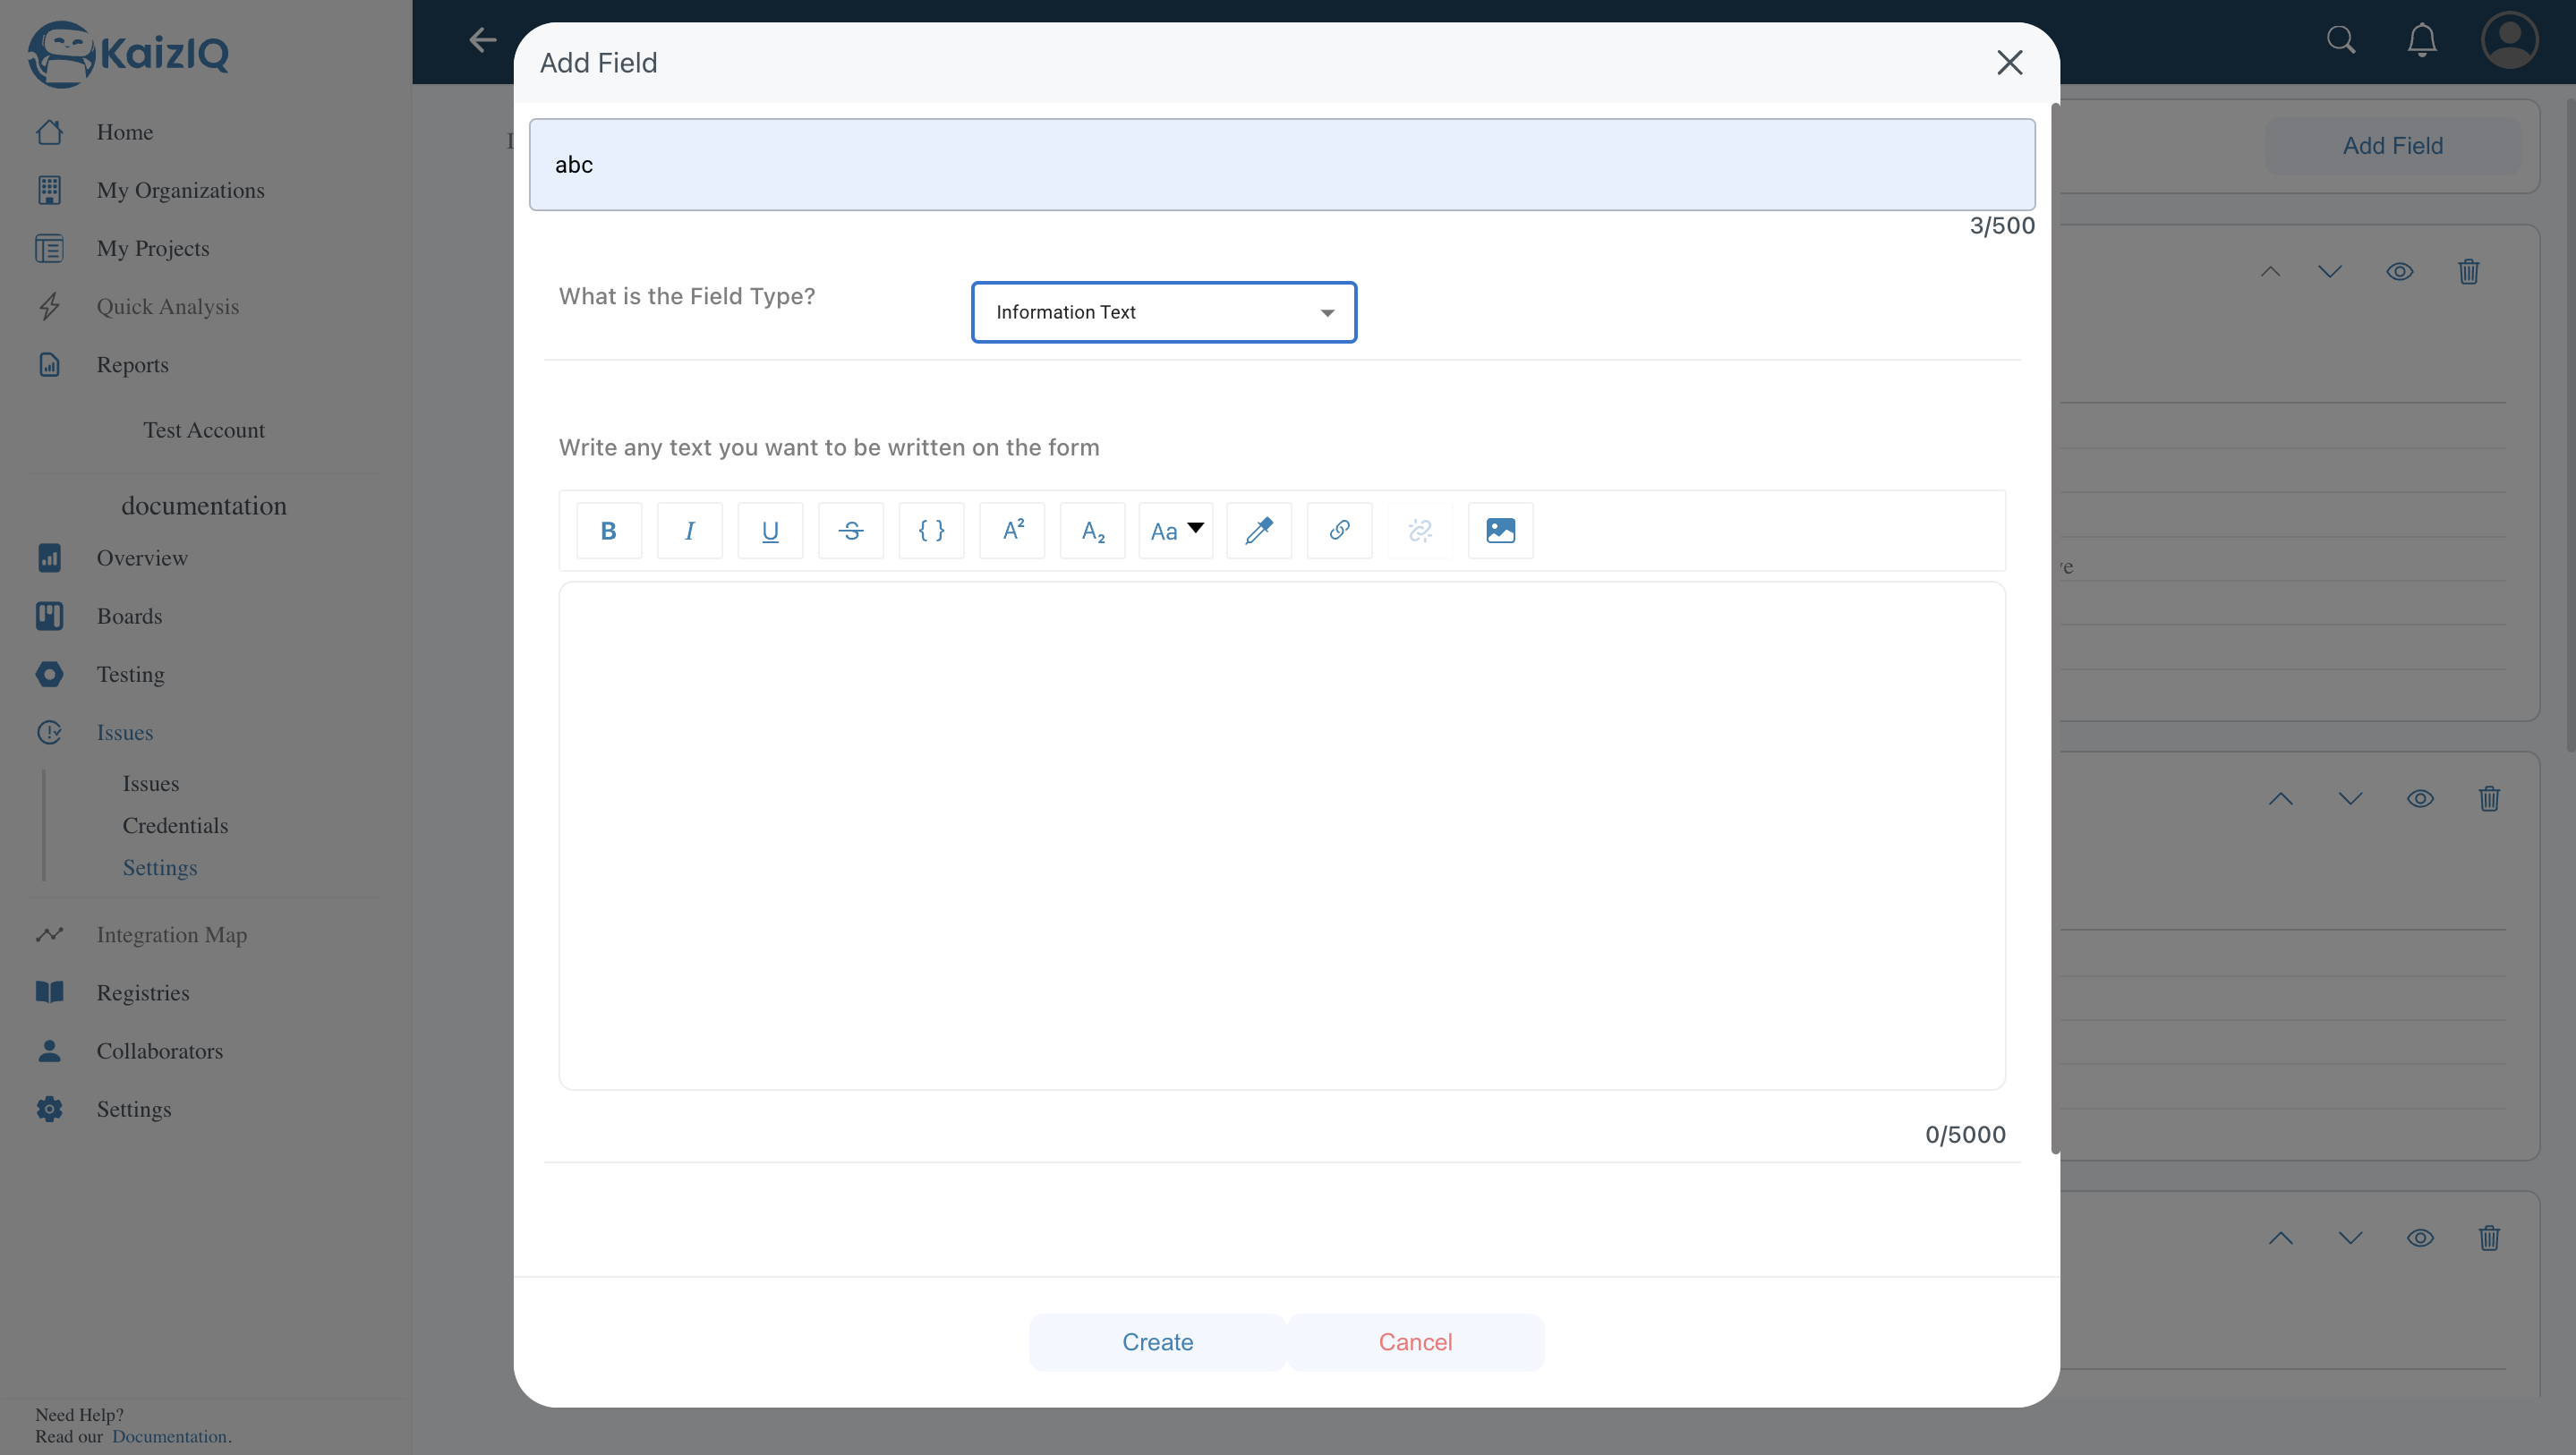
Multiple Choice
In this field you can add multiple choices to your issue, you may or may not choose the default choice and you can also choose whether it is required or not. Also, you can choose different colors for different choices.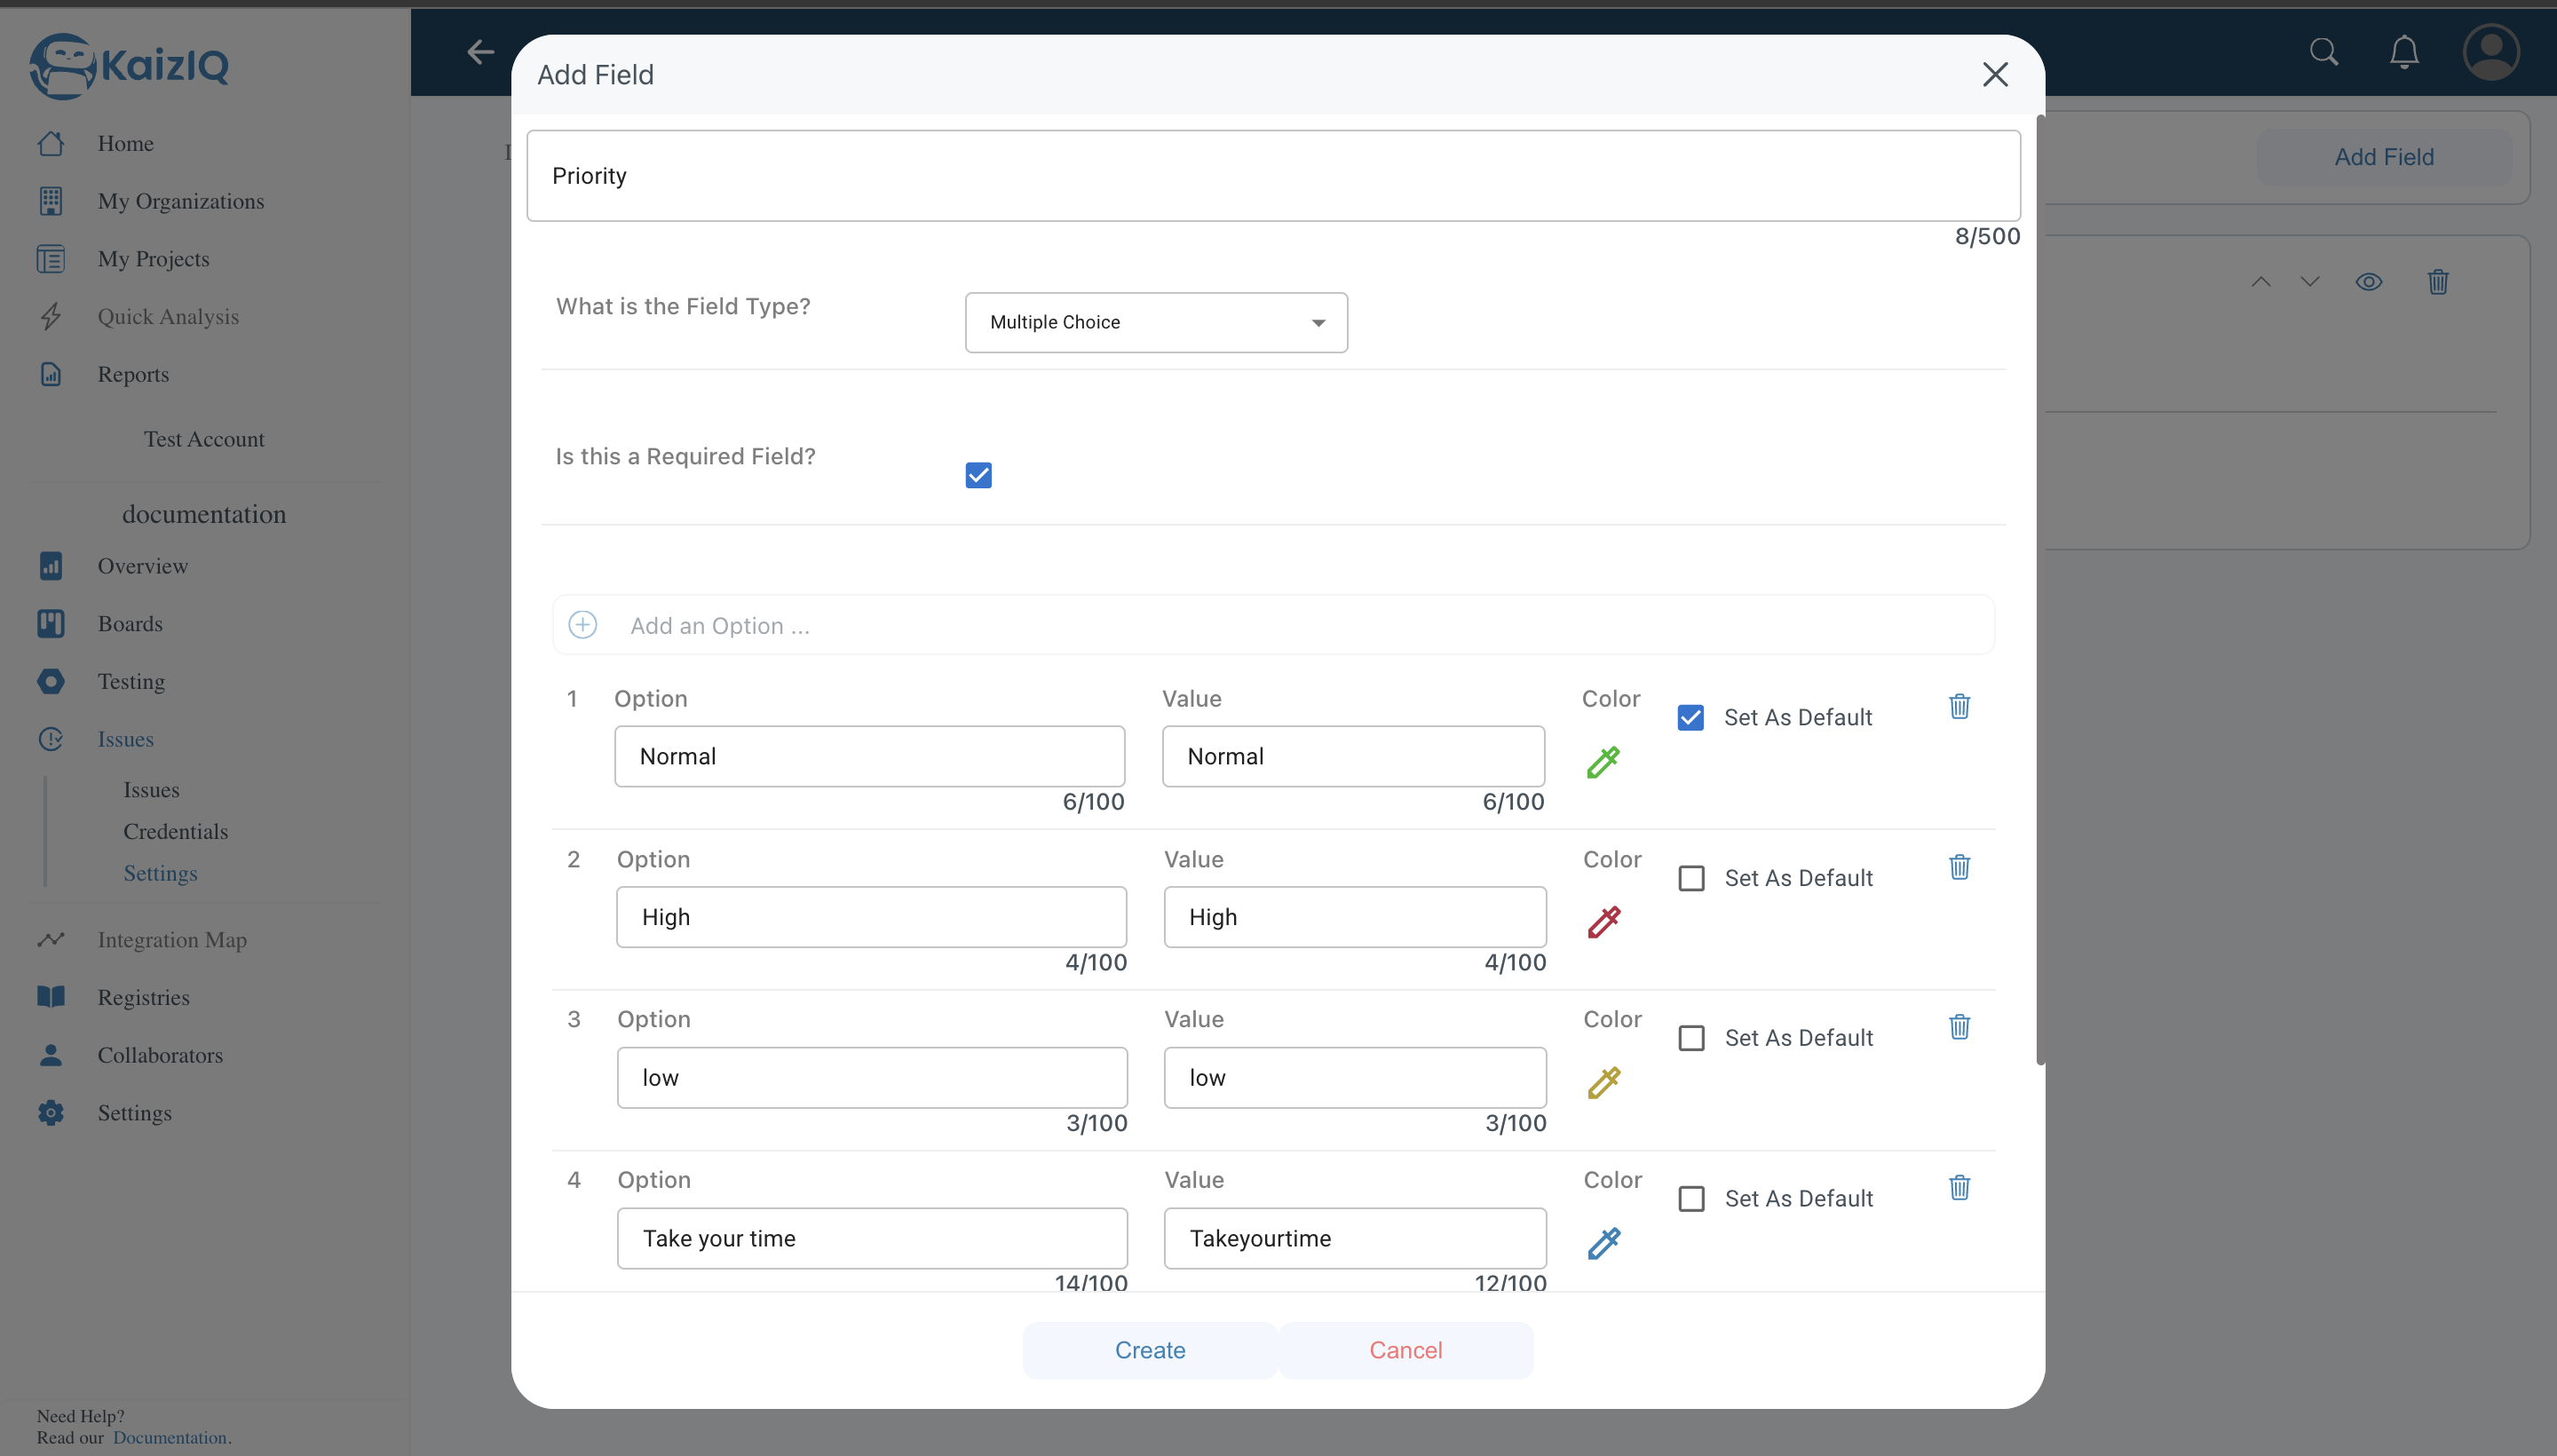
Number
In this field, you can add numbers. You can choose the range, default value, and whether it is required or not.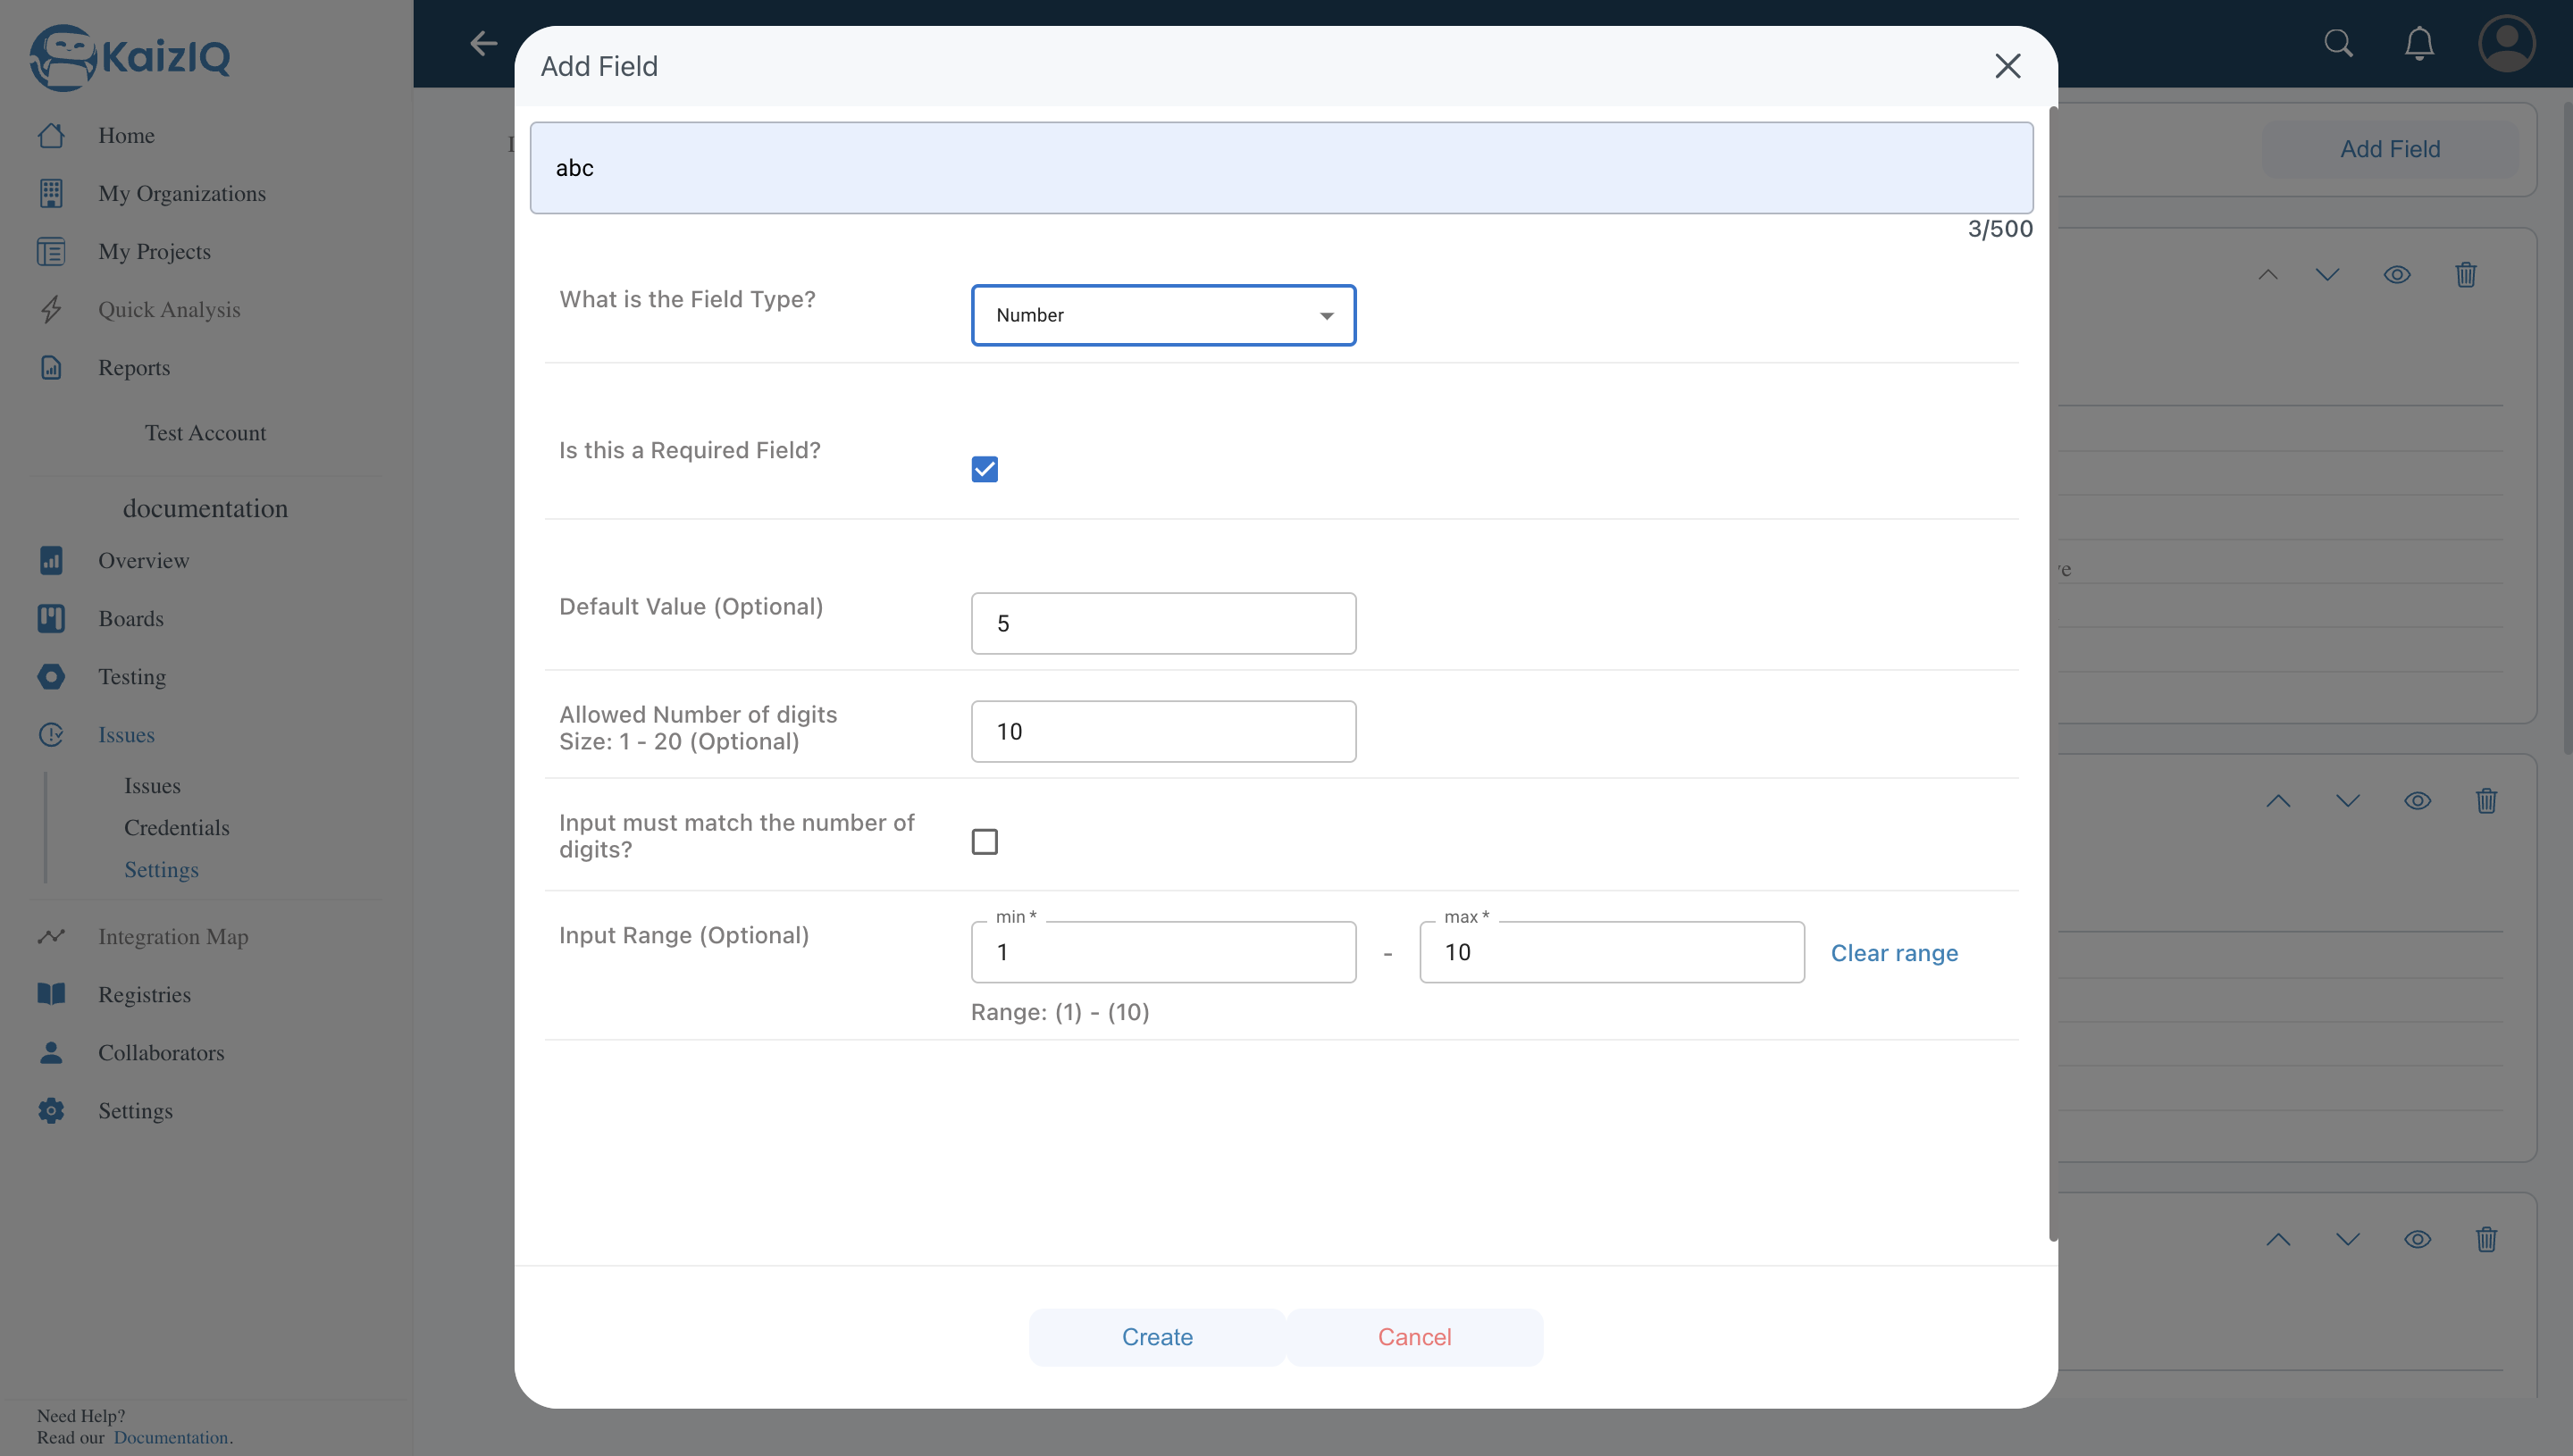
Date
You can choose whether it is required or not, and you can also choose whether to allow past dates or not.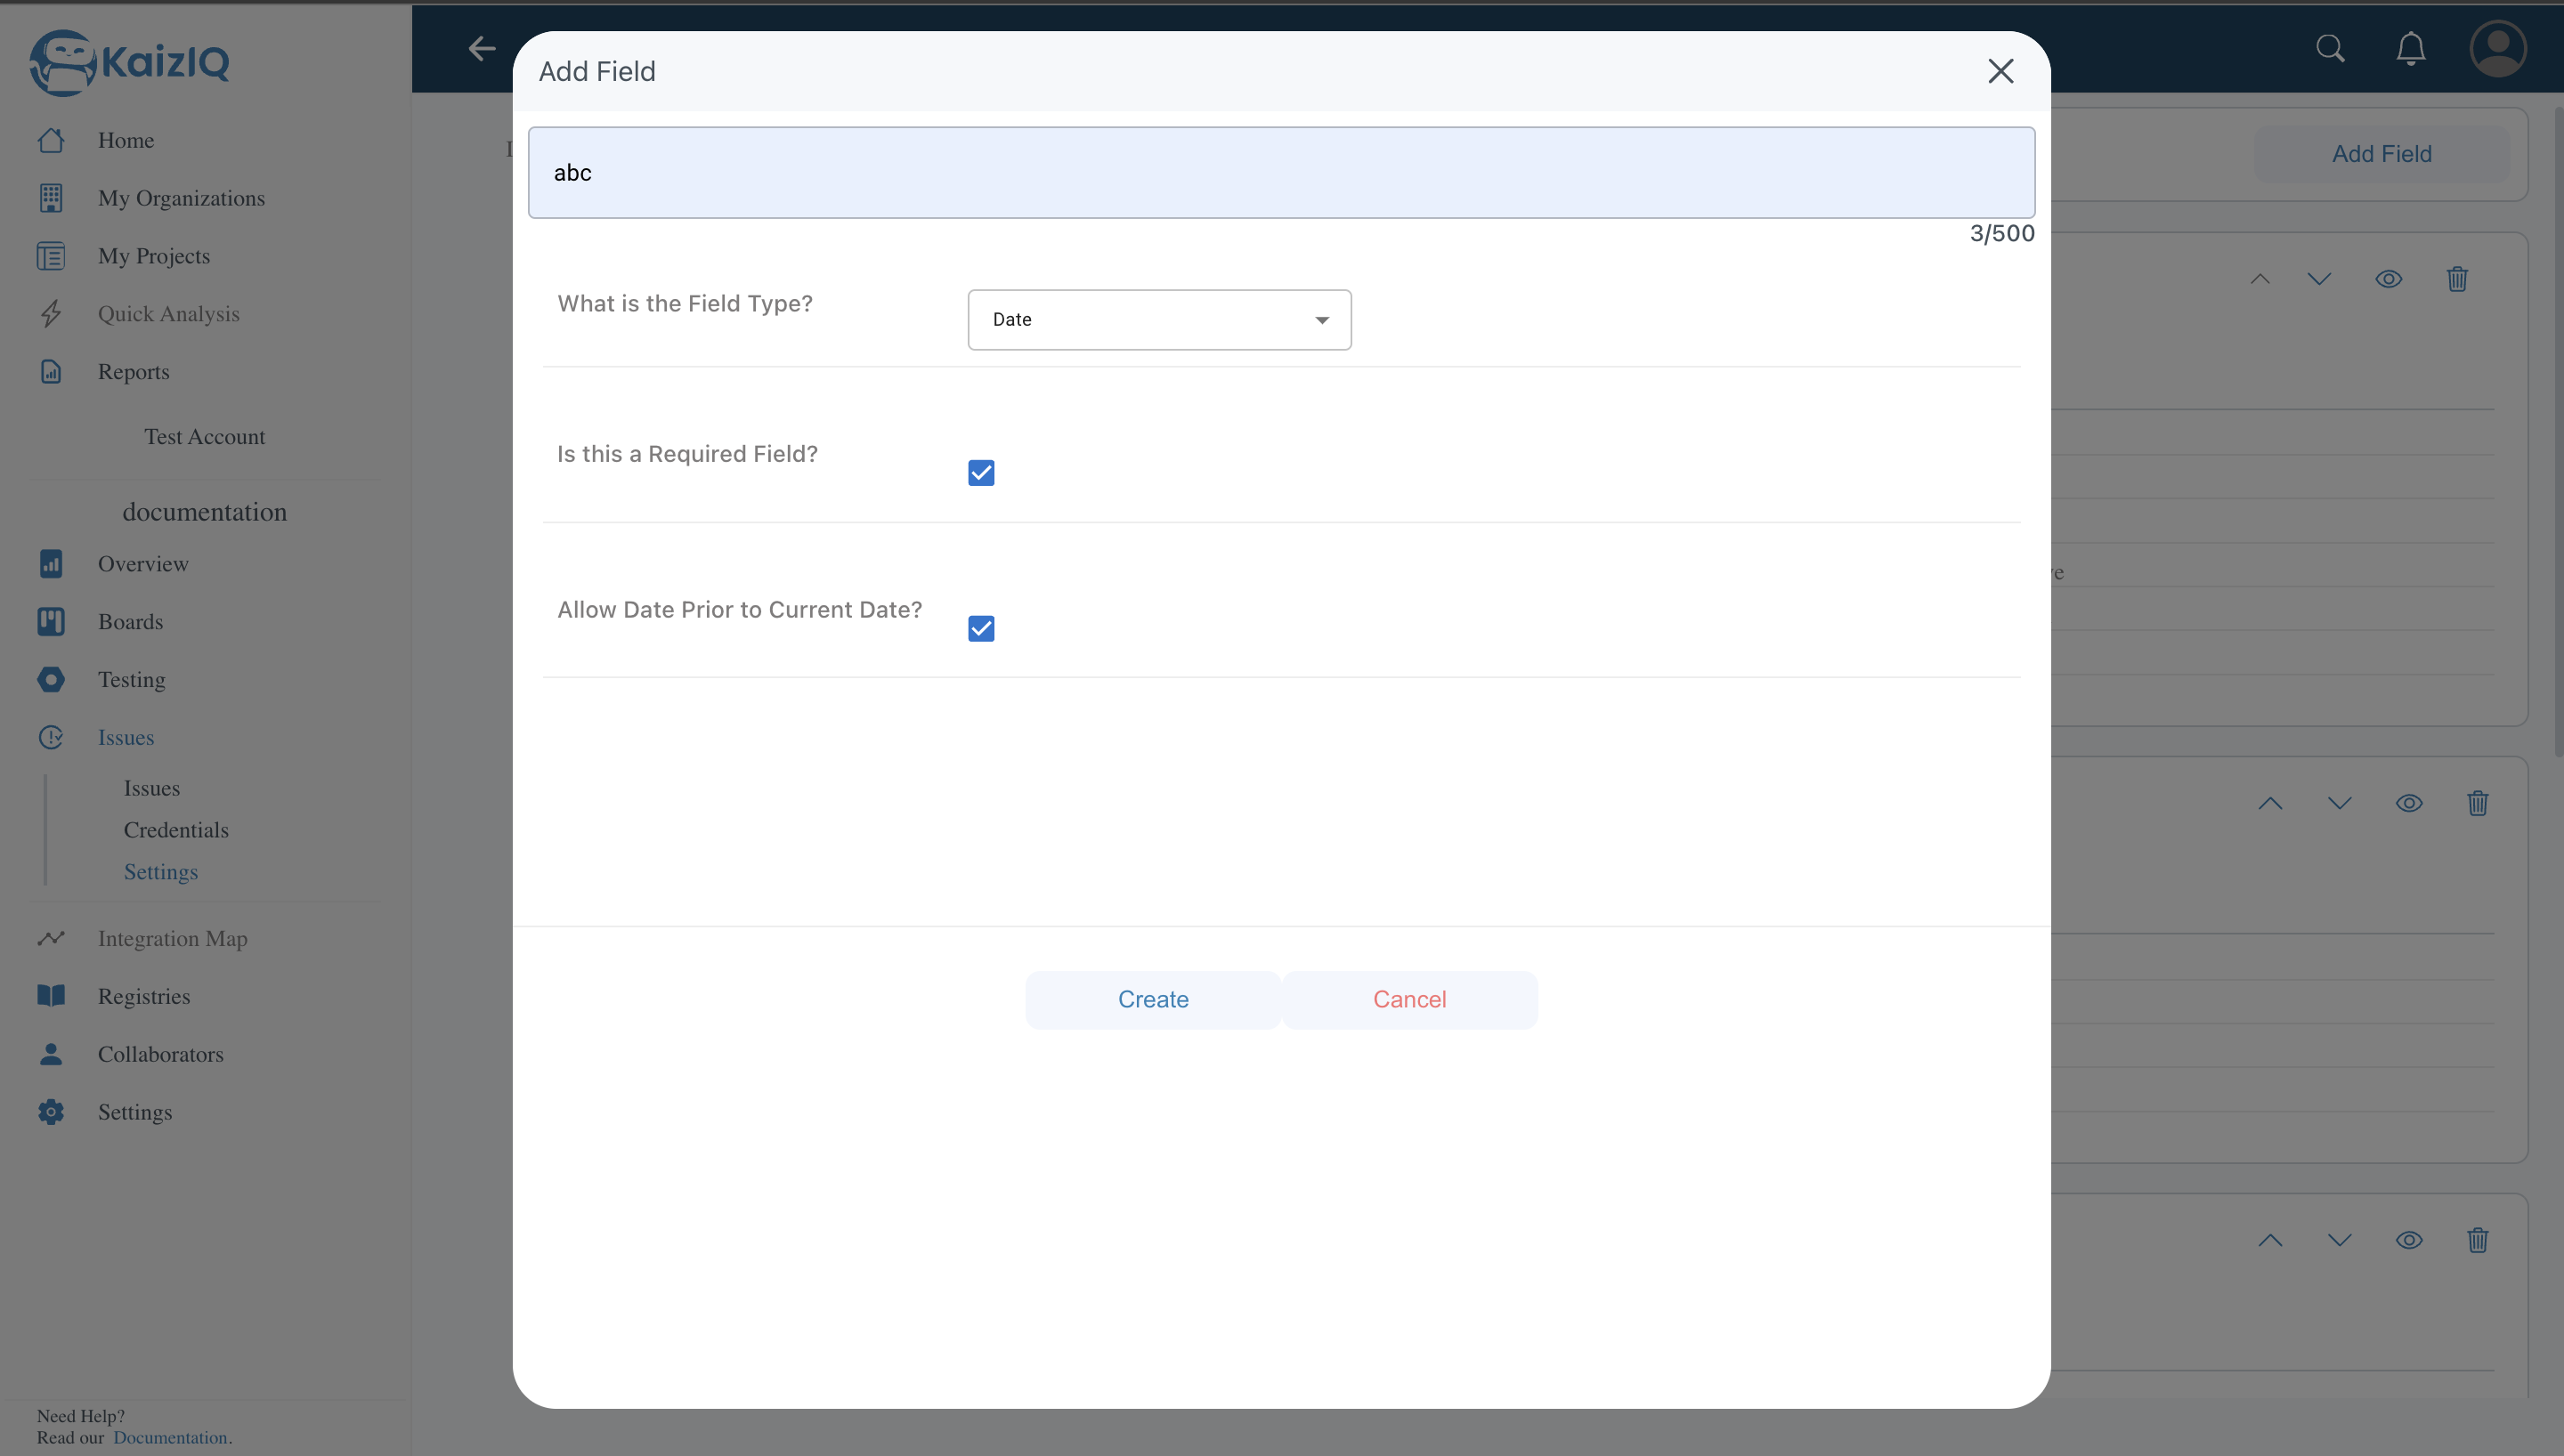
File
In this field, you can add files, and you can choose whether it is required or not.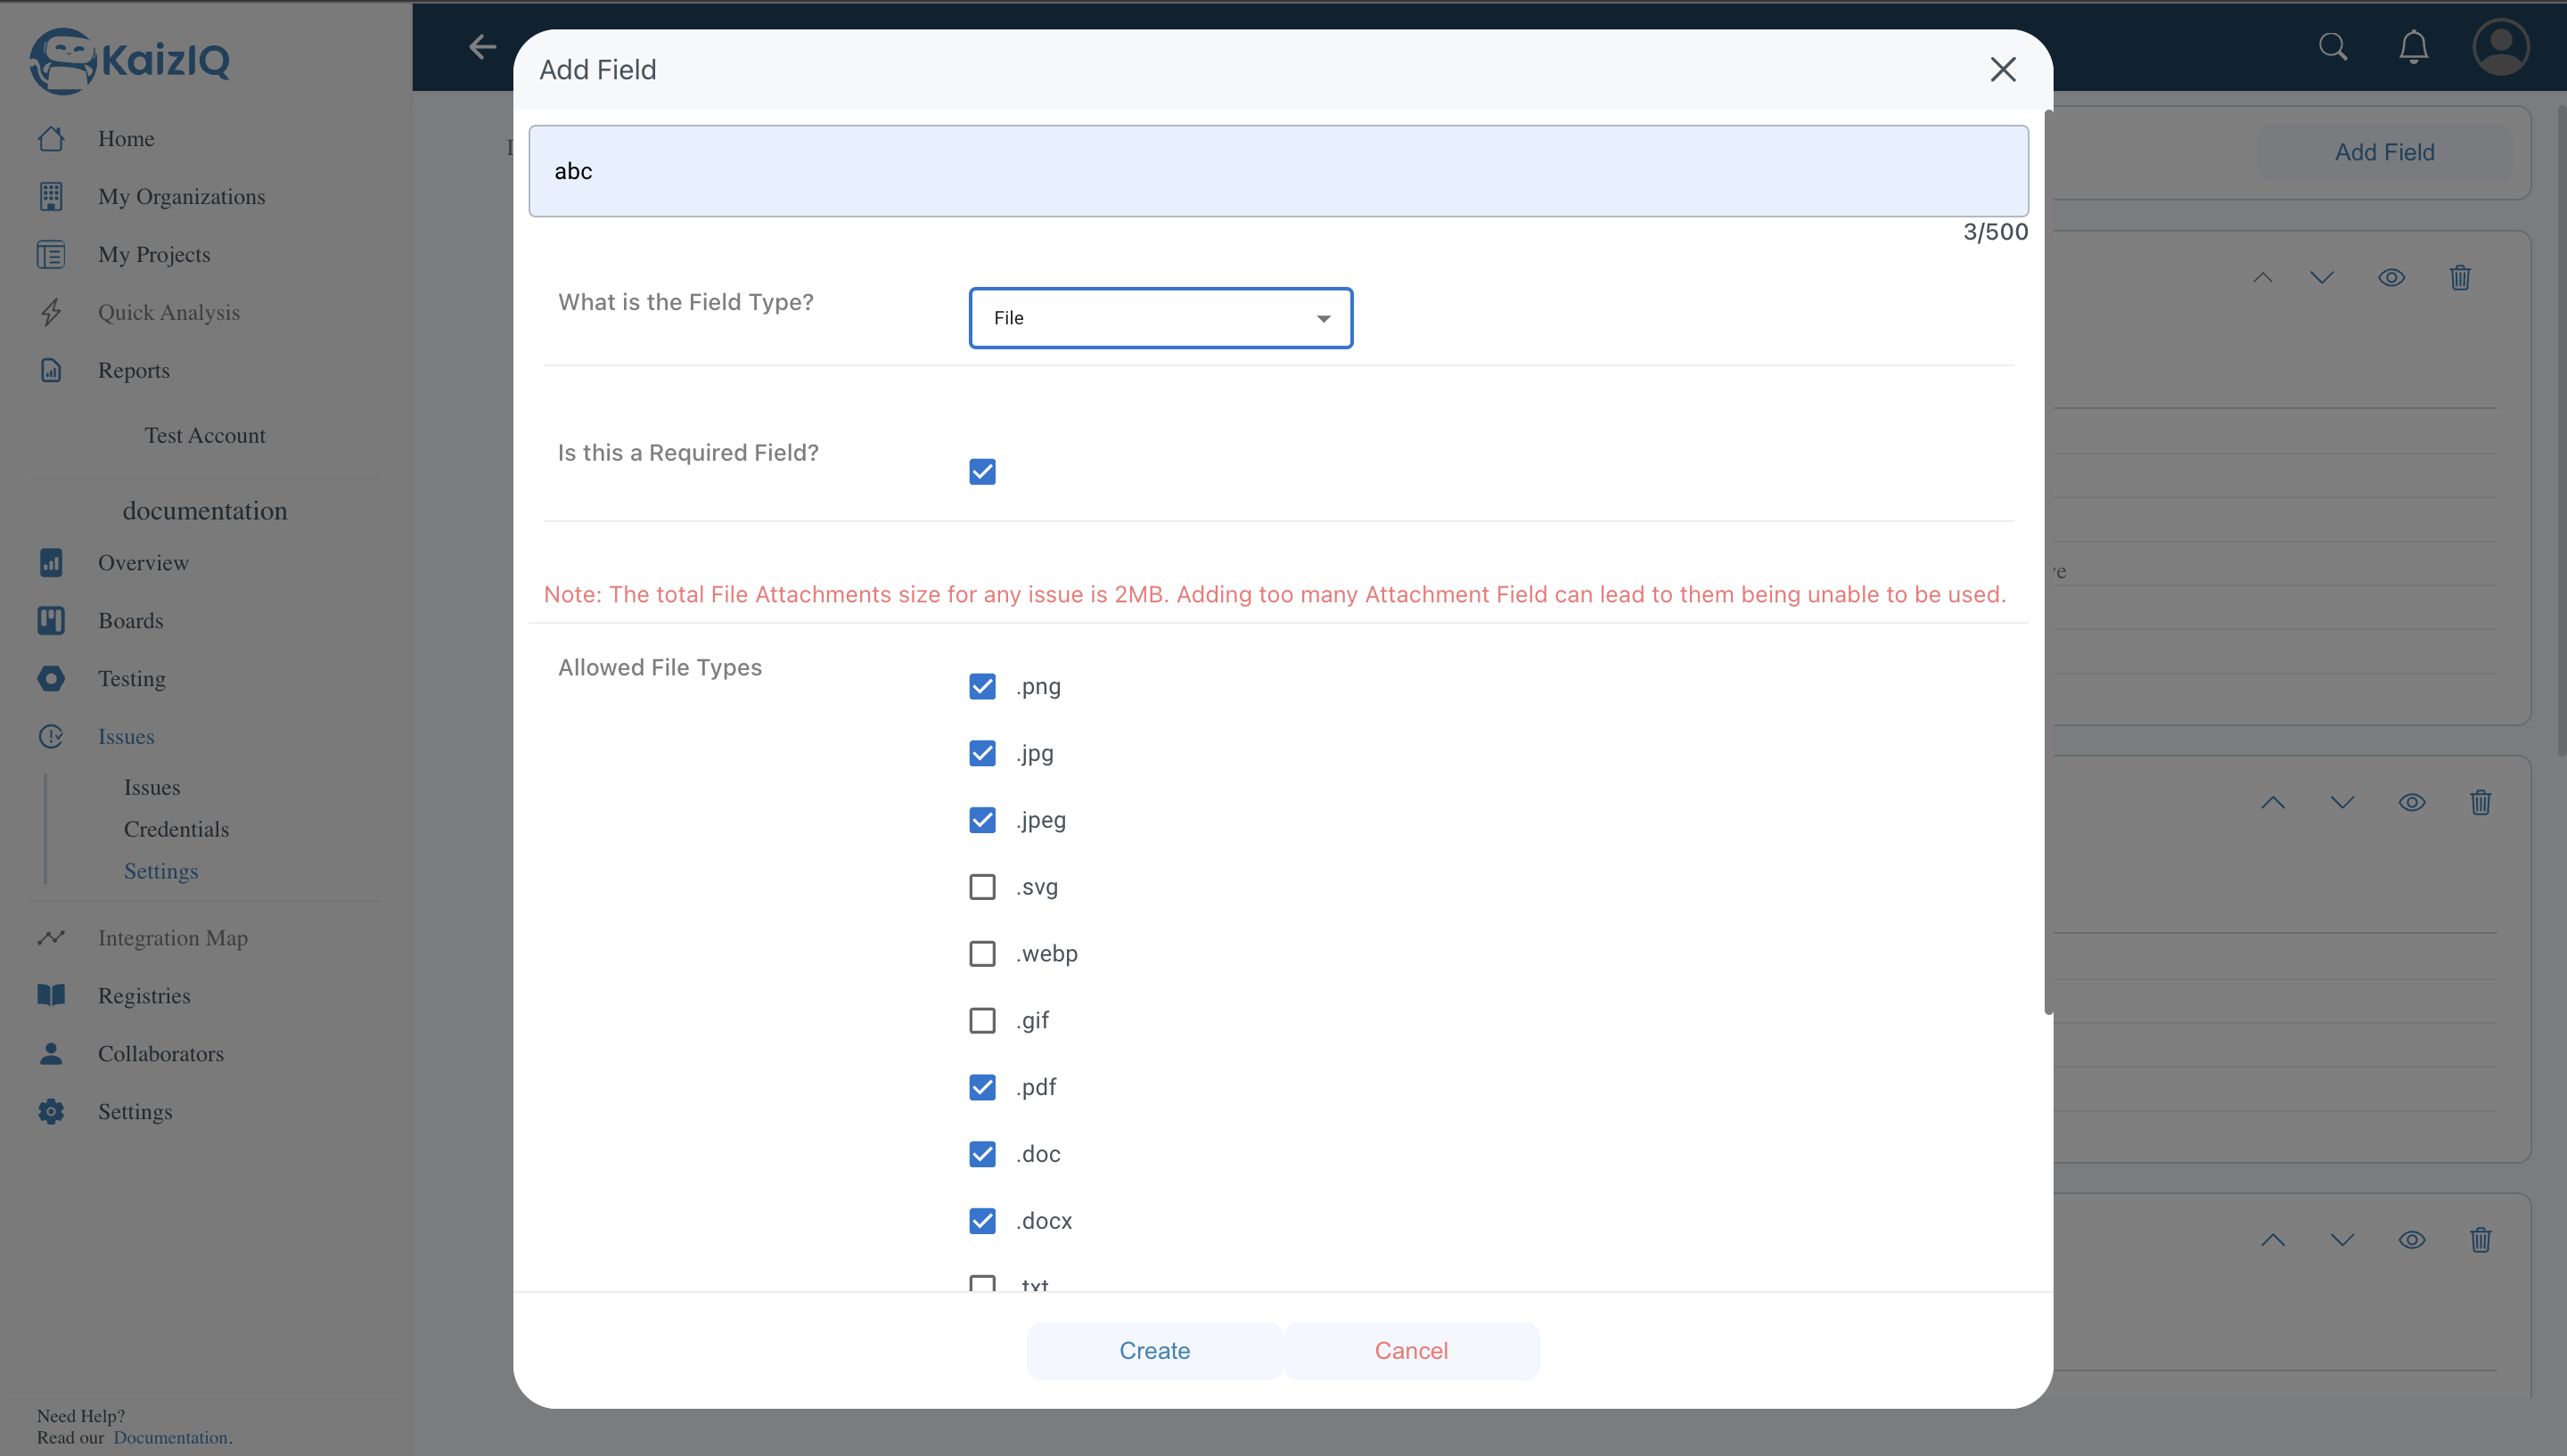
After filling up the form click on the "Create" button.
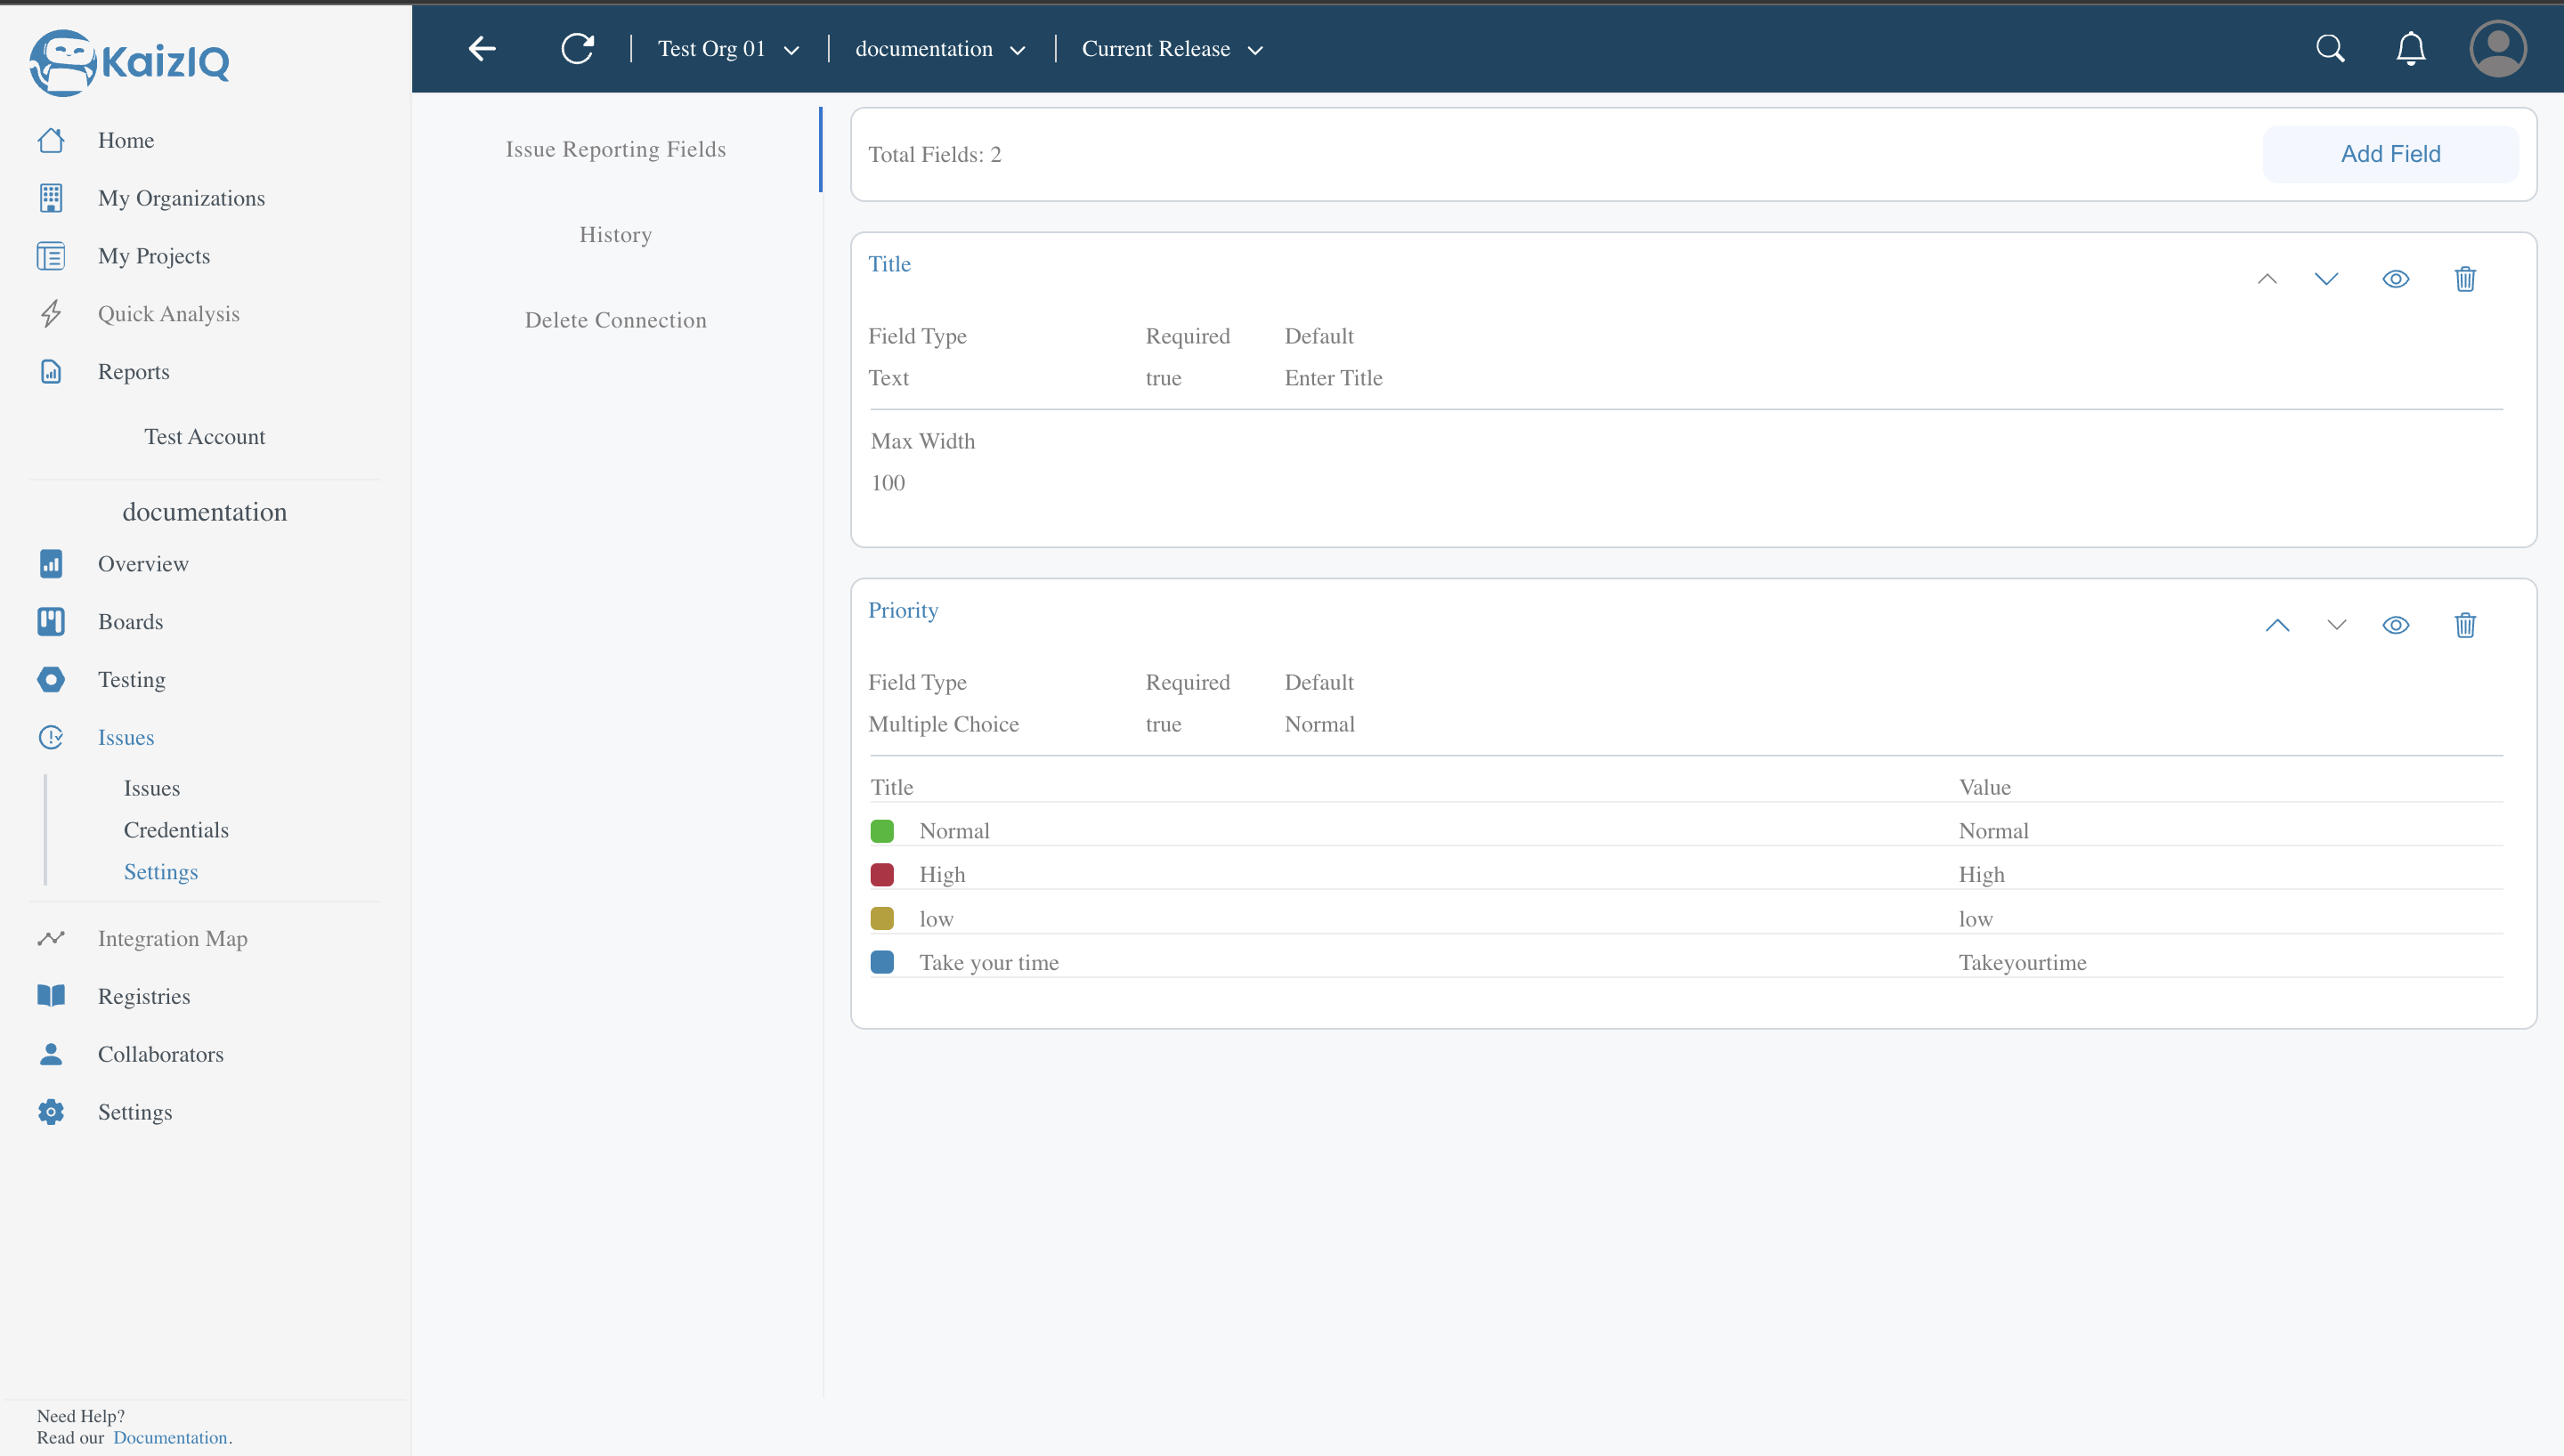
For an example, we have created two fields:
1) A text field and in that we have entered the title as "Title", maximum size as "100", default text as "Enter title" and we have made it required.
2) A multiple choice field and in that we have entered the title as "Priority", default choice as "Normal", we have made it required and we have chosen different colors for different choices.
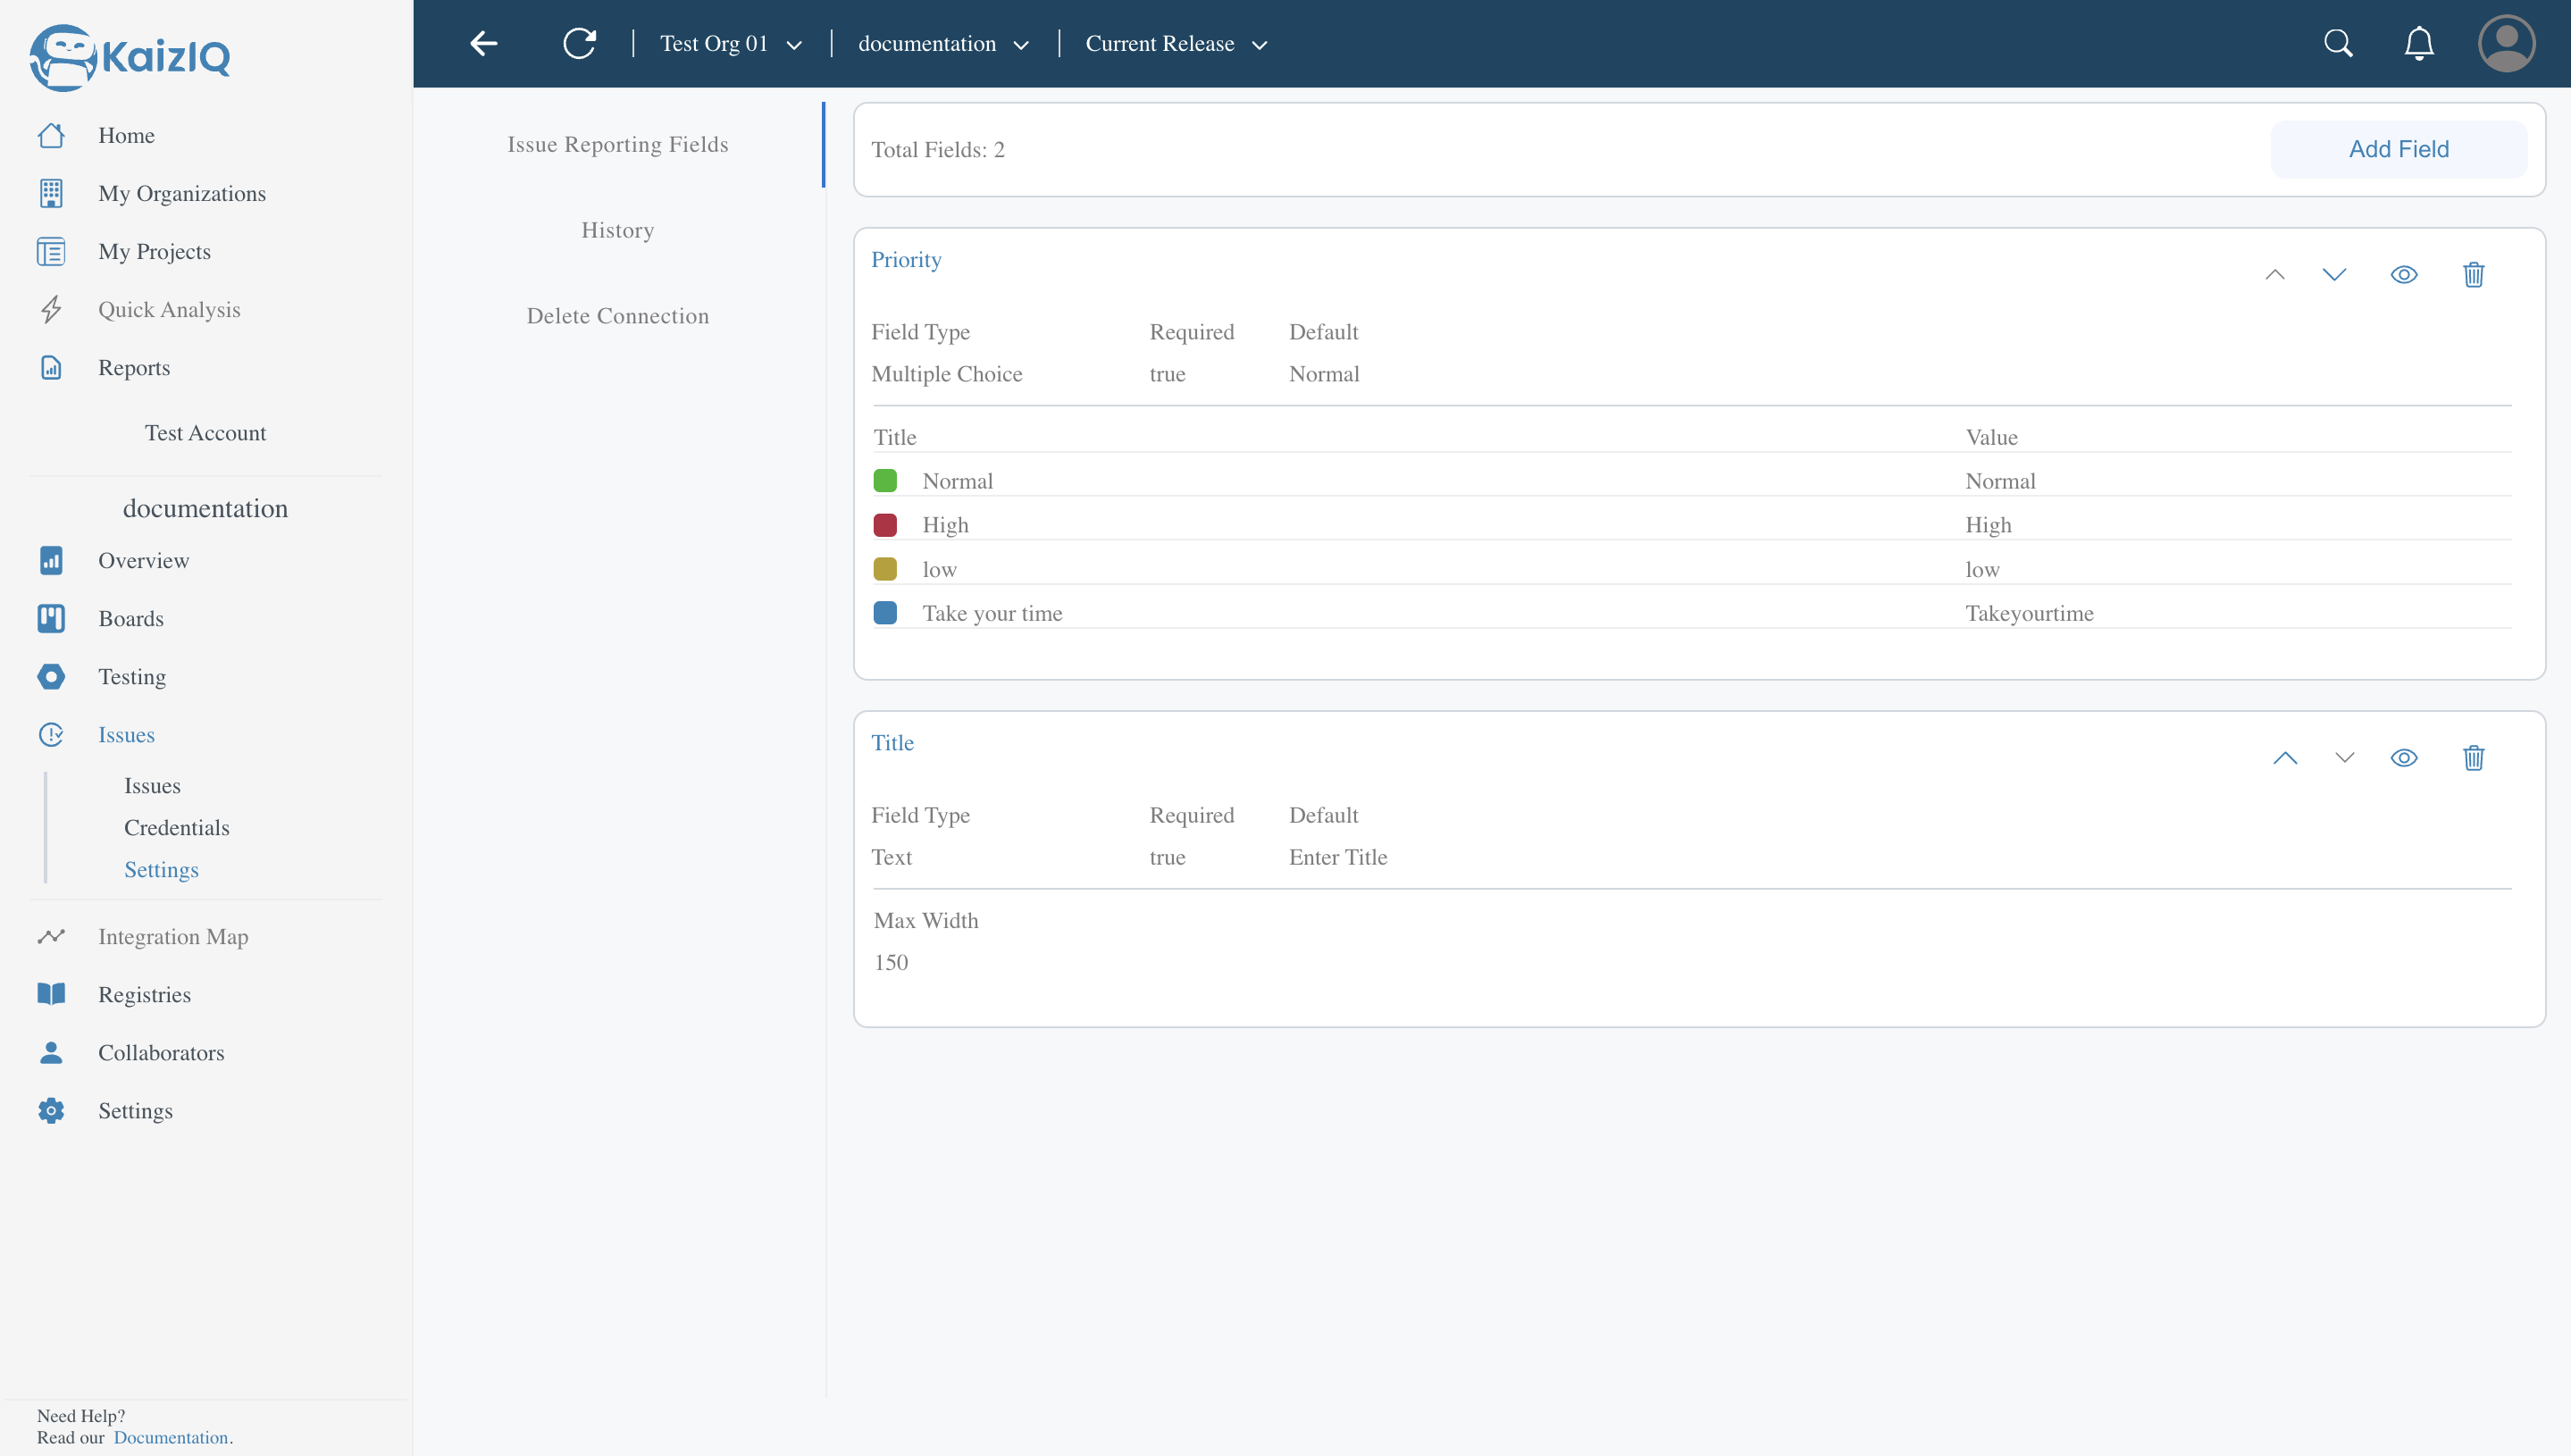
So, now the issues page will look like this:
Features
We have following features in the KaizIQ Issues page:-
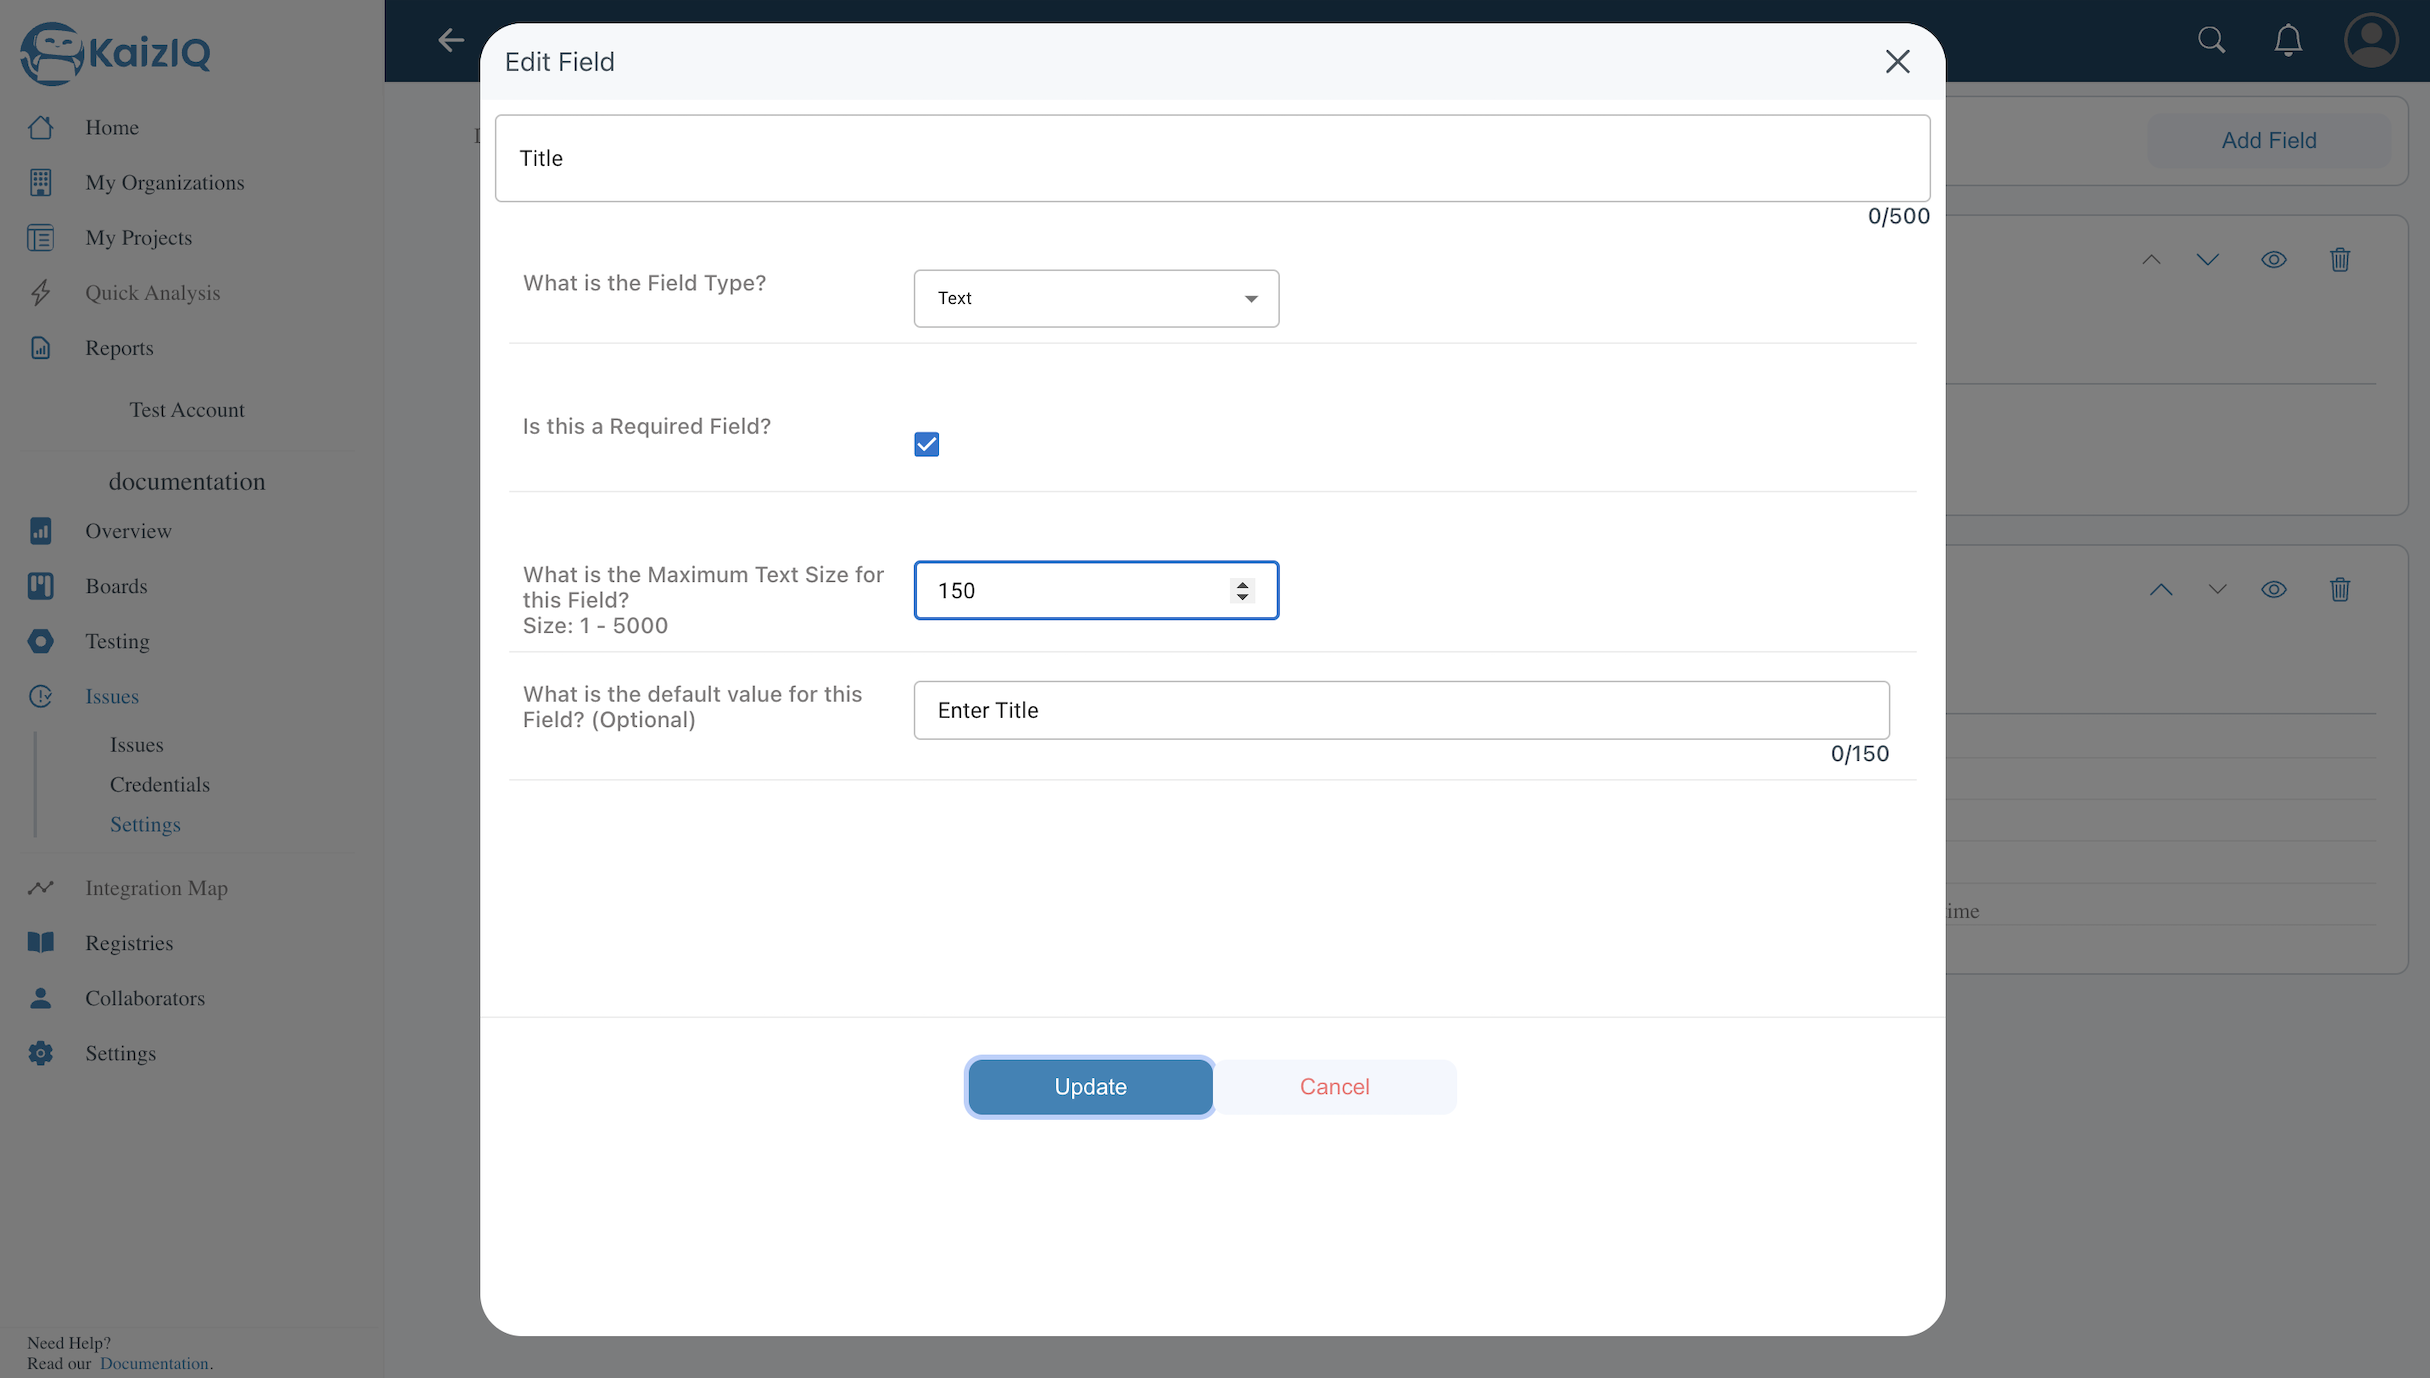
Edit- You can edit the fields by clicking on the eye icon. You may edit your issue title, maximum size, default text, default choice, range, default value, whether it is required or not, whether to allow past dates or not and whether to allow multiple files or not according to the field type.
After that click on the update button to save the changes.
For example, we have edited the text field and changed the maximum size to "150".
-
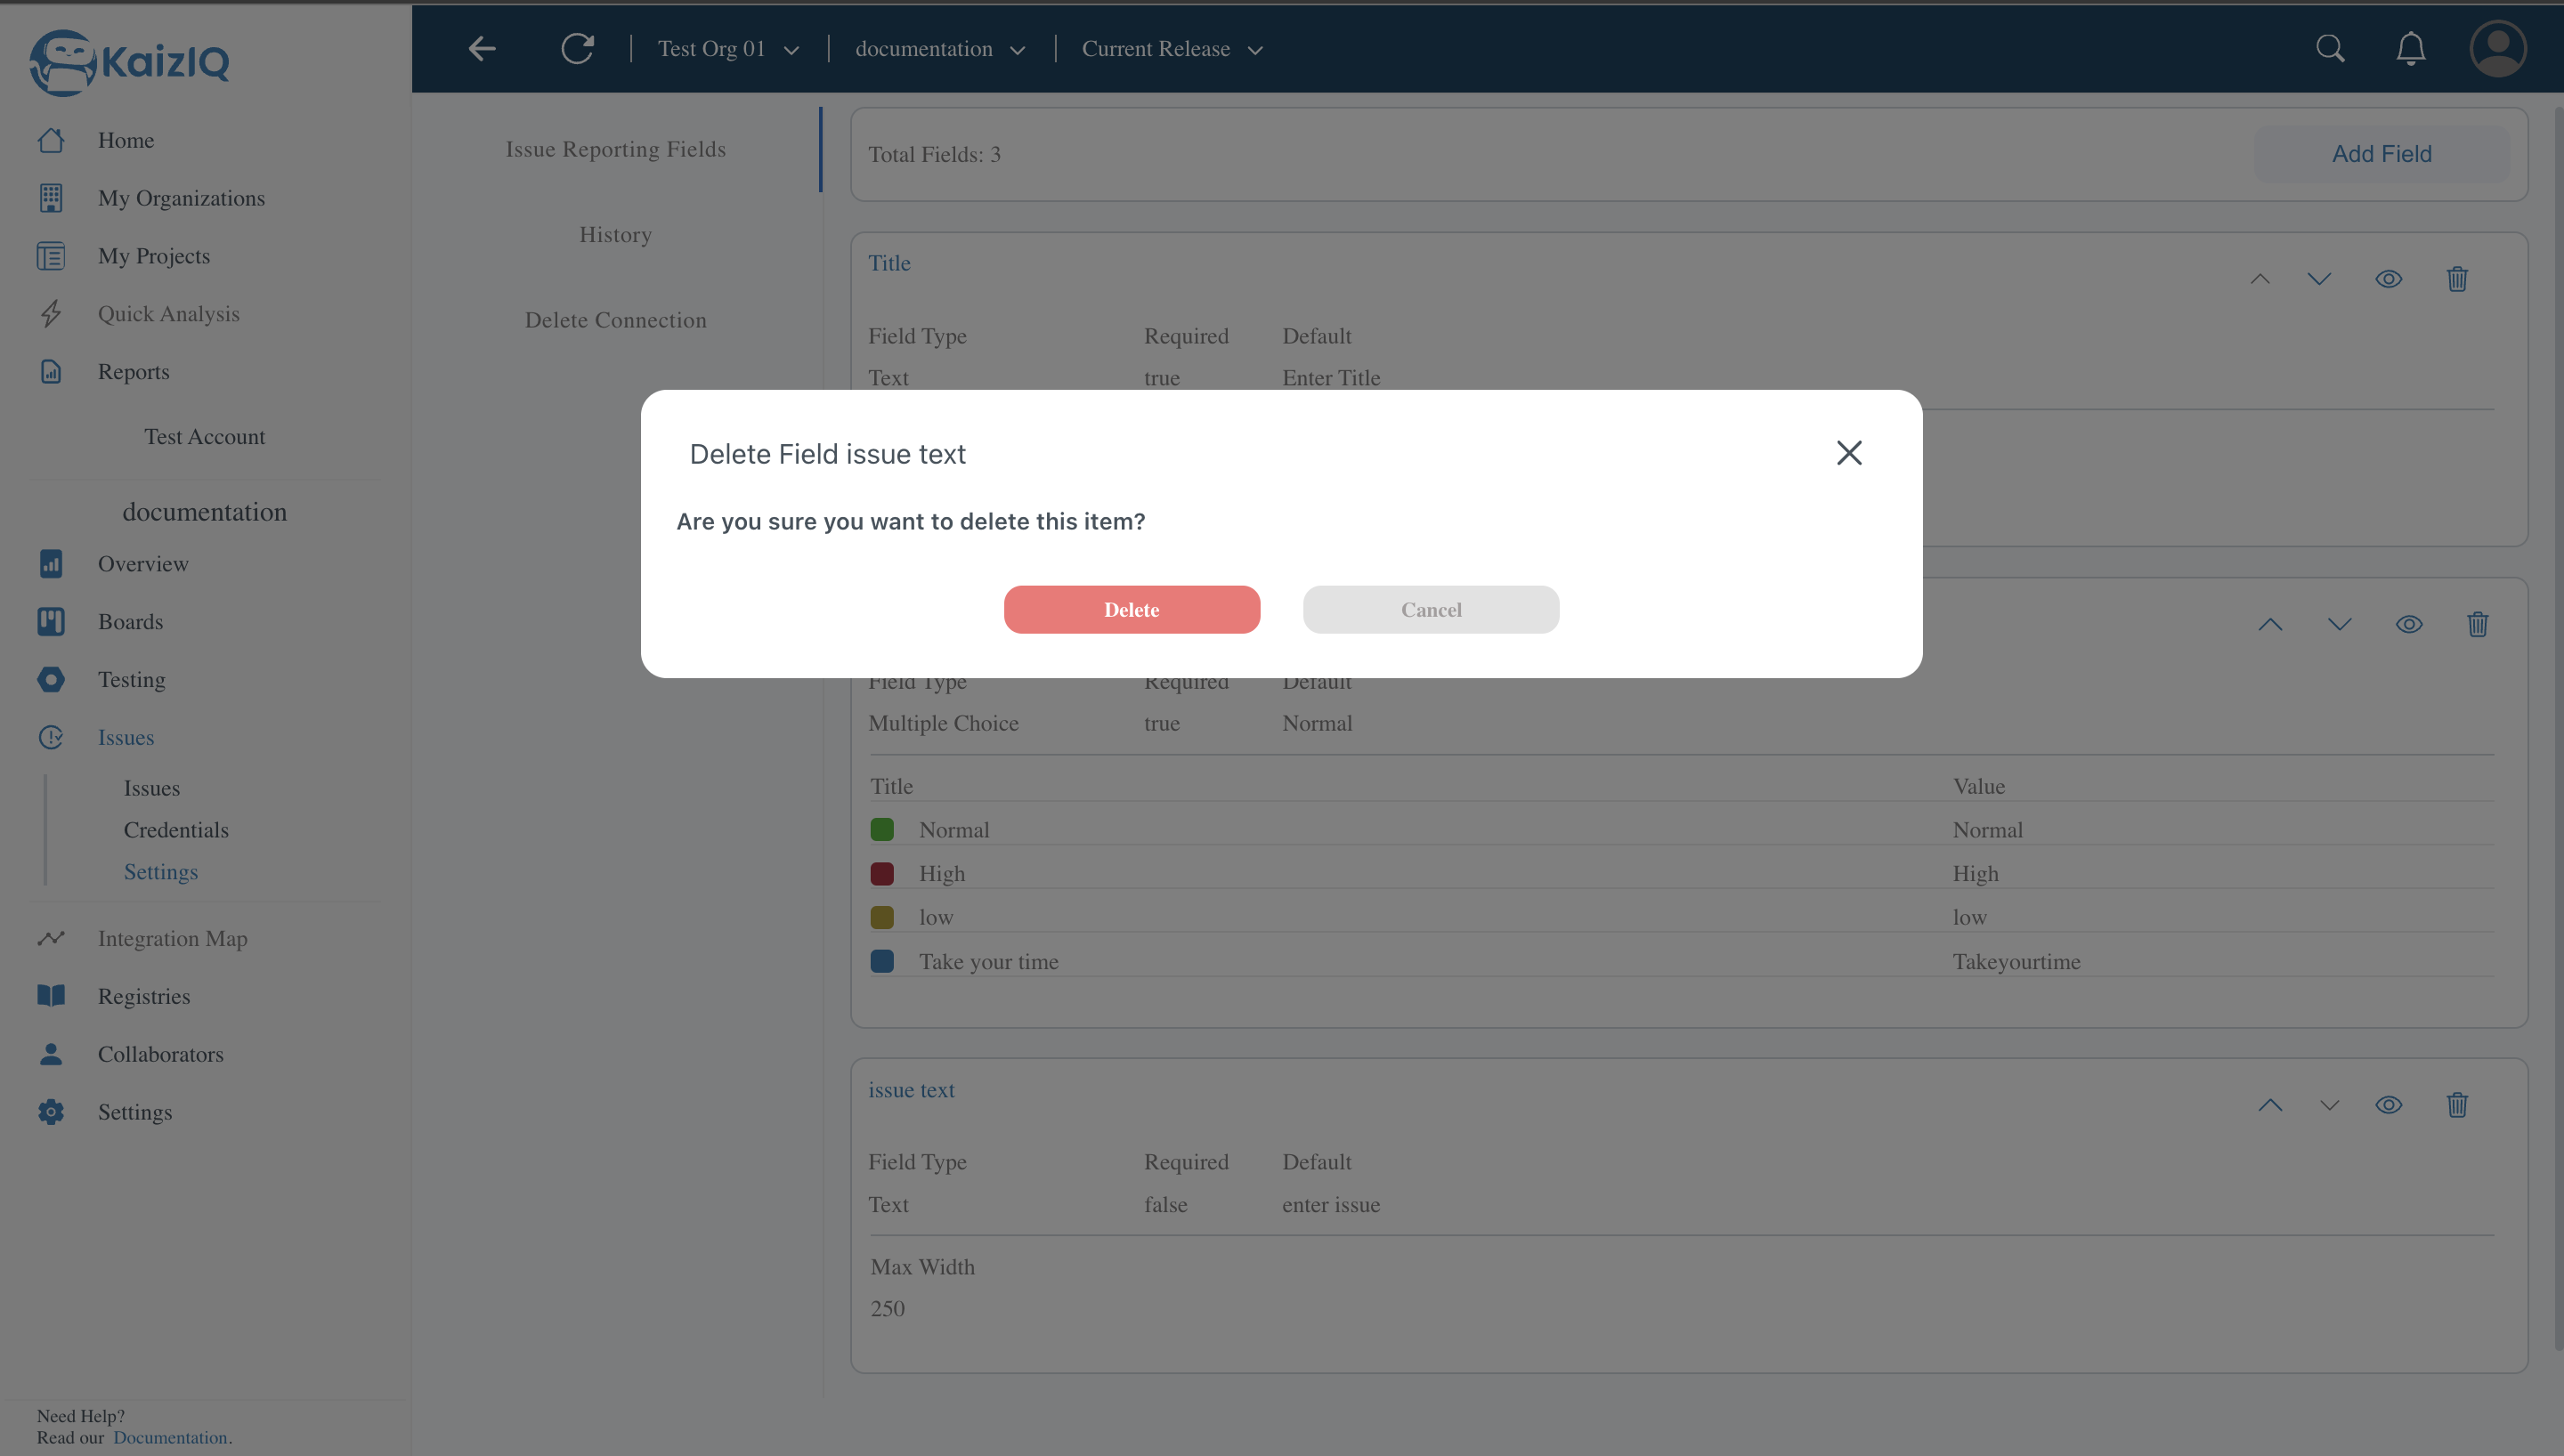
Delete- You can delete the fields by clicking on the trash icon. A confirmation popup will appear, click on the "Delete" button. For example, we have deleted the issue text field.
-
Reorder- You can reorder the fields by clicking on the reorder icon and dragging the field to the desired position using ^ and v icons. For example, earlier order of fields was "Title" and "Priority" and now we have reordered it to "Priority" and "Title".
Credentials
Generate Credentials
From the left pannel click on credentials and you will be redirected to the credentials page.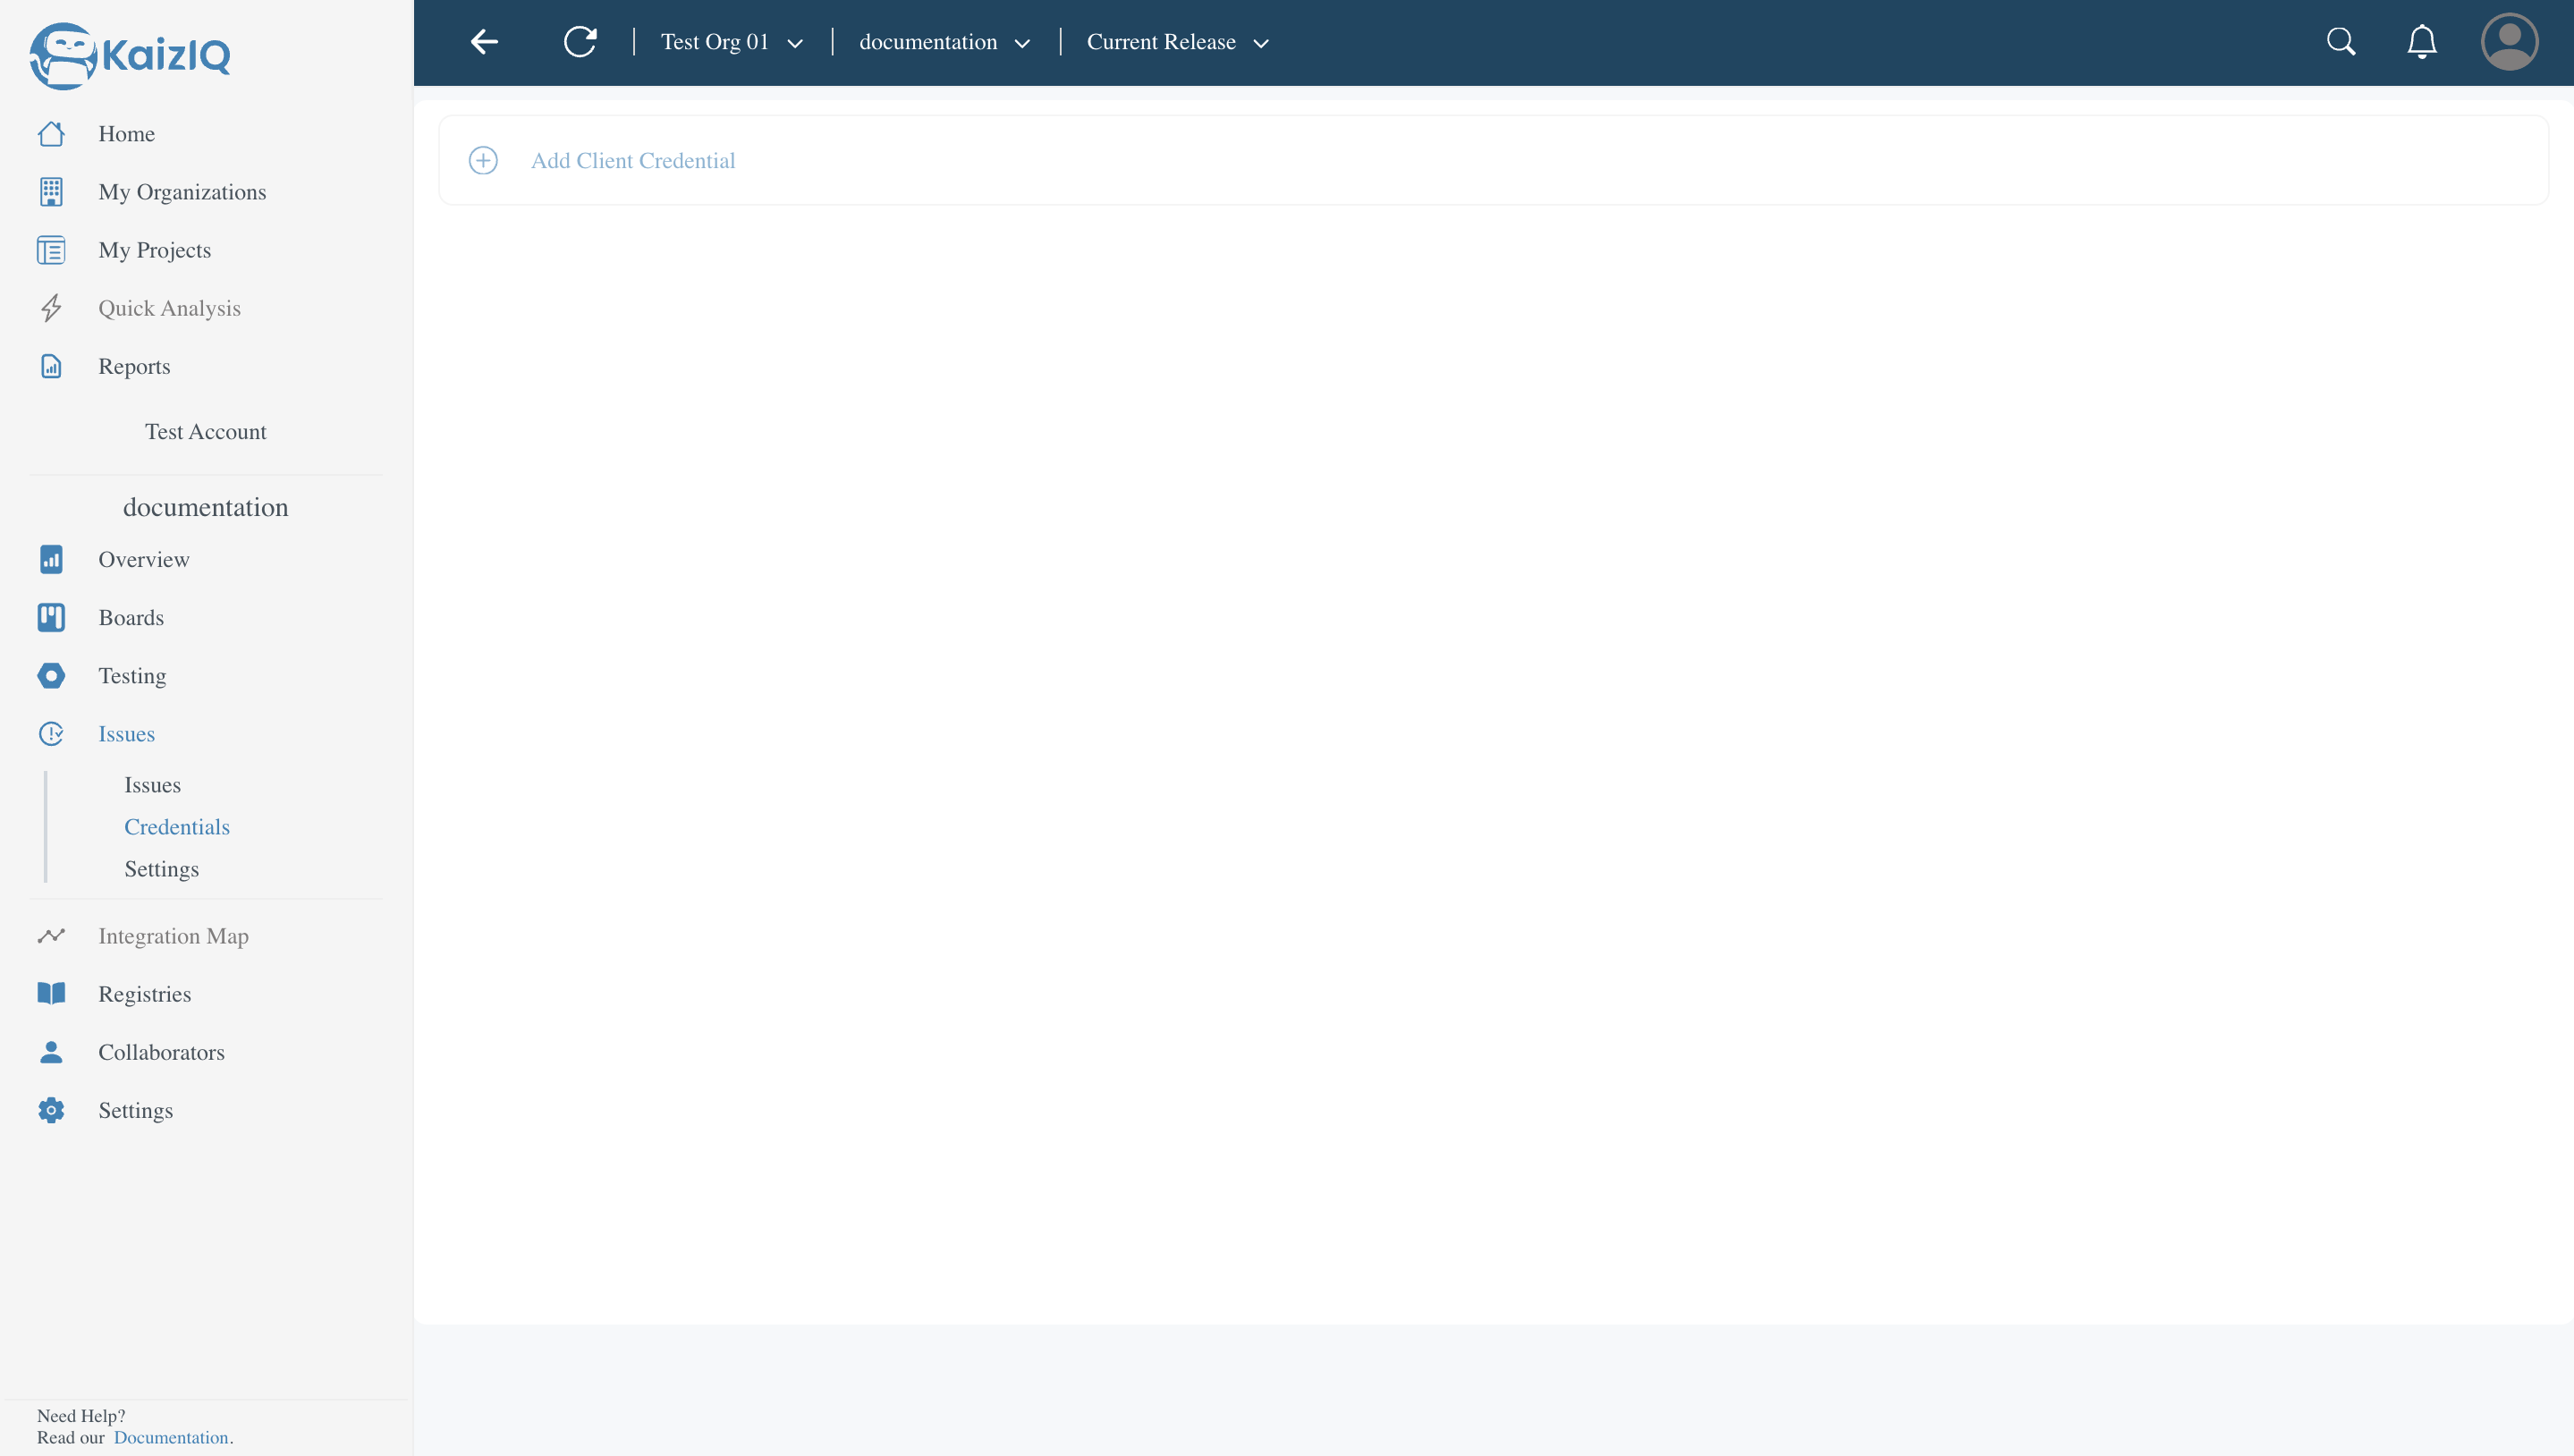
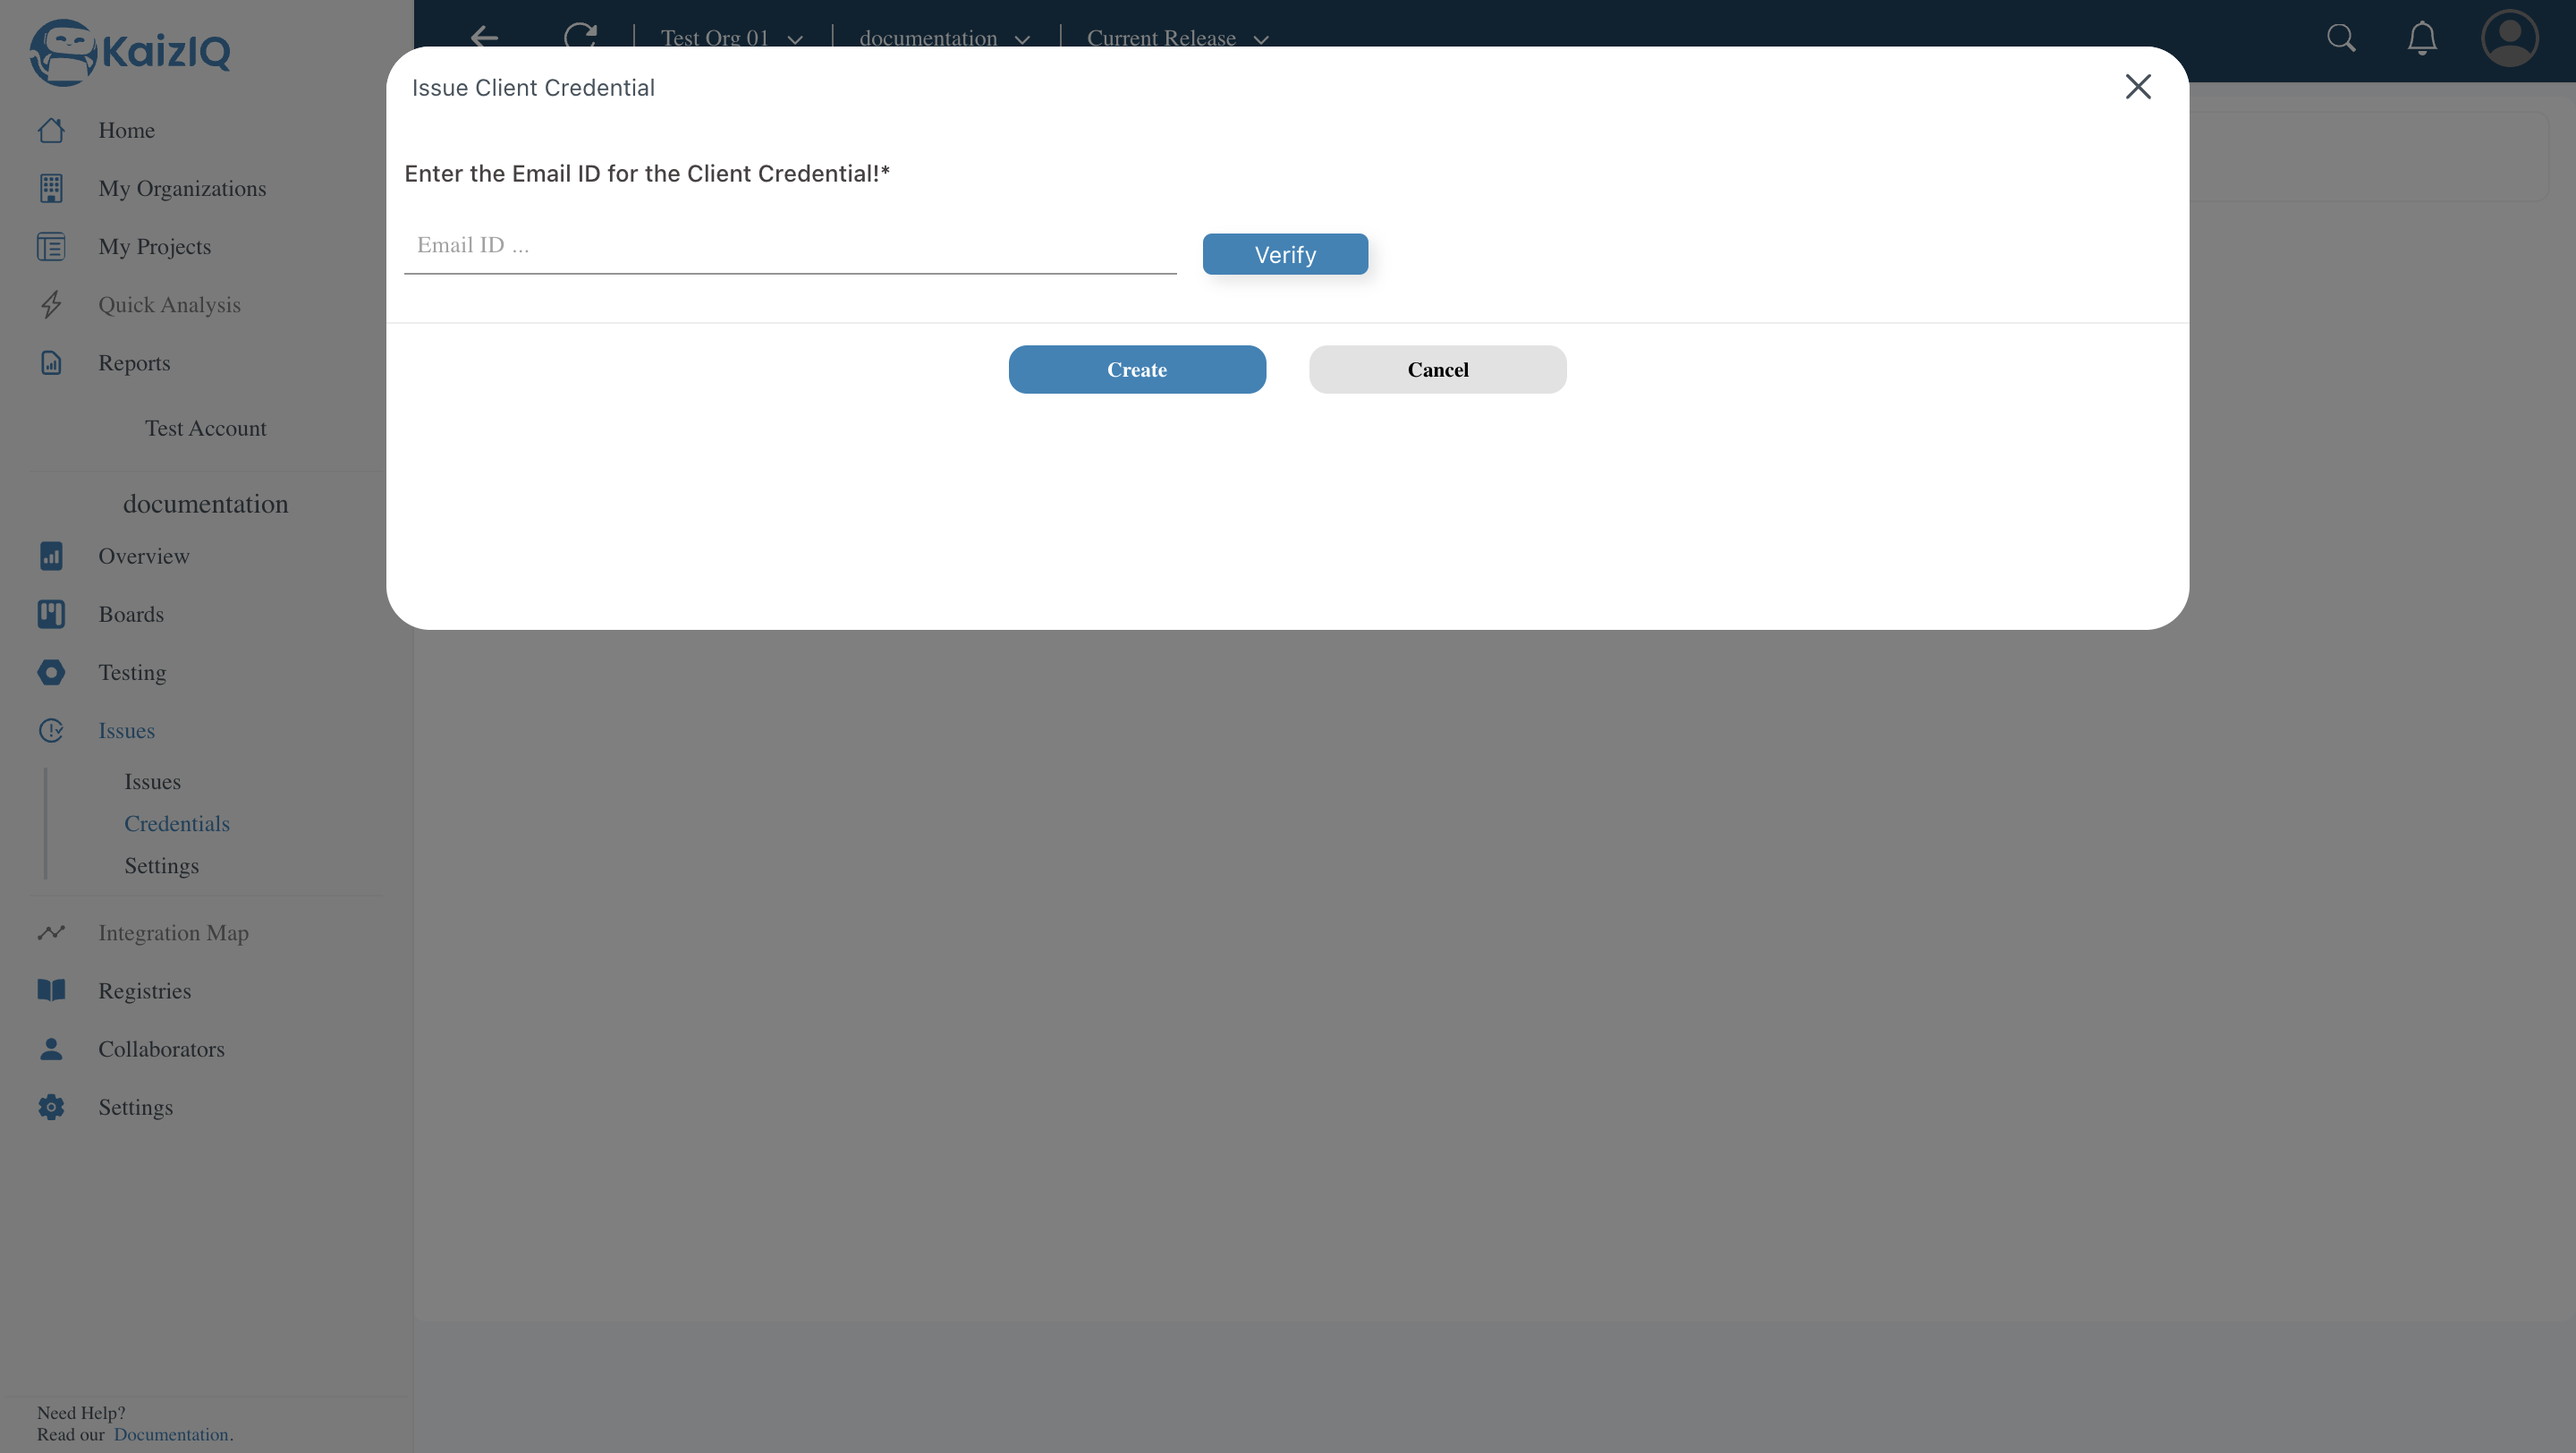
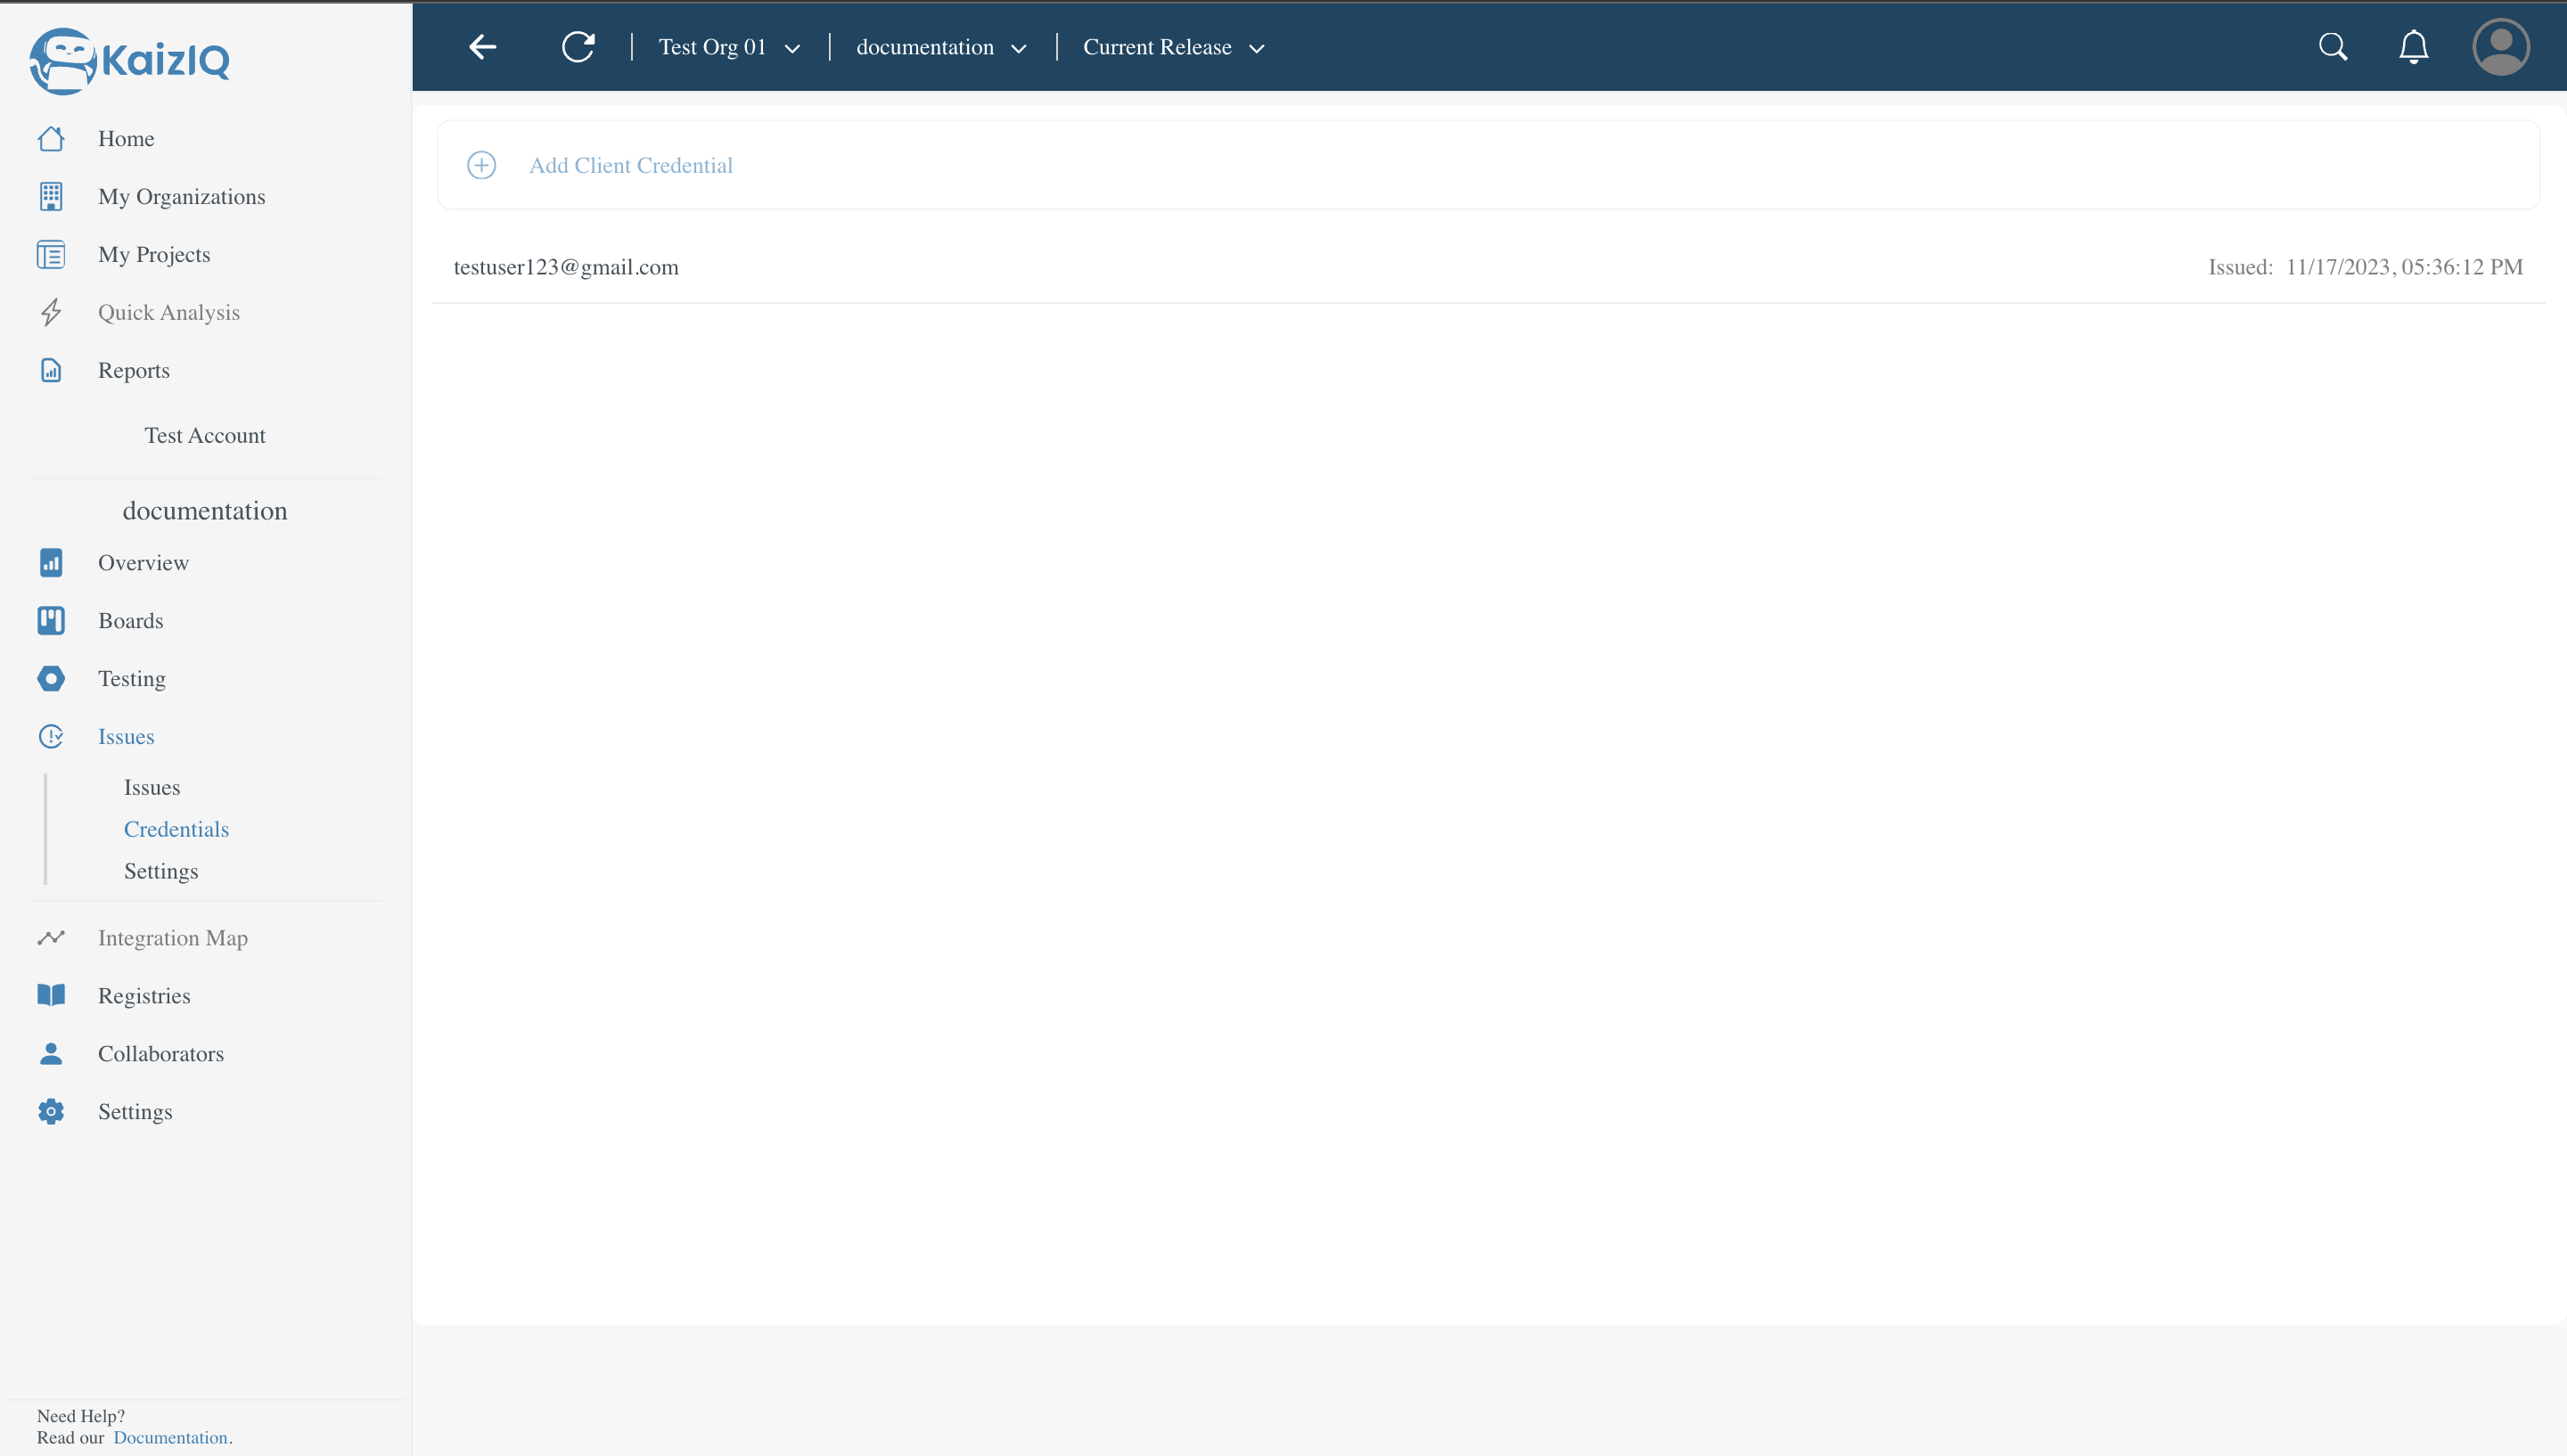
Now, you can generate credentials by clicking on the "Add Client Credentials" button. A form will appear, fill up the form.
New User
In the form enter the email of the user you want to add and click on the "Verify" button. Our system will check whether the user is new or not. If the user is new, then it will say new user and it will ask you to fill the required details.For example, here we enter the email testuser123@gmail.com, then it will ask you to fillup the detials of the user, here we have entered the name as "Test User", designation as "Developer", company as "Test Company" and phone number as "1234567890".
We can also grant any type of access to the user, we have following types of access:
-
Report Issues Access- In this access the client is allowed to report issues related to your project. -
See All Issues Access- In this access the client is allowed to view the issues irrespective of the status or who reported it. -
Project Overview Access- In this access the client is allowed to view the project overview page.
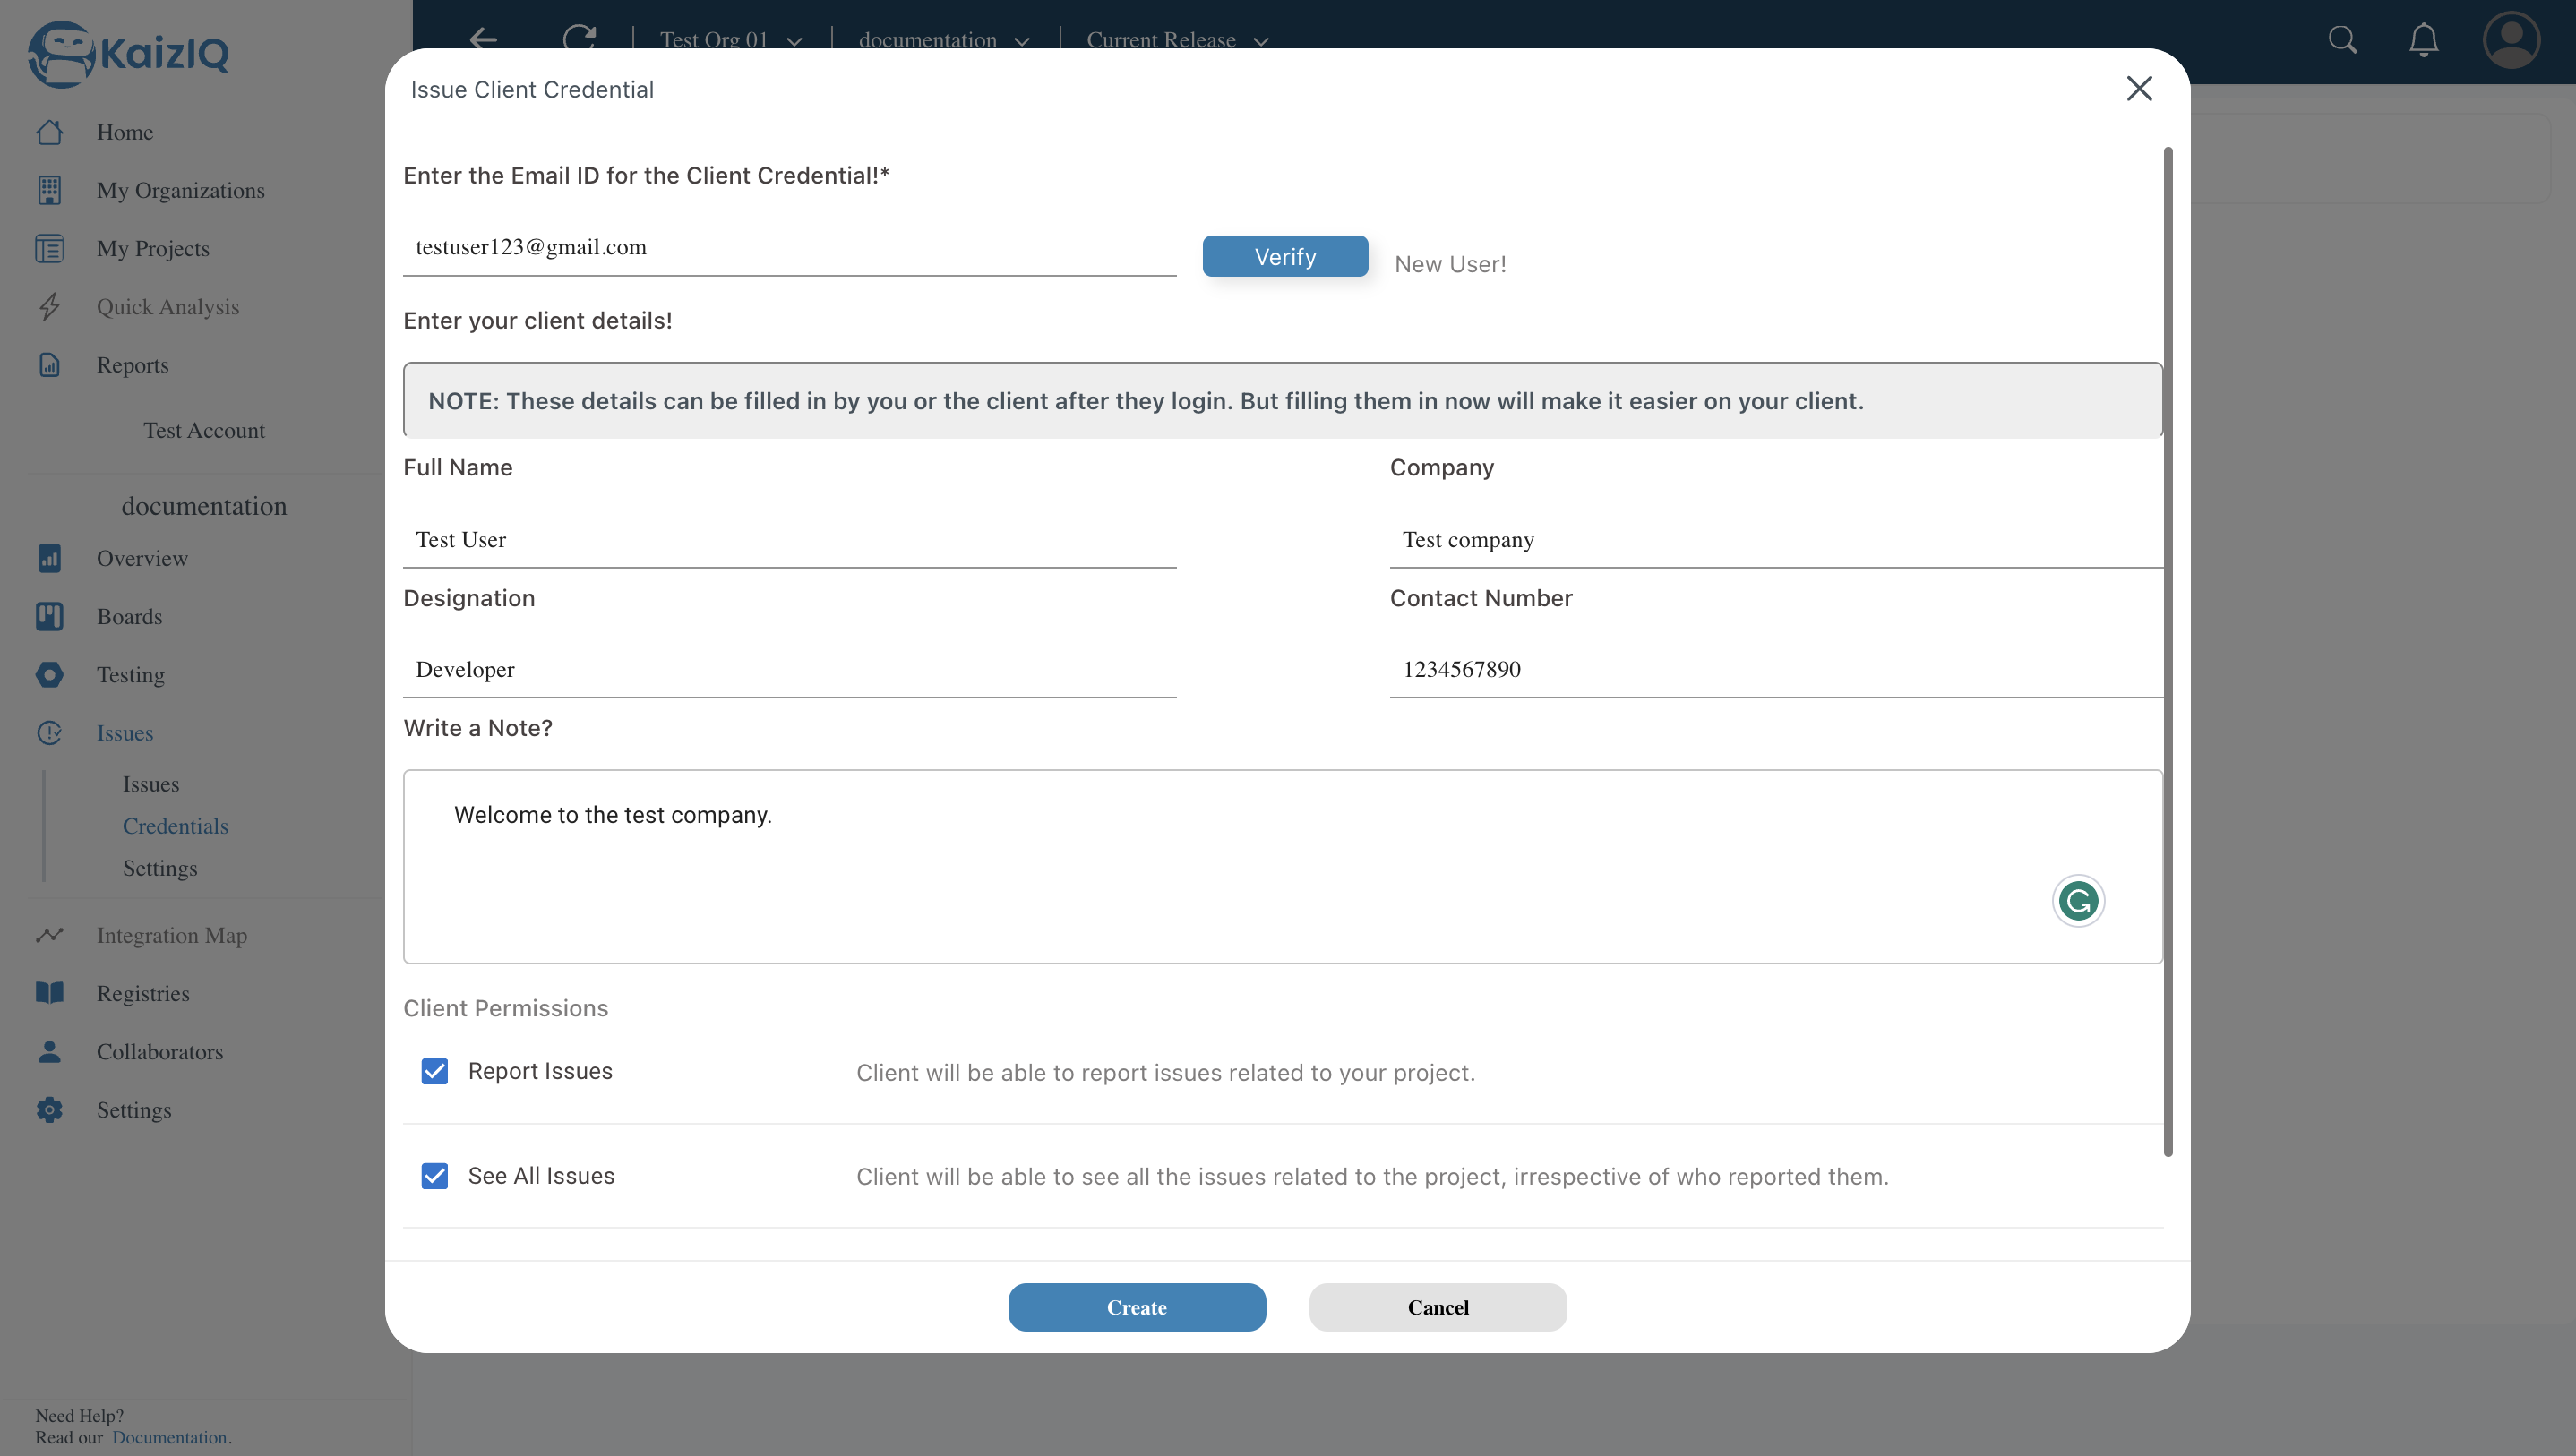
After filling up the form click on the "Create" button. Now, the user will be added to the credentials page.
Client Login
Once, an admin has added you as a user, the user will receive an email with the login credentials.
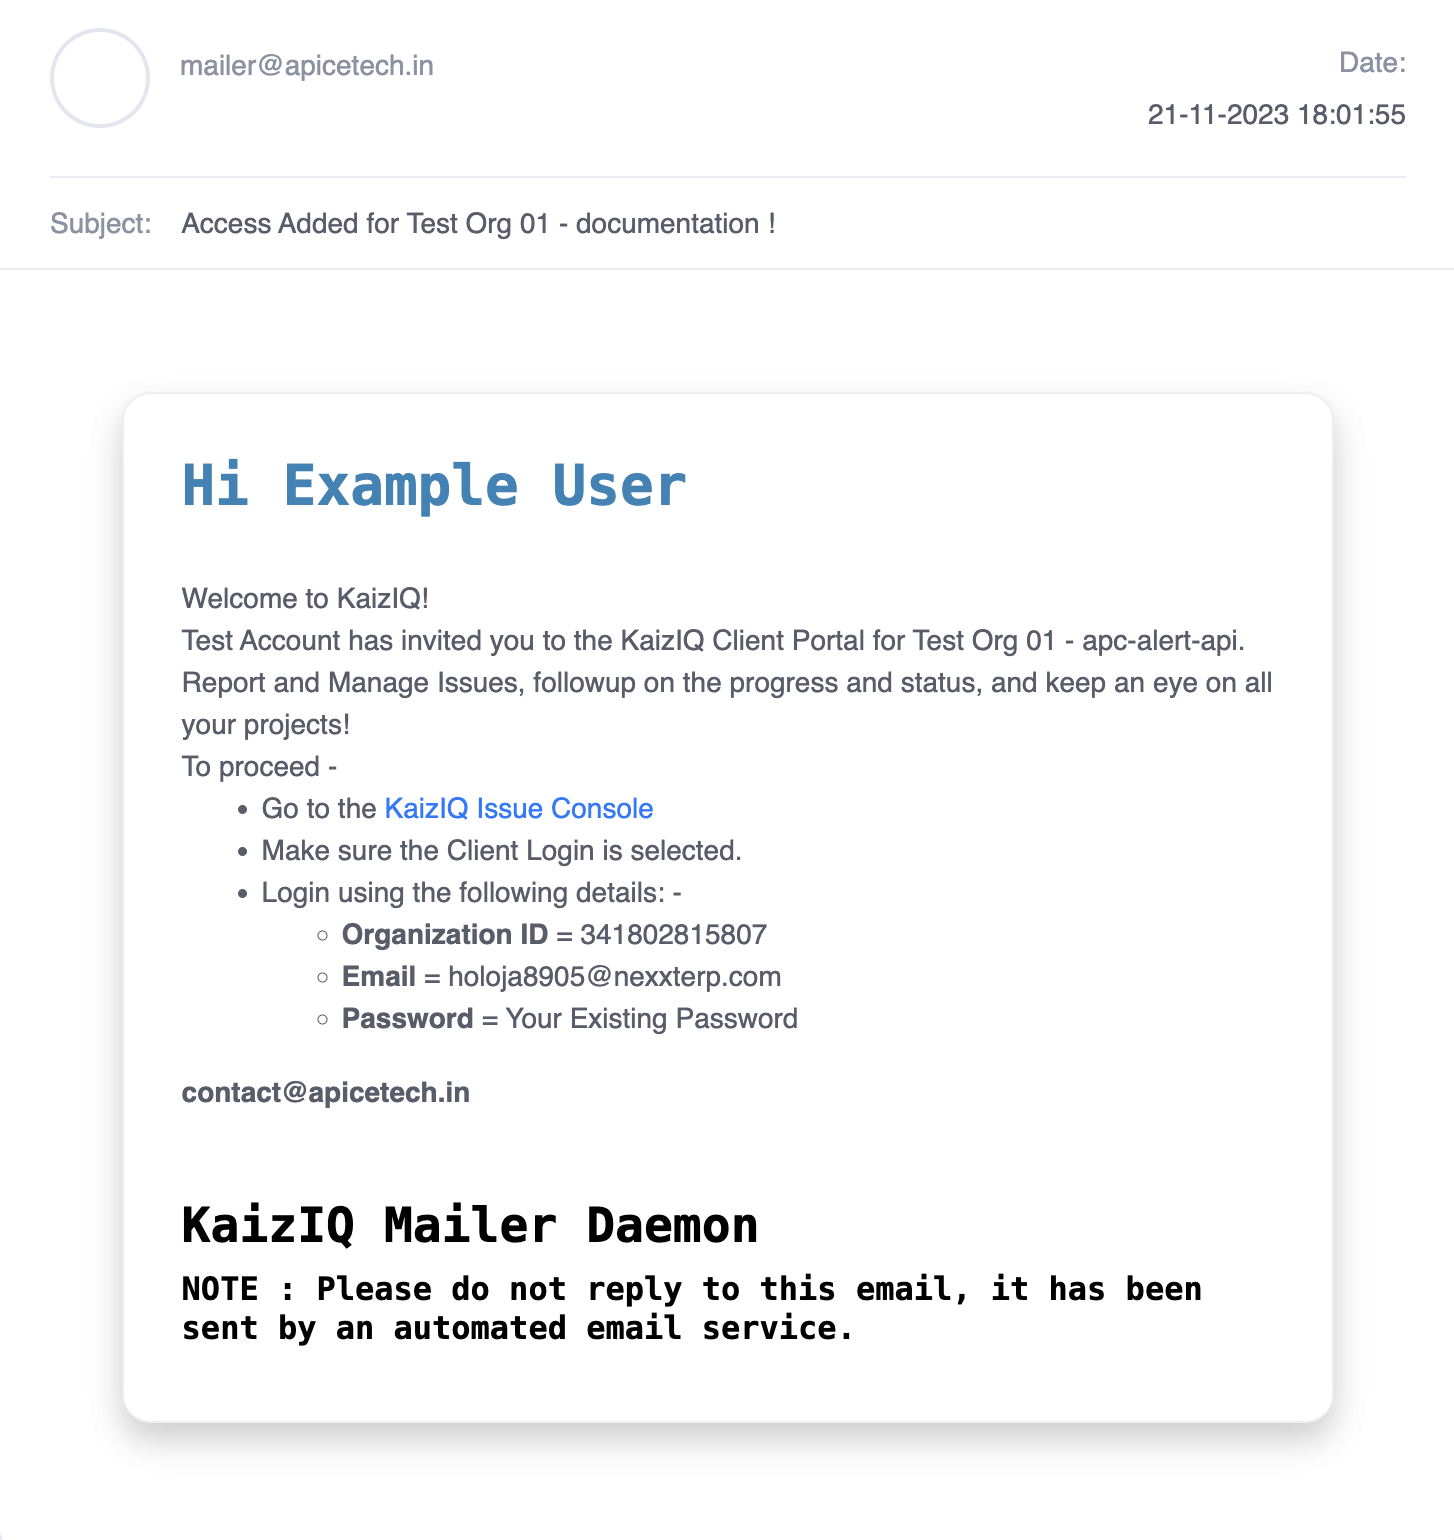
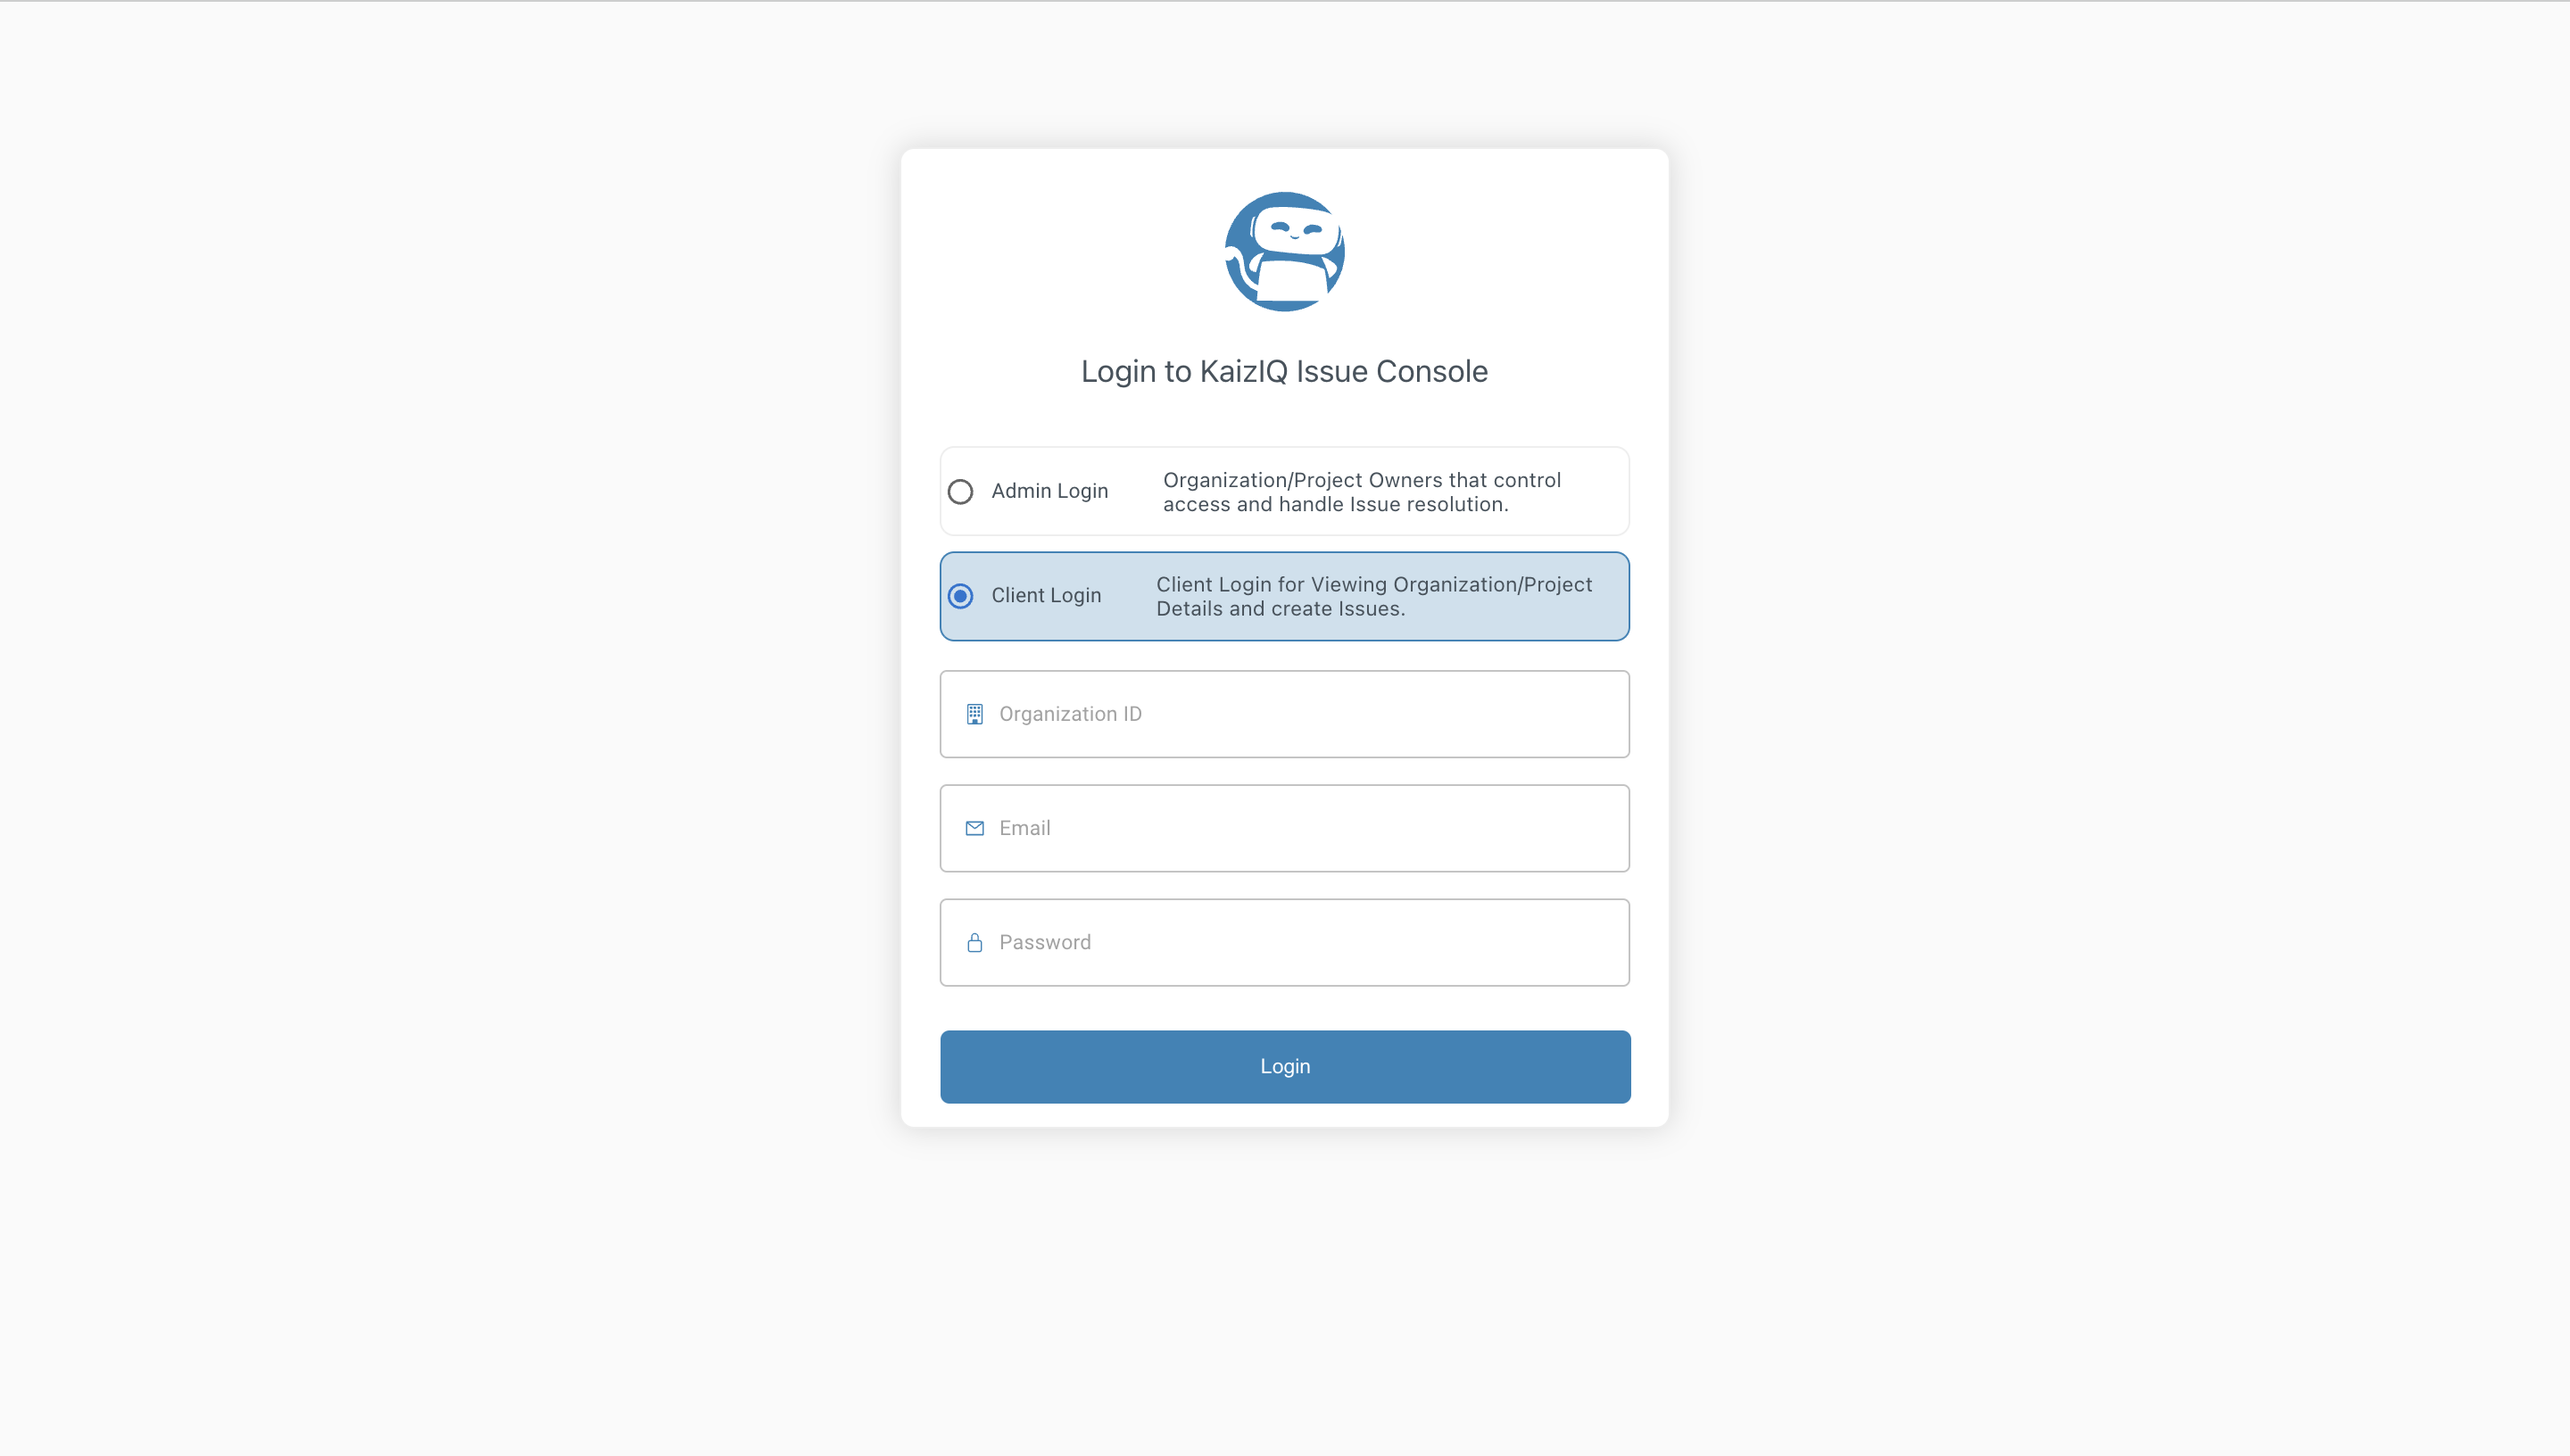
Now, you can login to the console using the link provided in the email. You will be redirected to the login page. Use the credentials provided in the email to login.
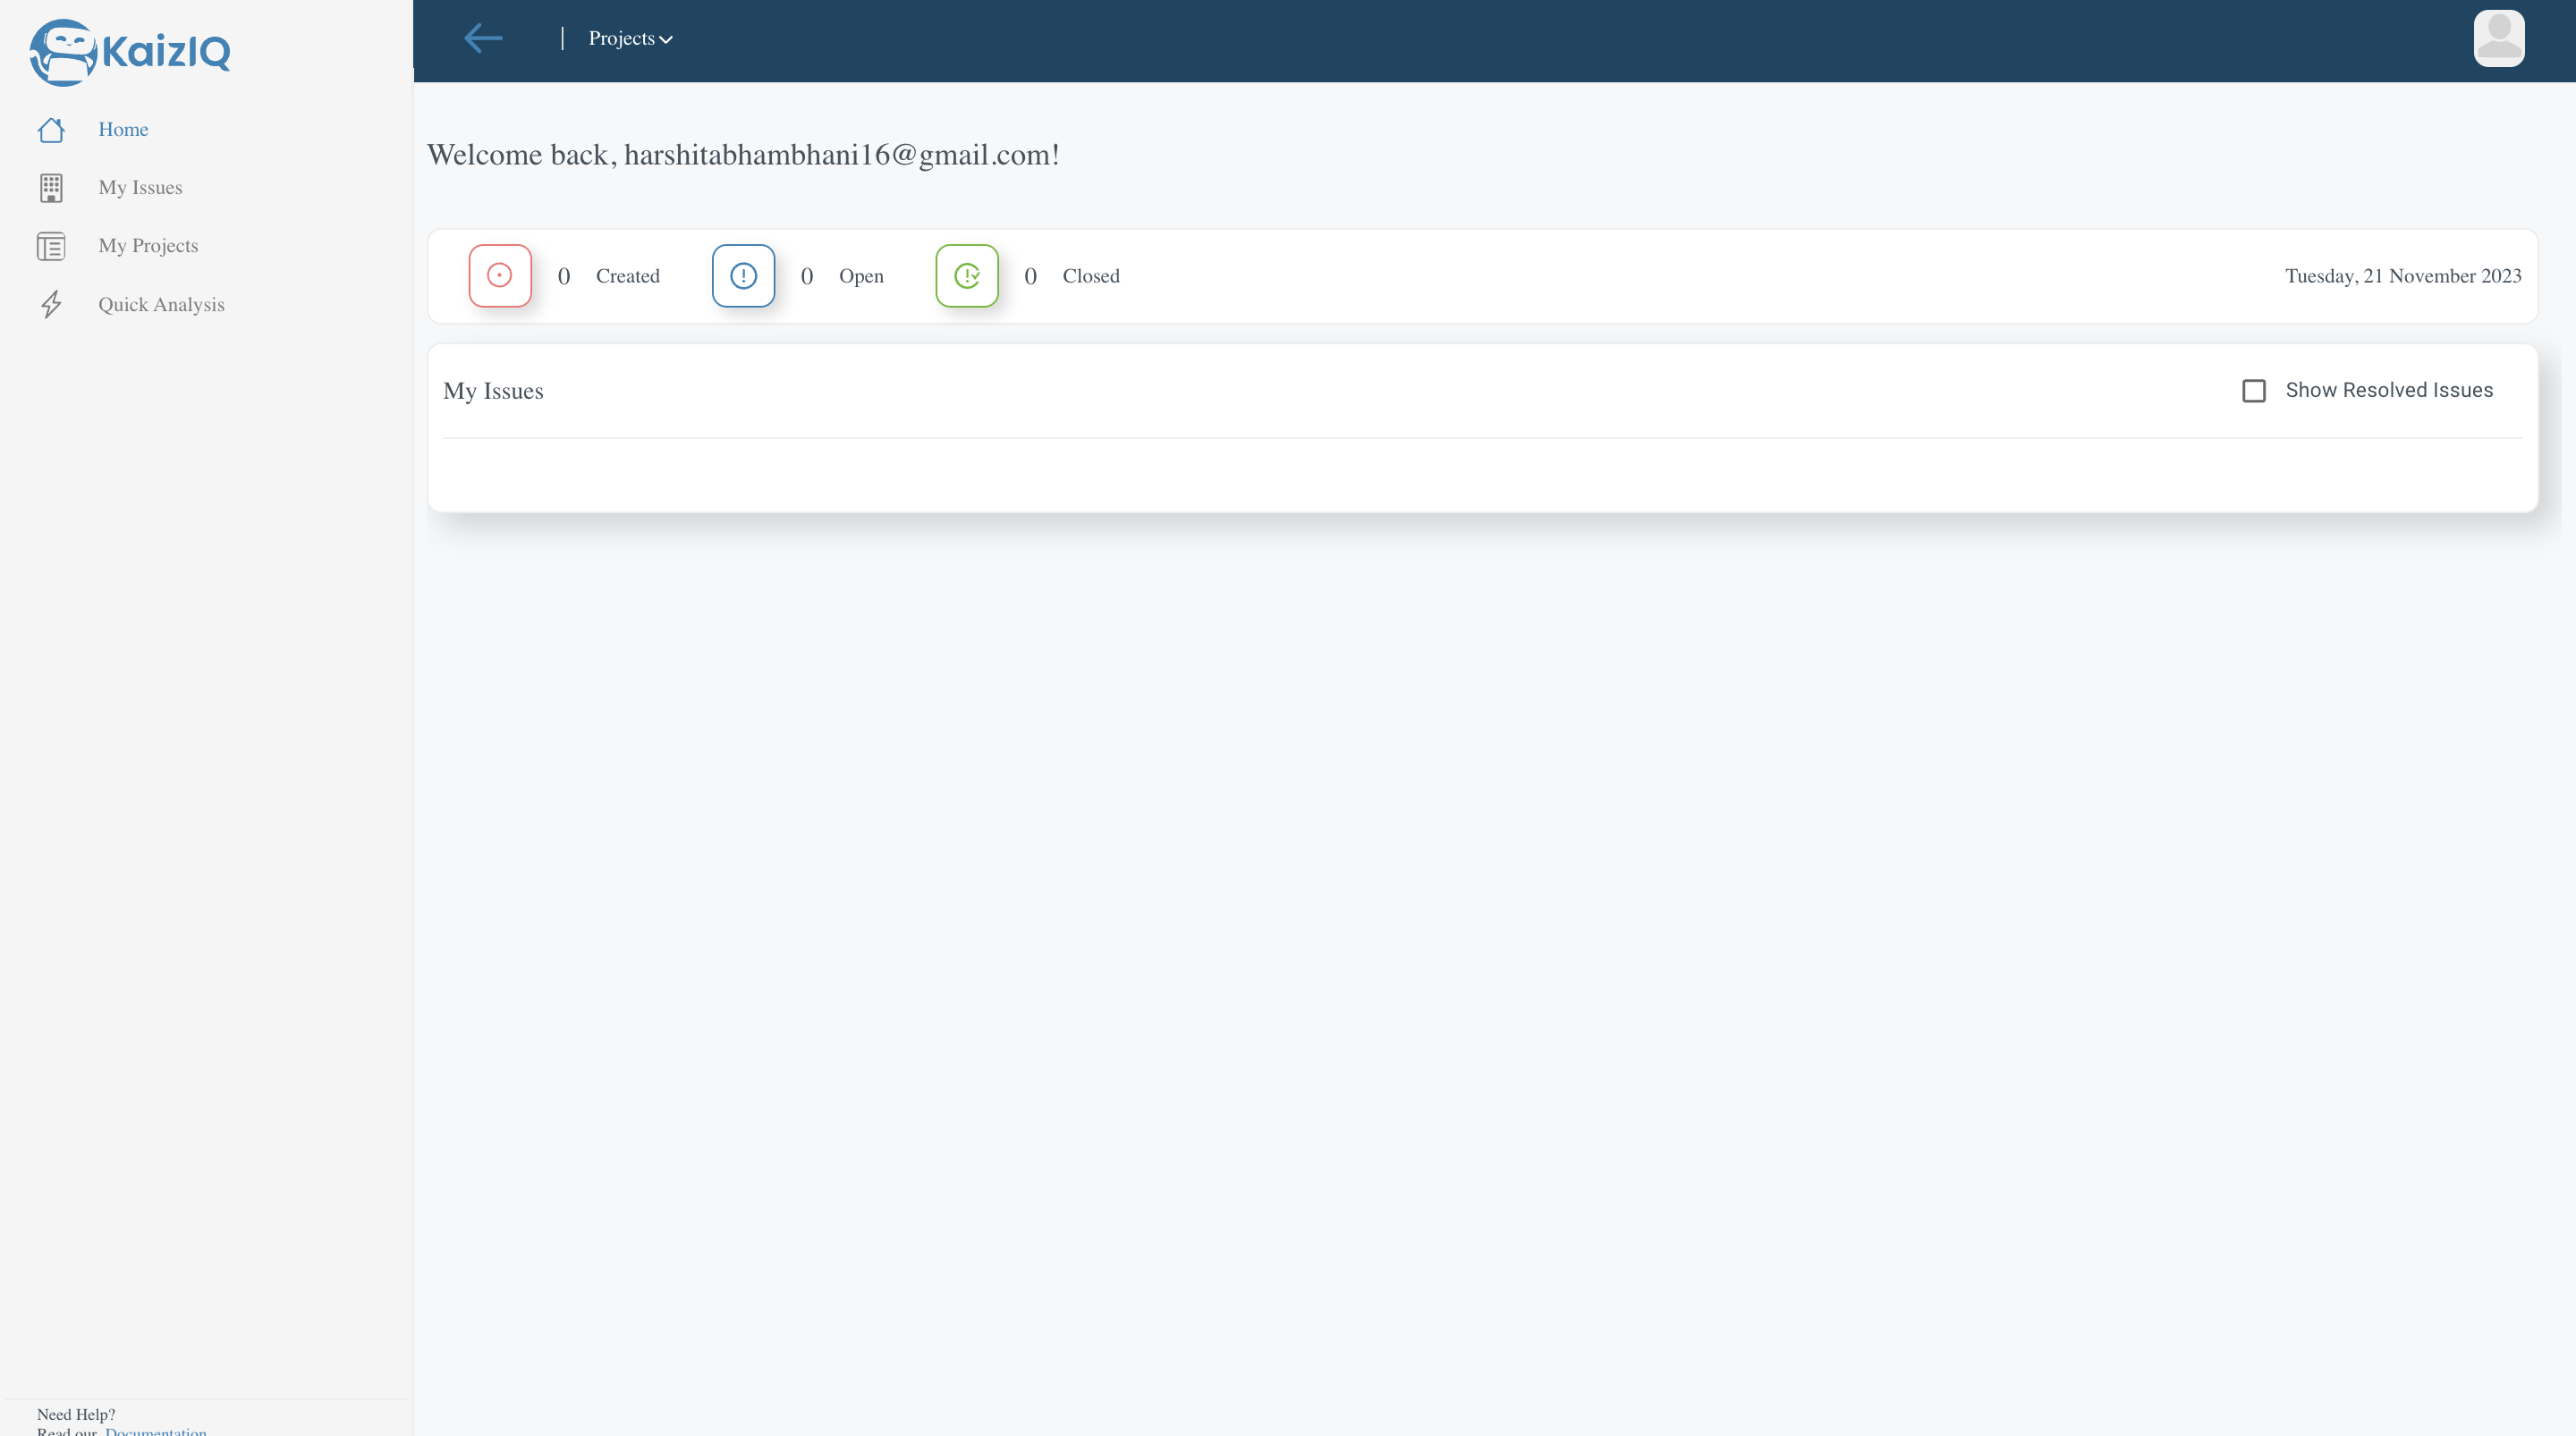
After logging in, you will be redirected to the issues page. Here you can report issues, view issues and view the project overview page.
Report Issues
To report any issue, you first need to choose the project from the dropdown menu. This will take you to the overview page of the project.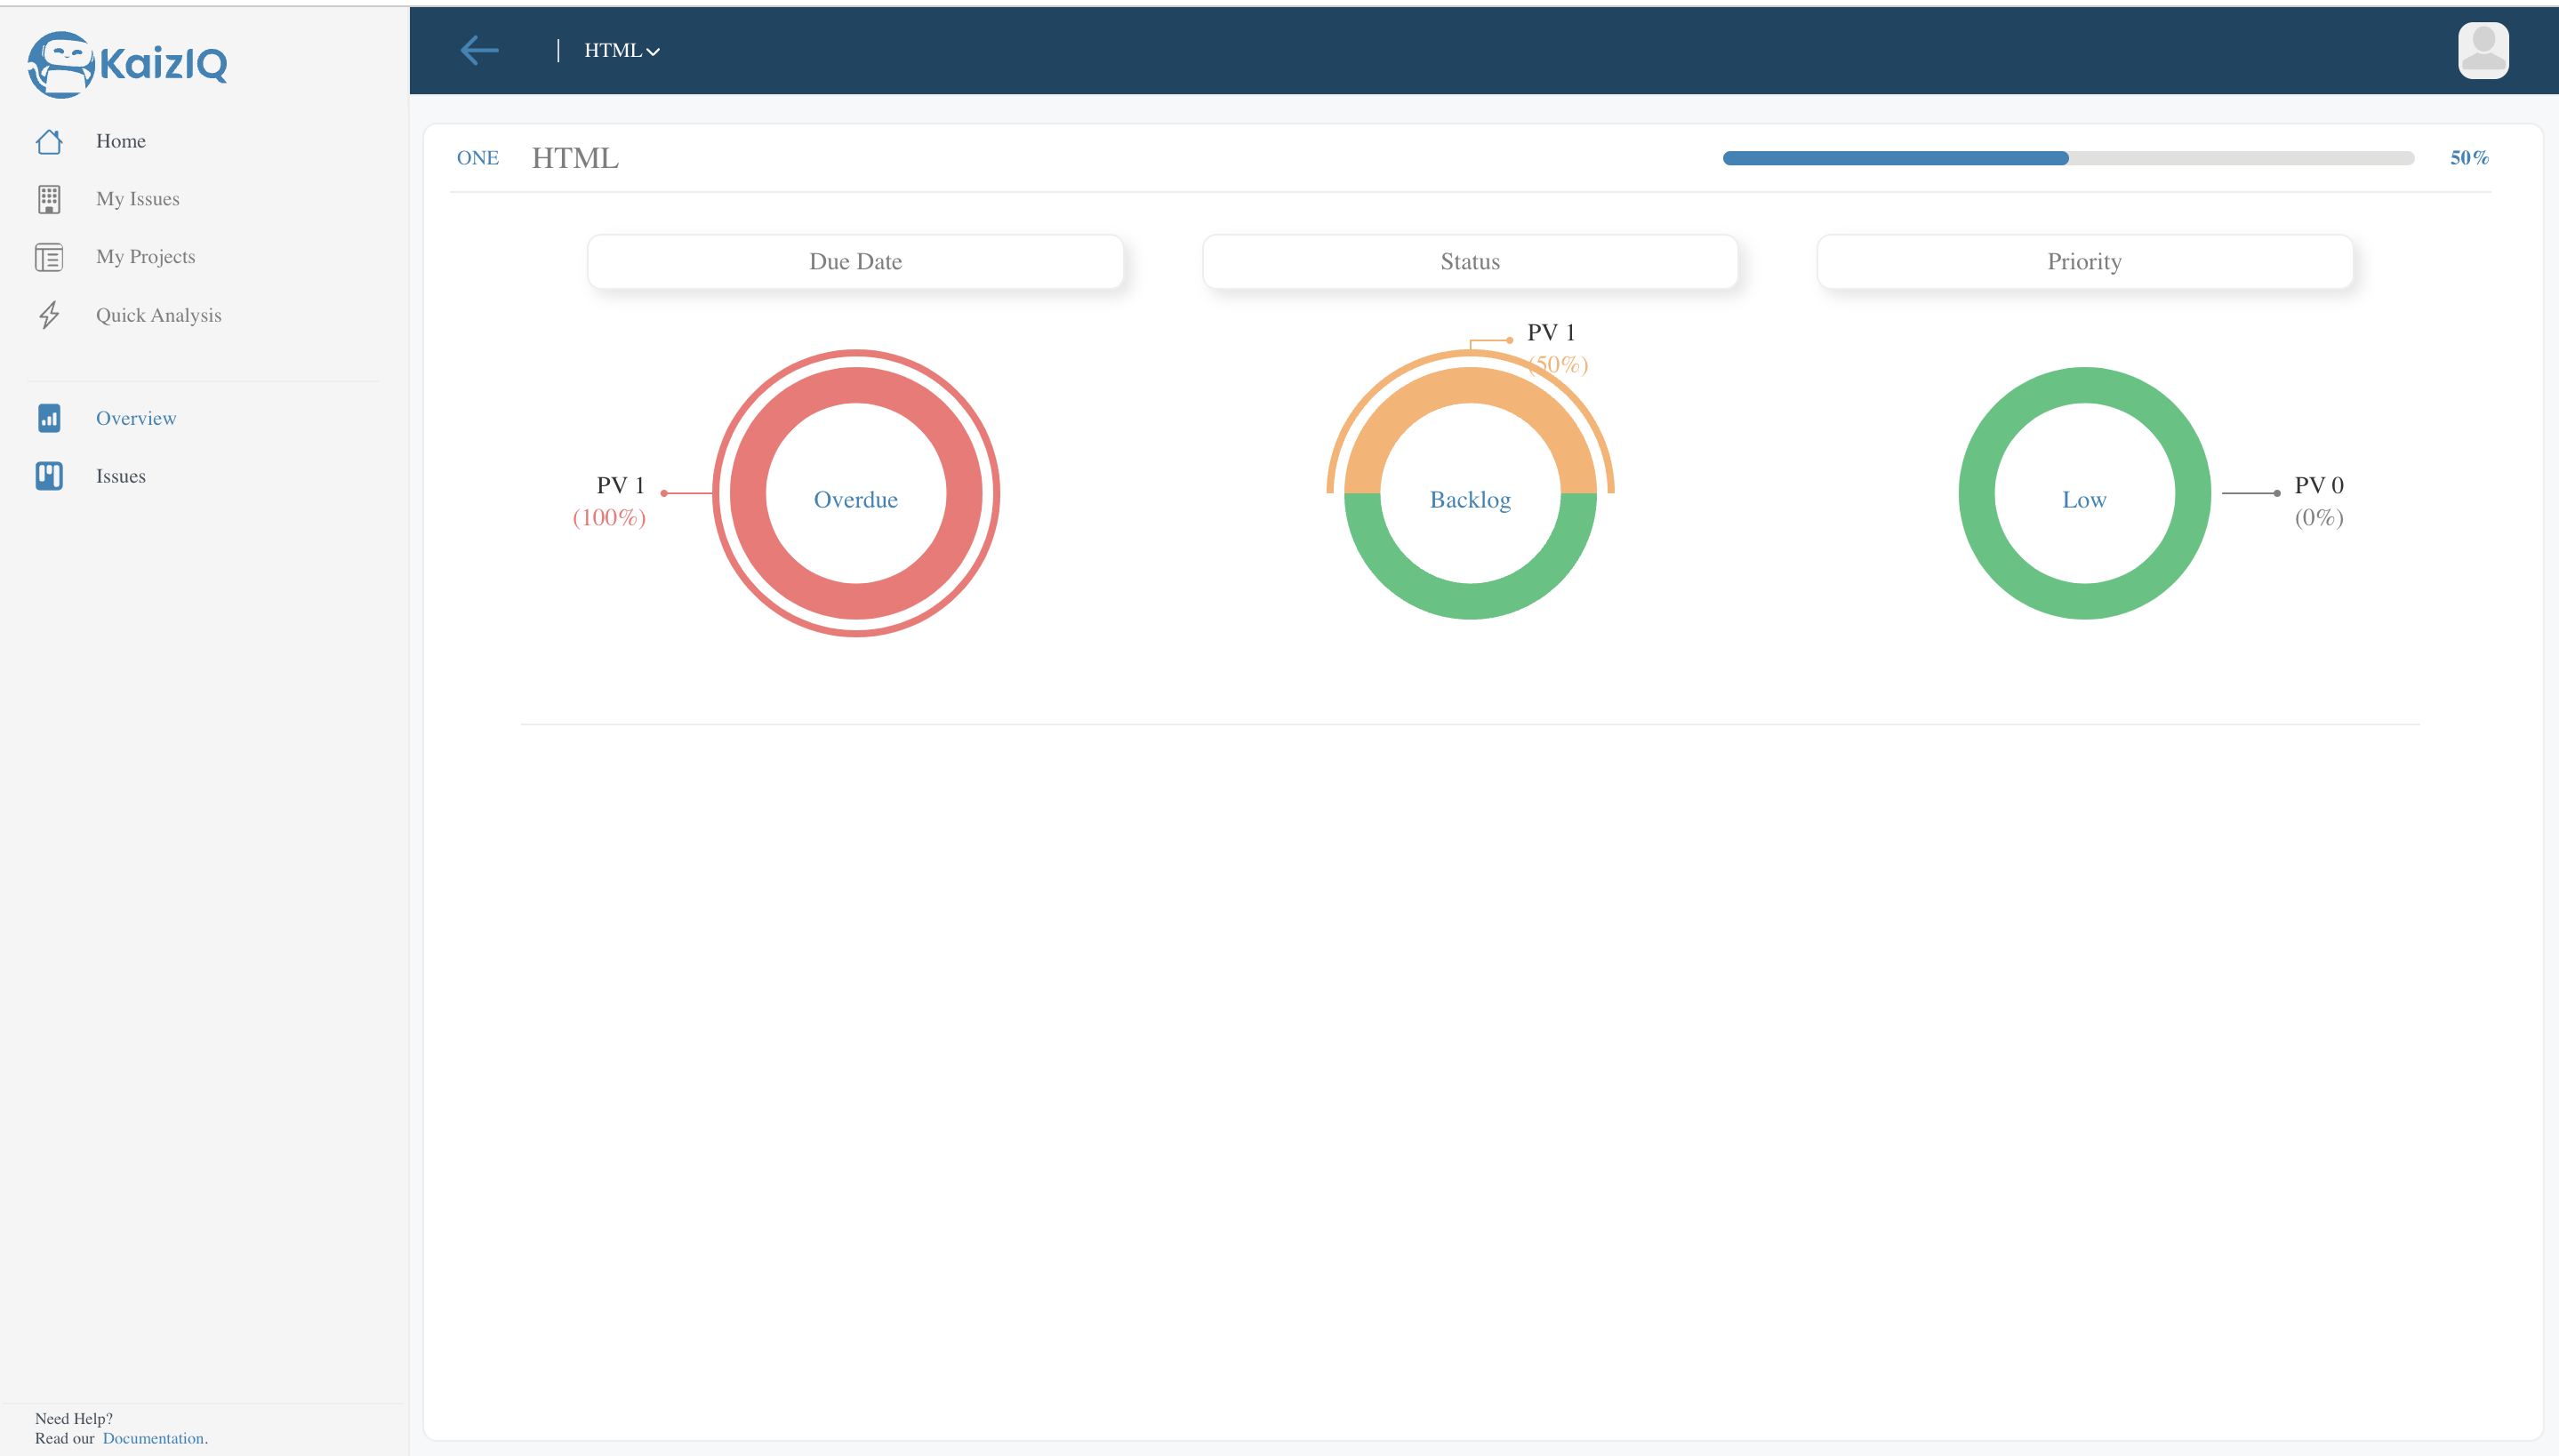
Now, click on the issues button from the left pannel. This will take you to the issues page. Here you can report issues and view issues.
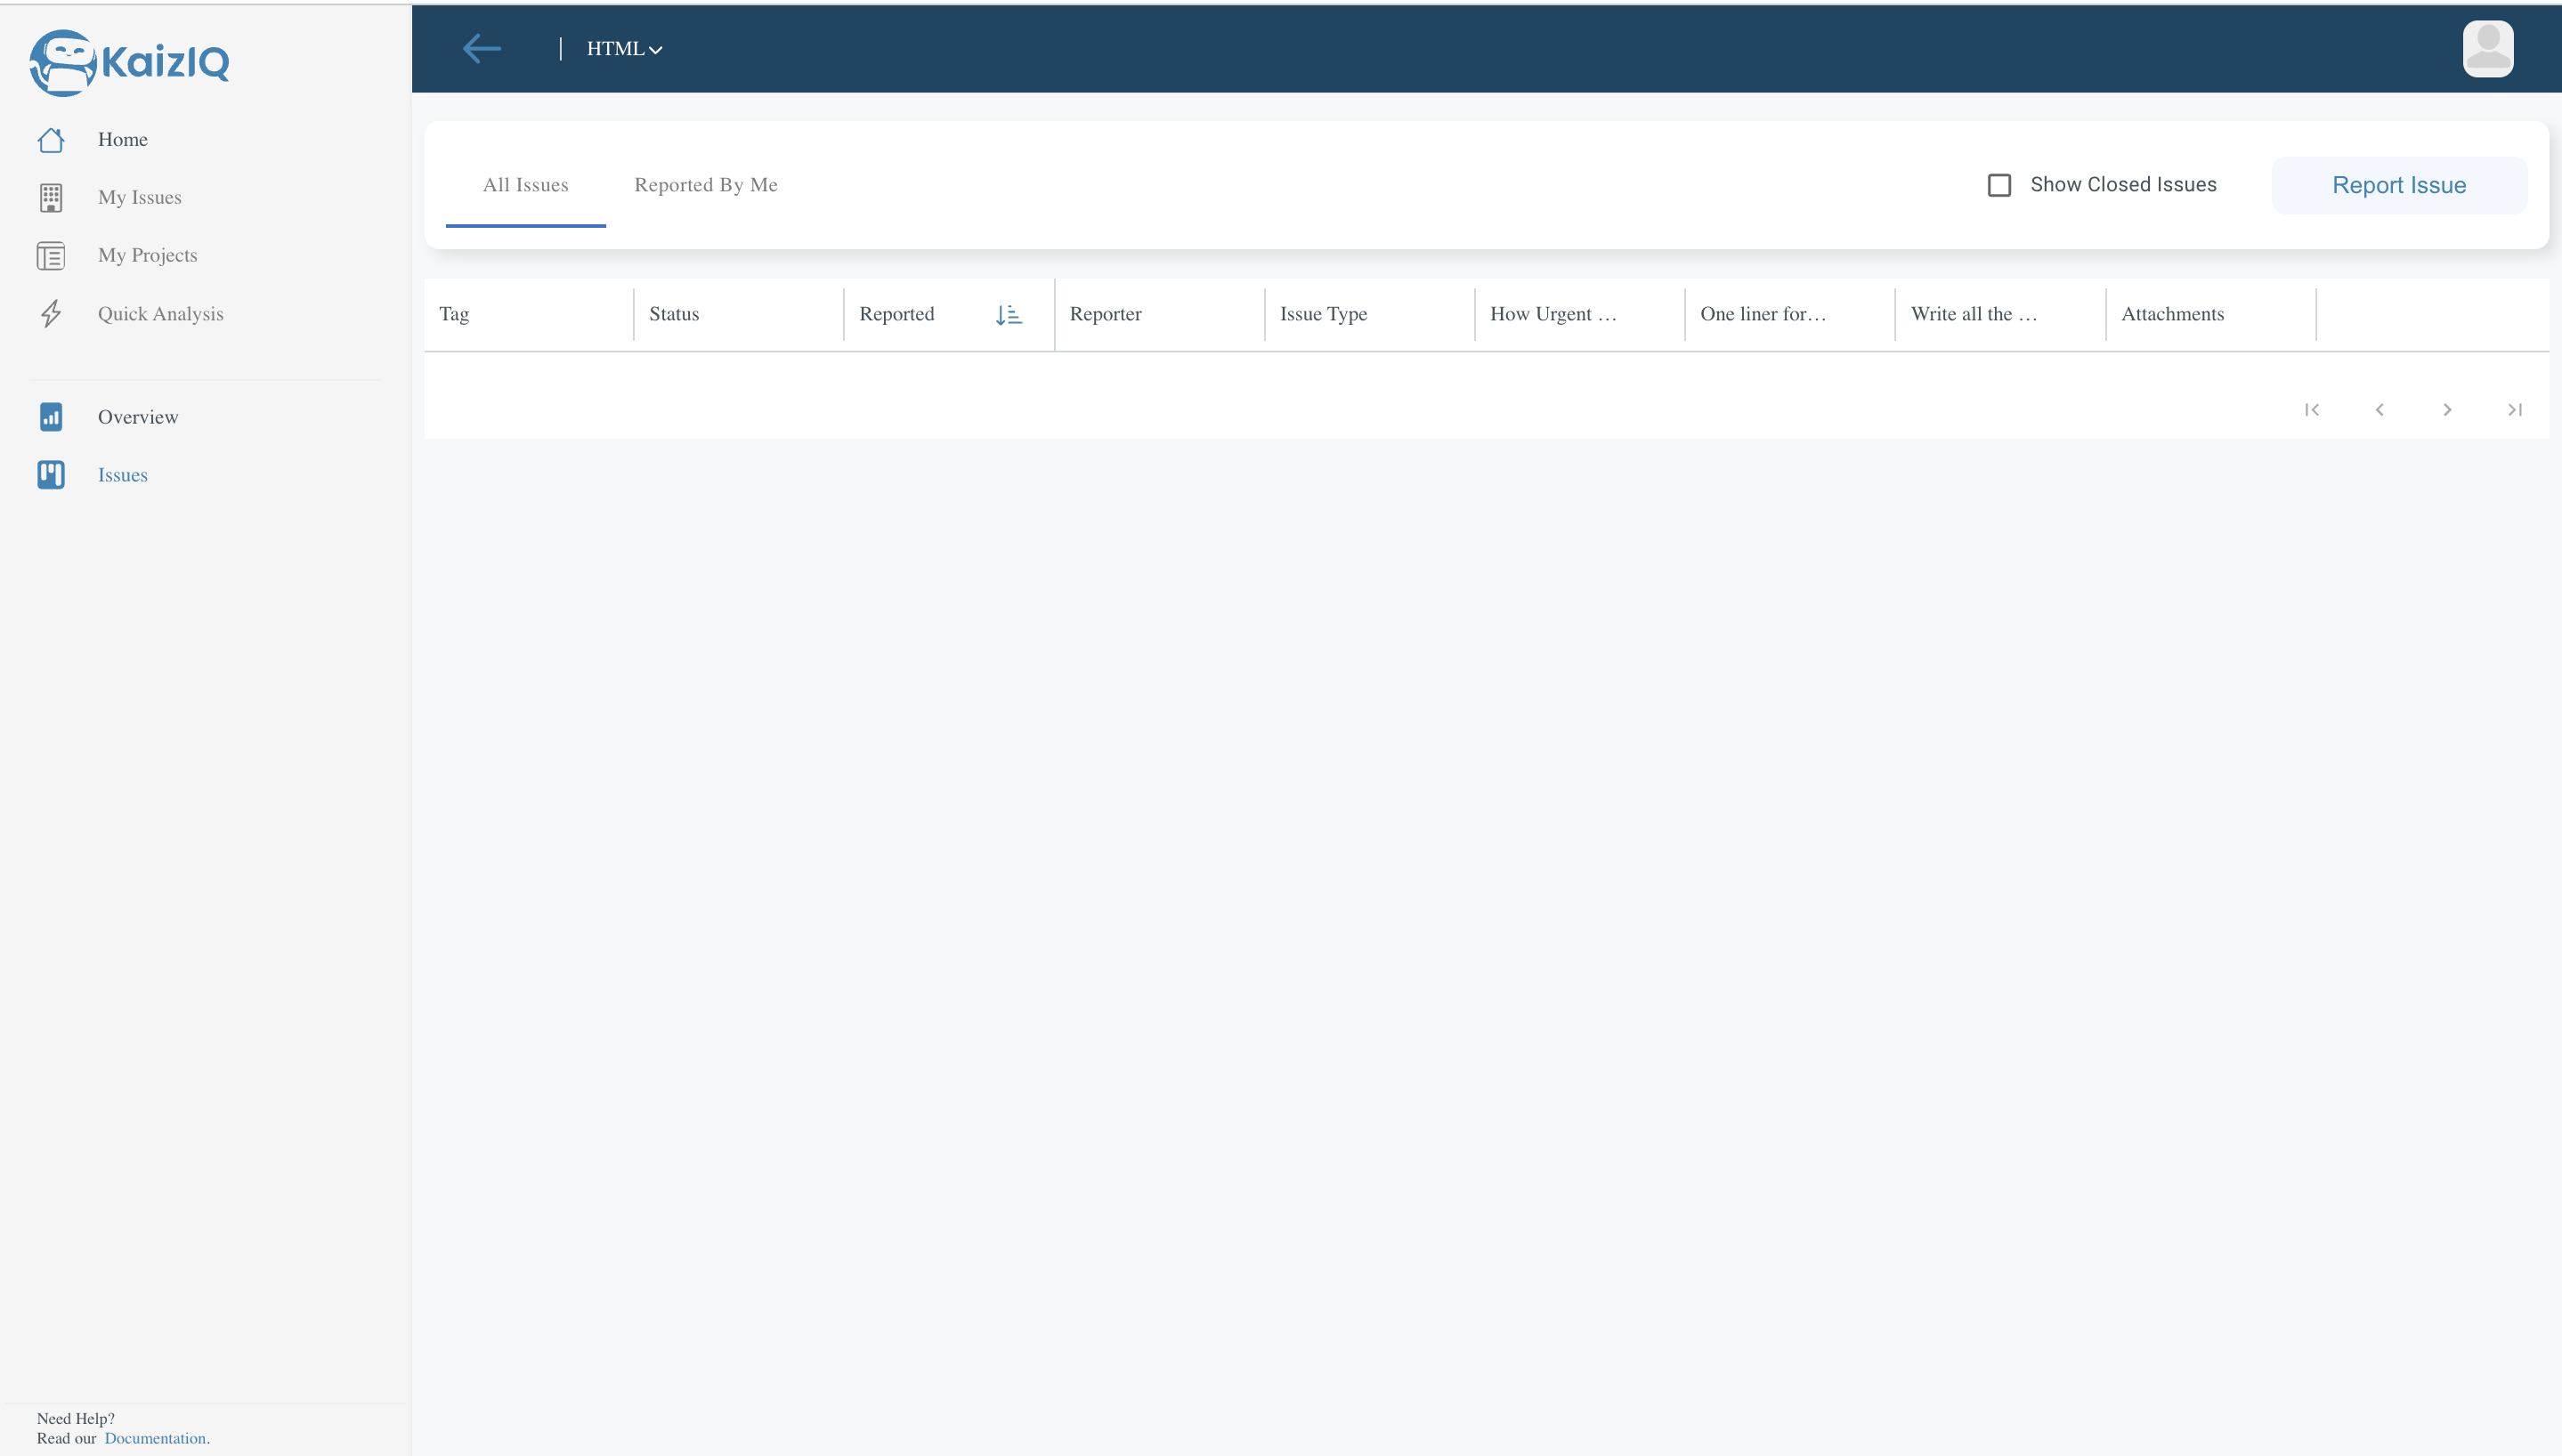
Now, click on the "Report Issue" button. A form will appear, fill up the form. In the form we have :
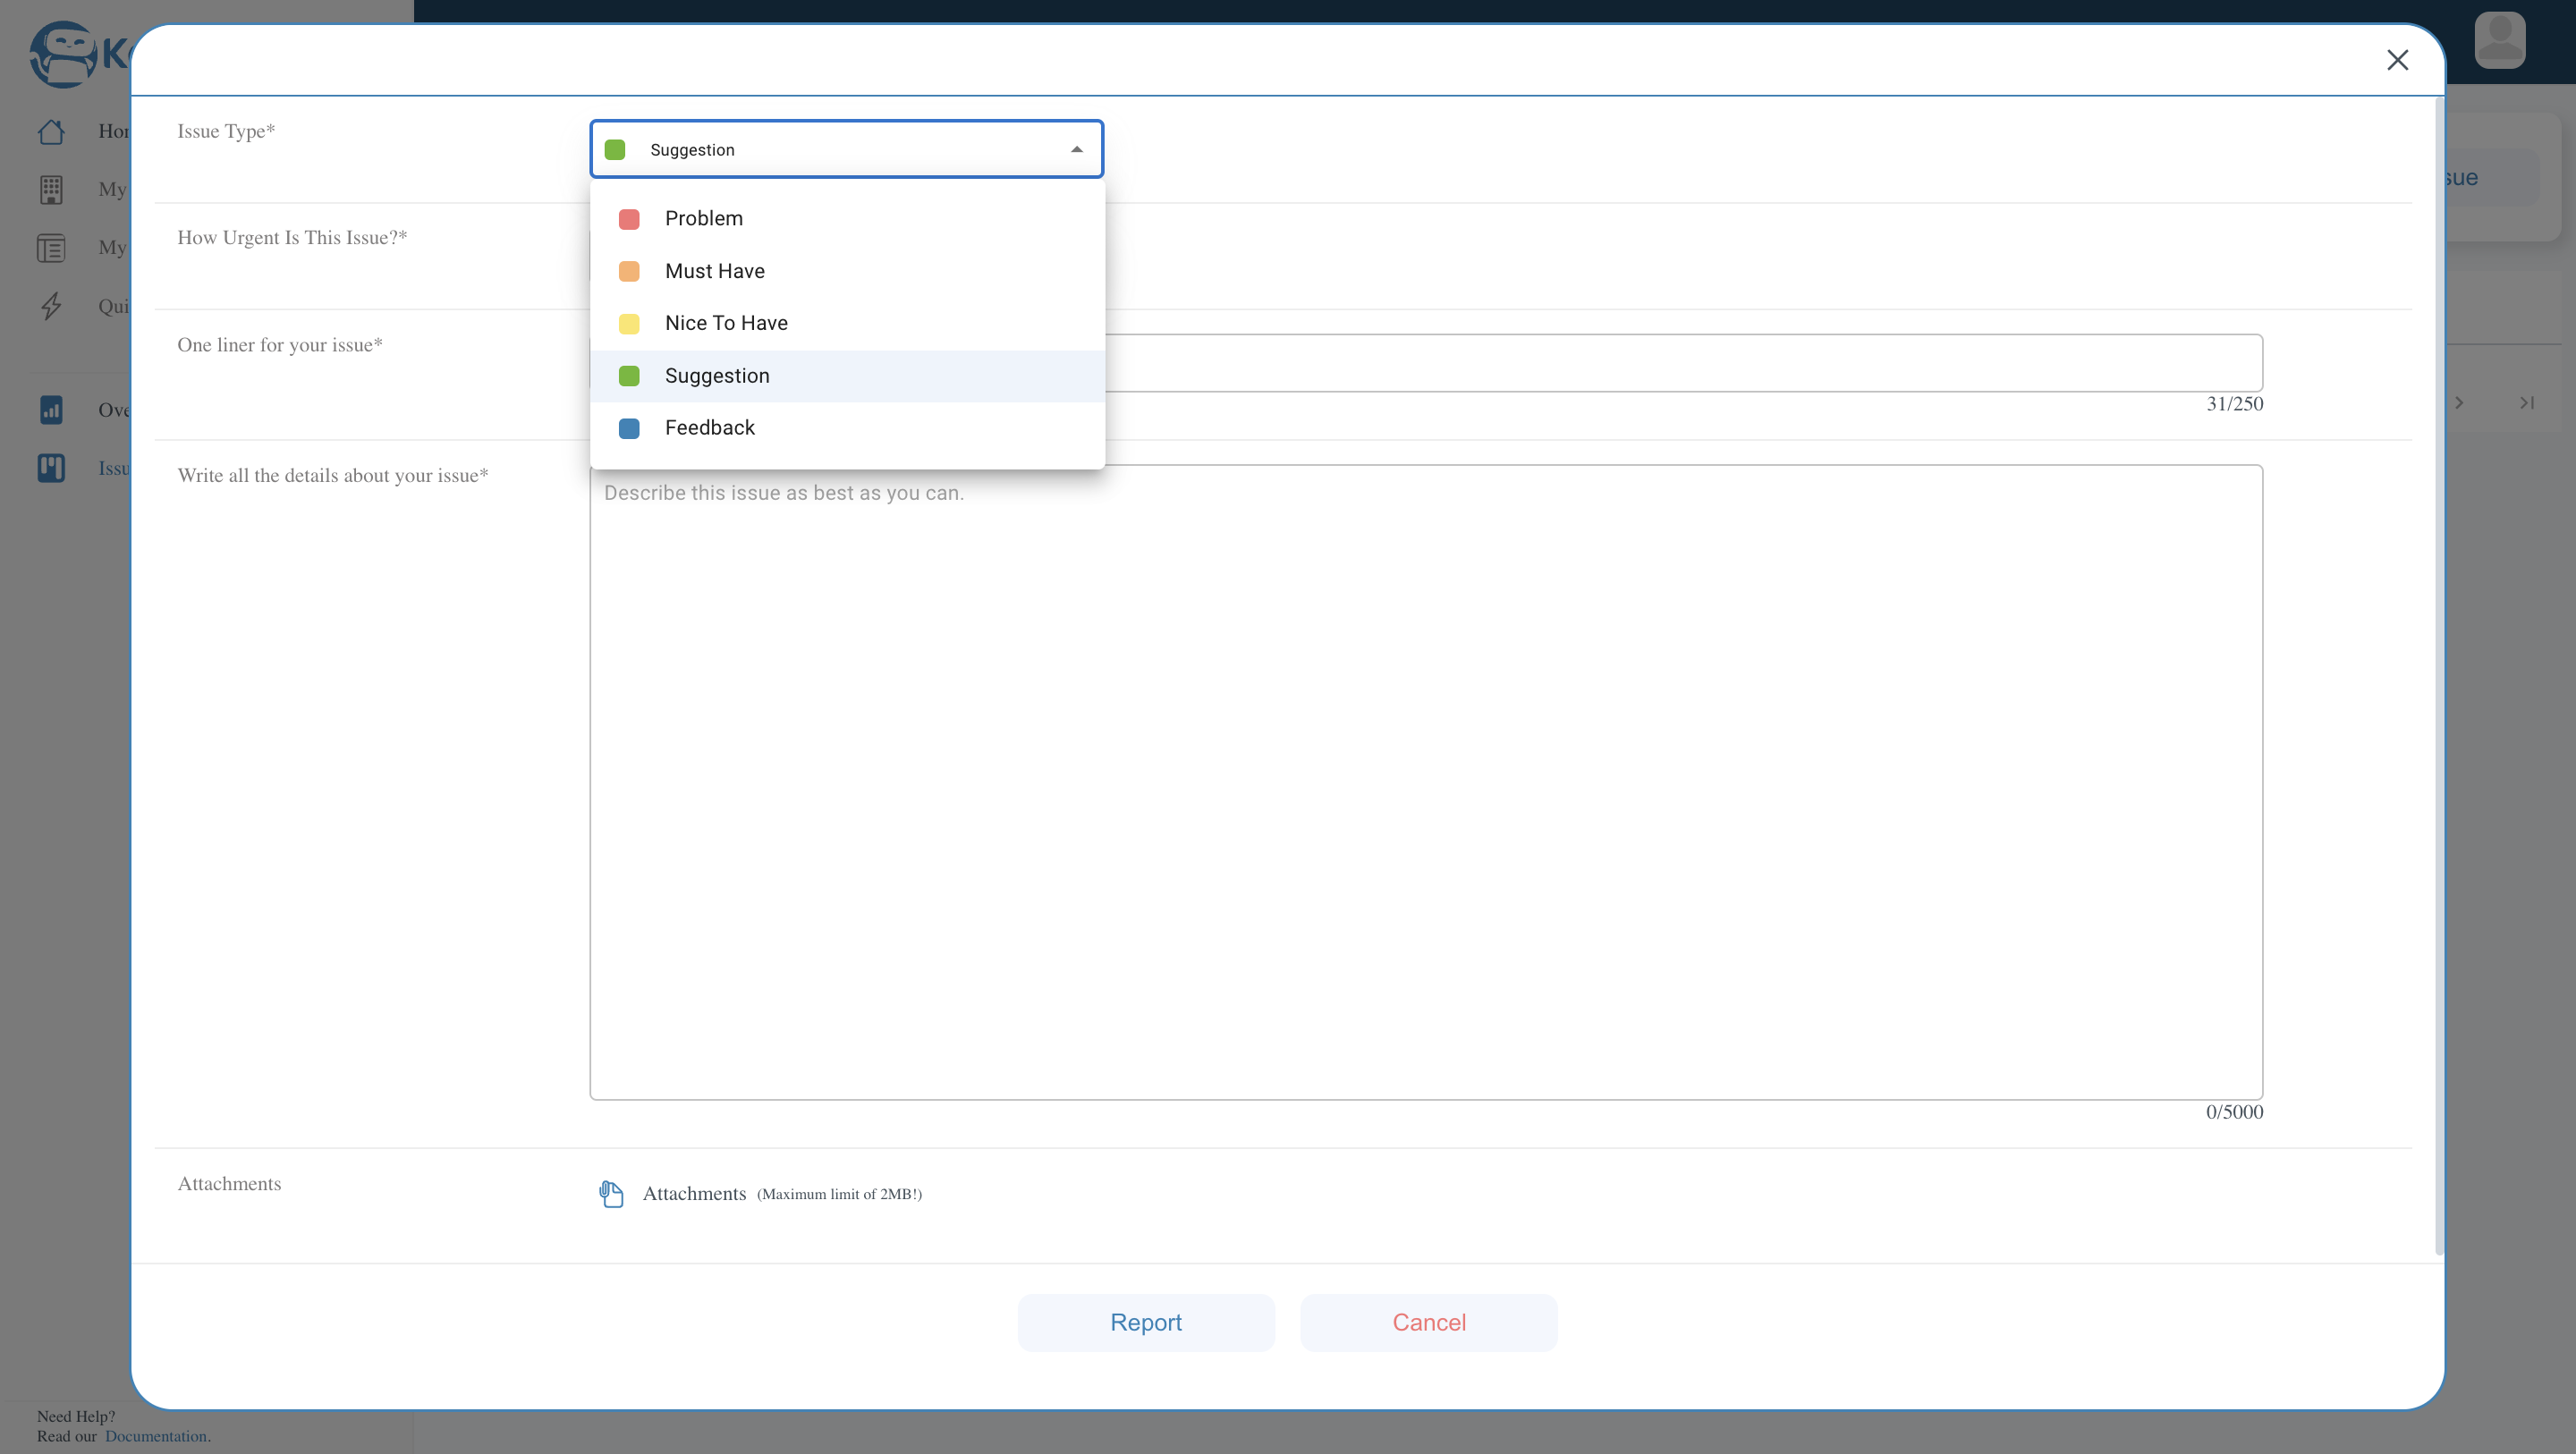
a) Type of the issue : We have following types of issues:
-
Problem- In this type of issue you can report any problem you are facing. -
Must Have- In this type of issue you can report any feature that is a must have. -
Nice to Have- In this type of issue you can report any feature that is nice to have. -
Suggestion- In this type of issue you can report any suggestion you have. -
Feedback- In this type of issue you can report any feedback you have.
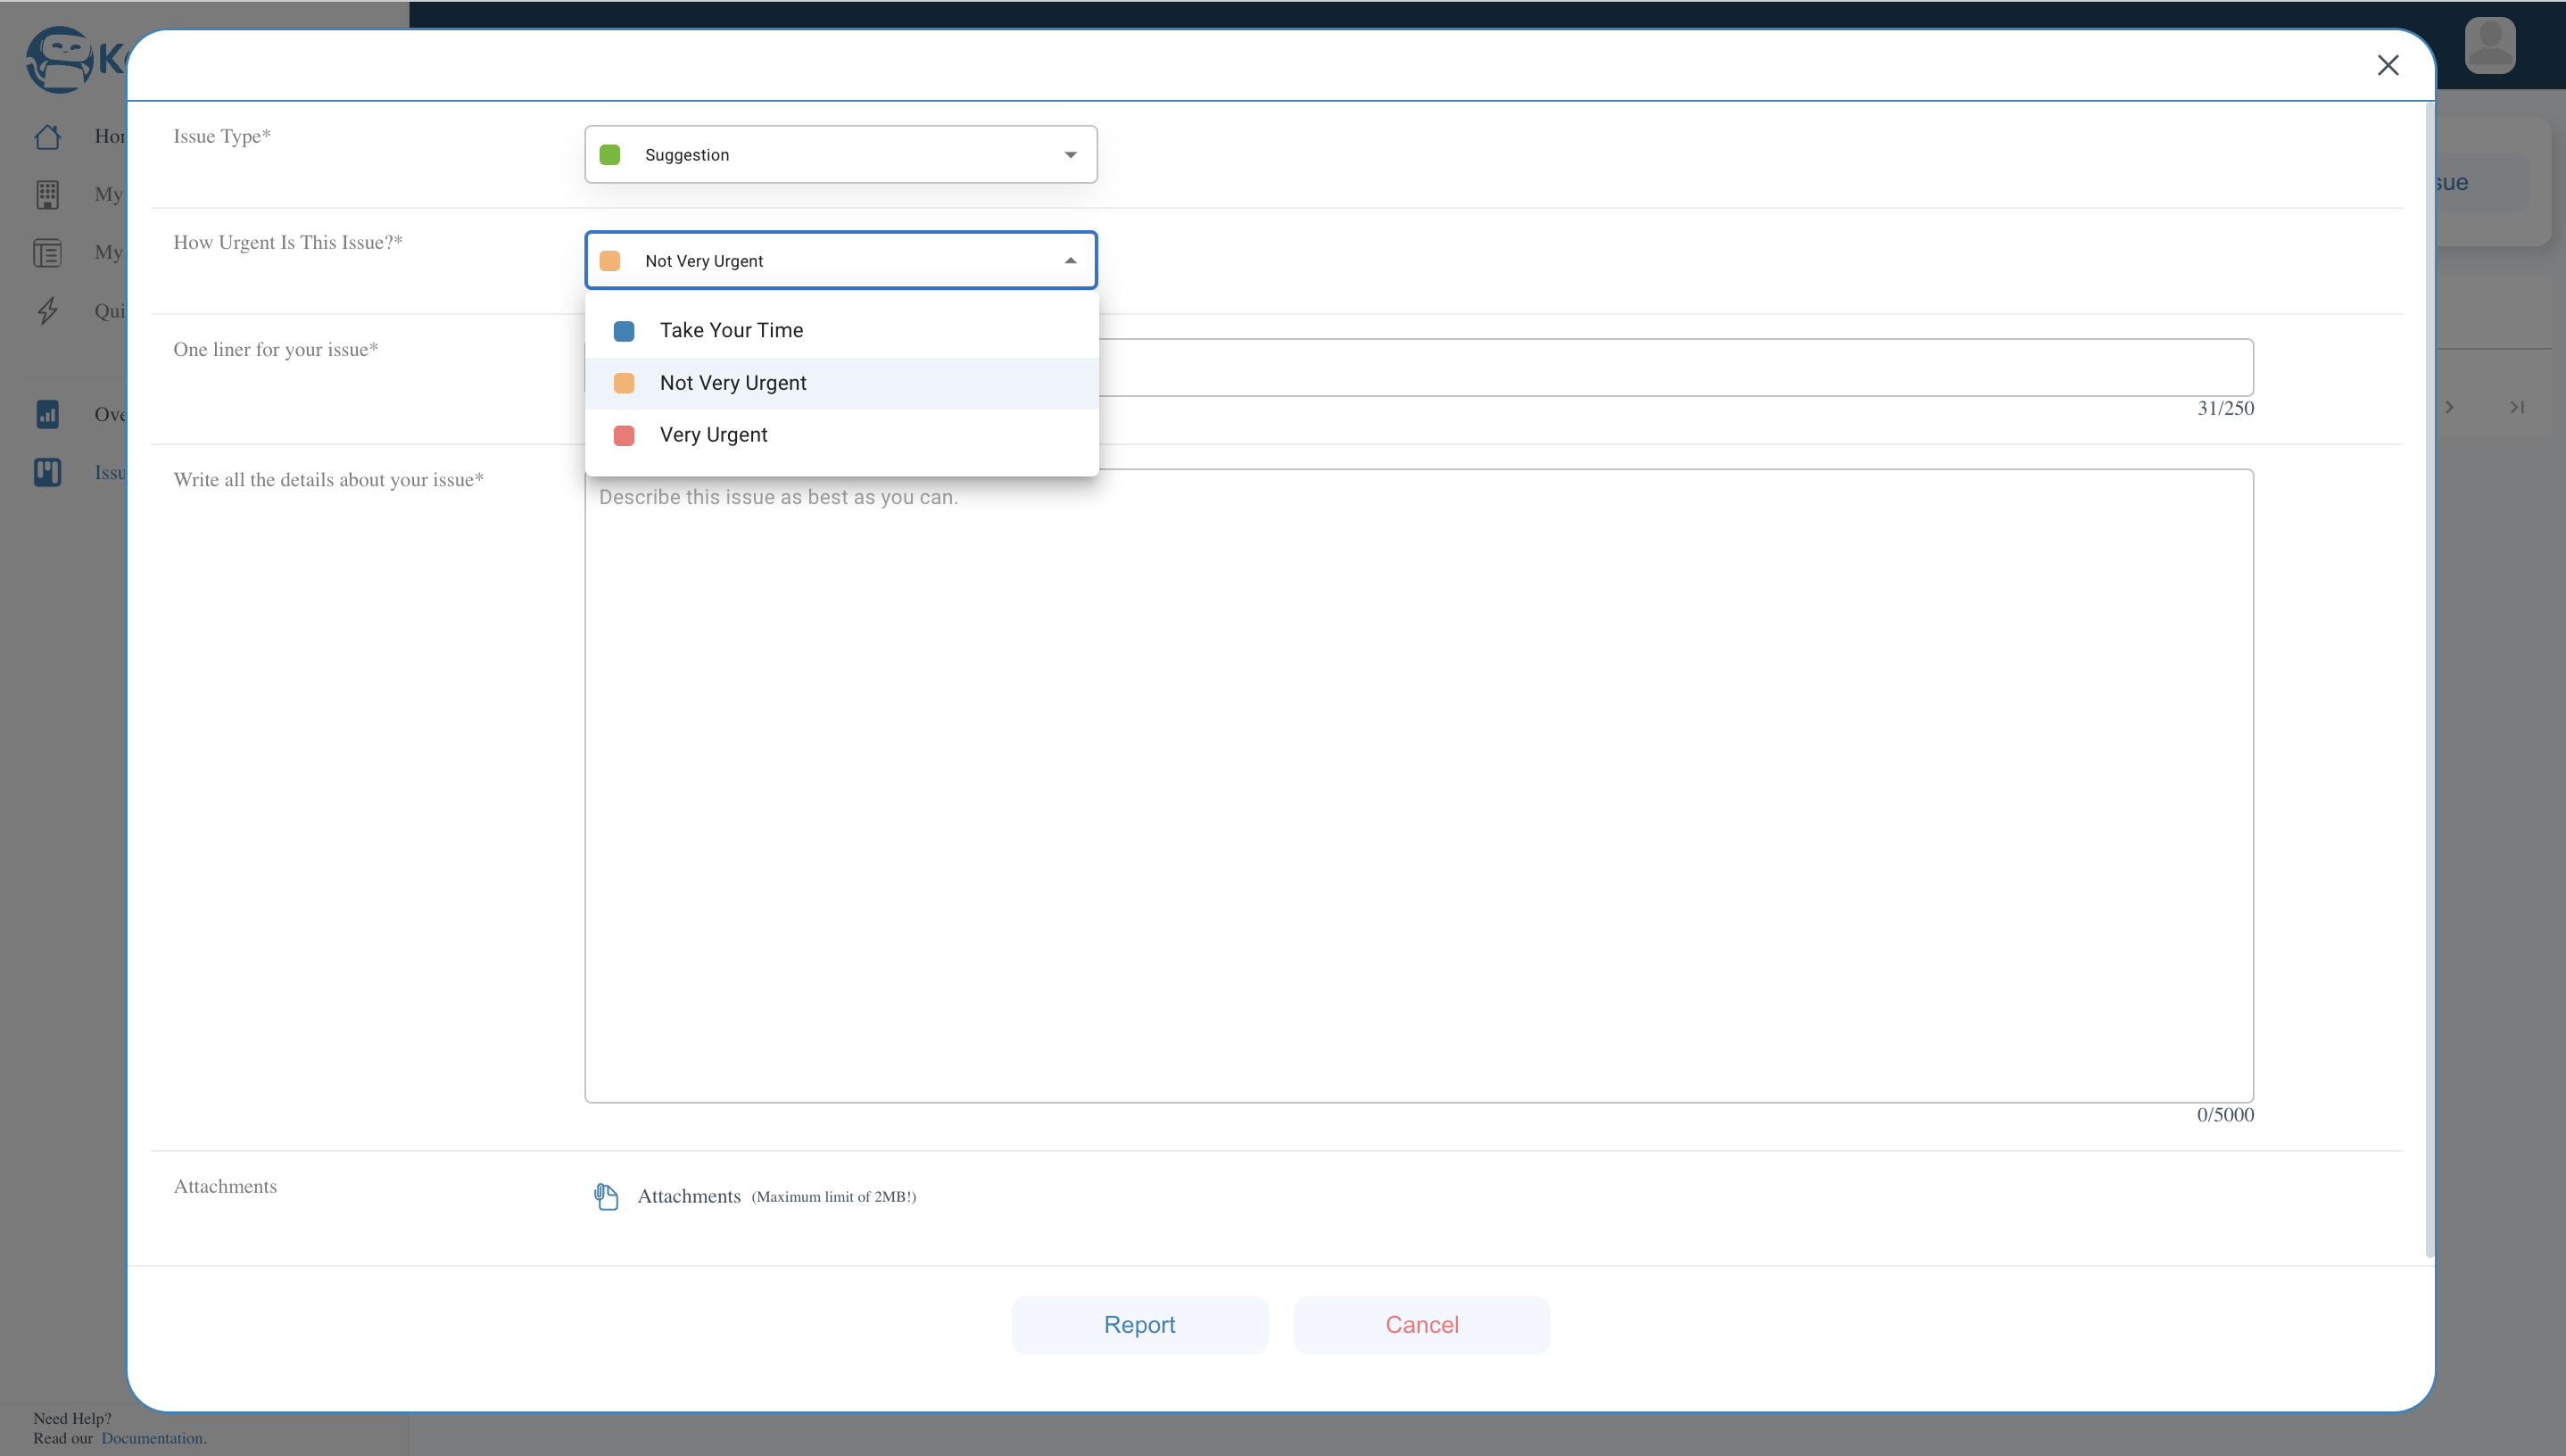
b) Urgency of the issue : We have following types of urgency:
-
Take your time- In this urgency you can report any issue can be solved later. -
Not Very Urgent- In this urgency you can report any issue that is not very urgent. -
Very Urgent- In this urgency you can report any issue that is very urgent.
c) One line summary of the issue : In this field you can give a one line summary of the issue.
d) Description of the issue : In this field you can give a detailed description of the issue.
e) Attachments : In this field you can attach any file related to the issue.
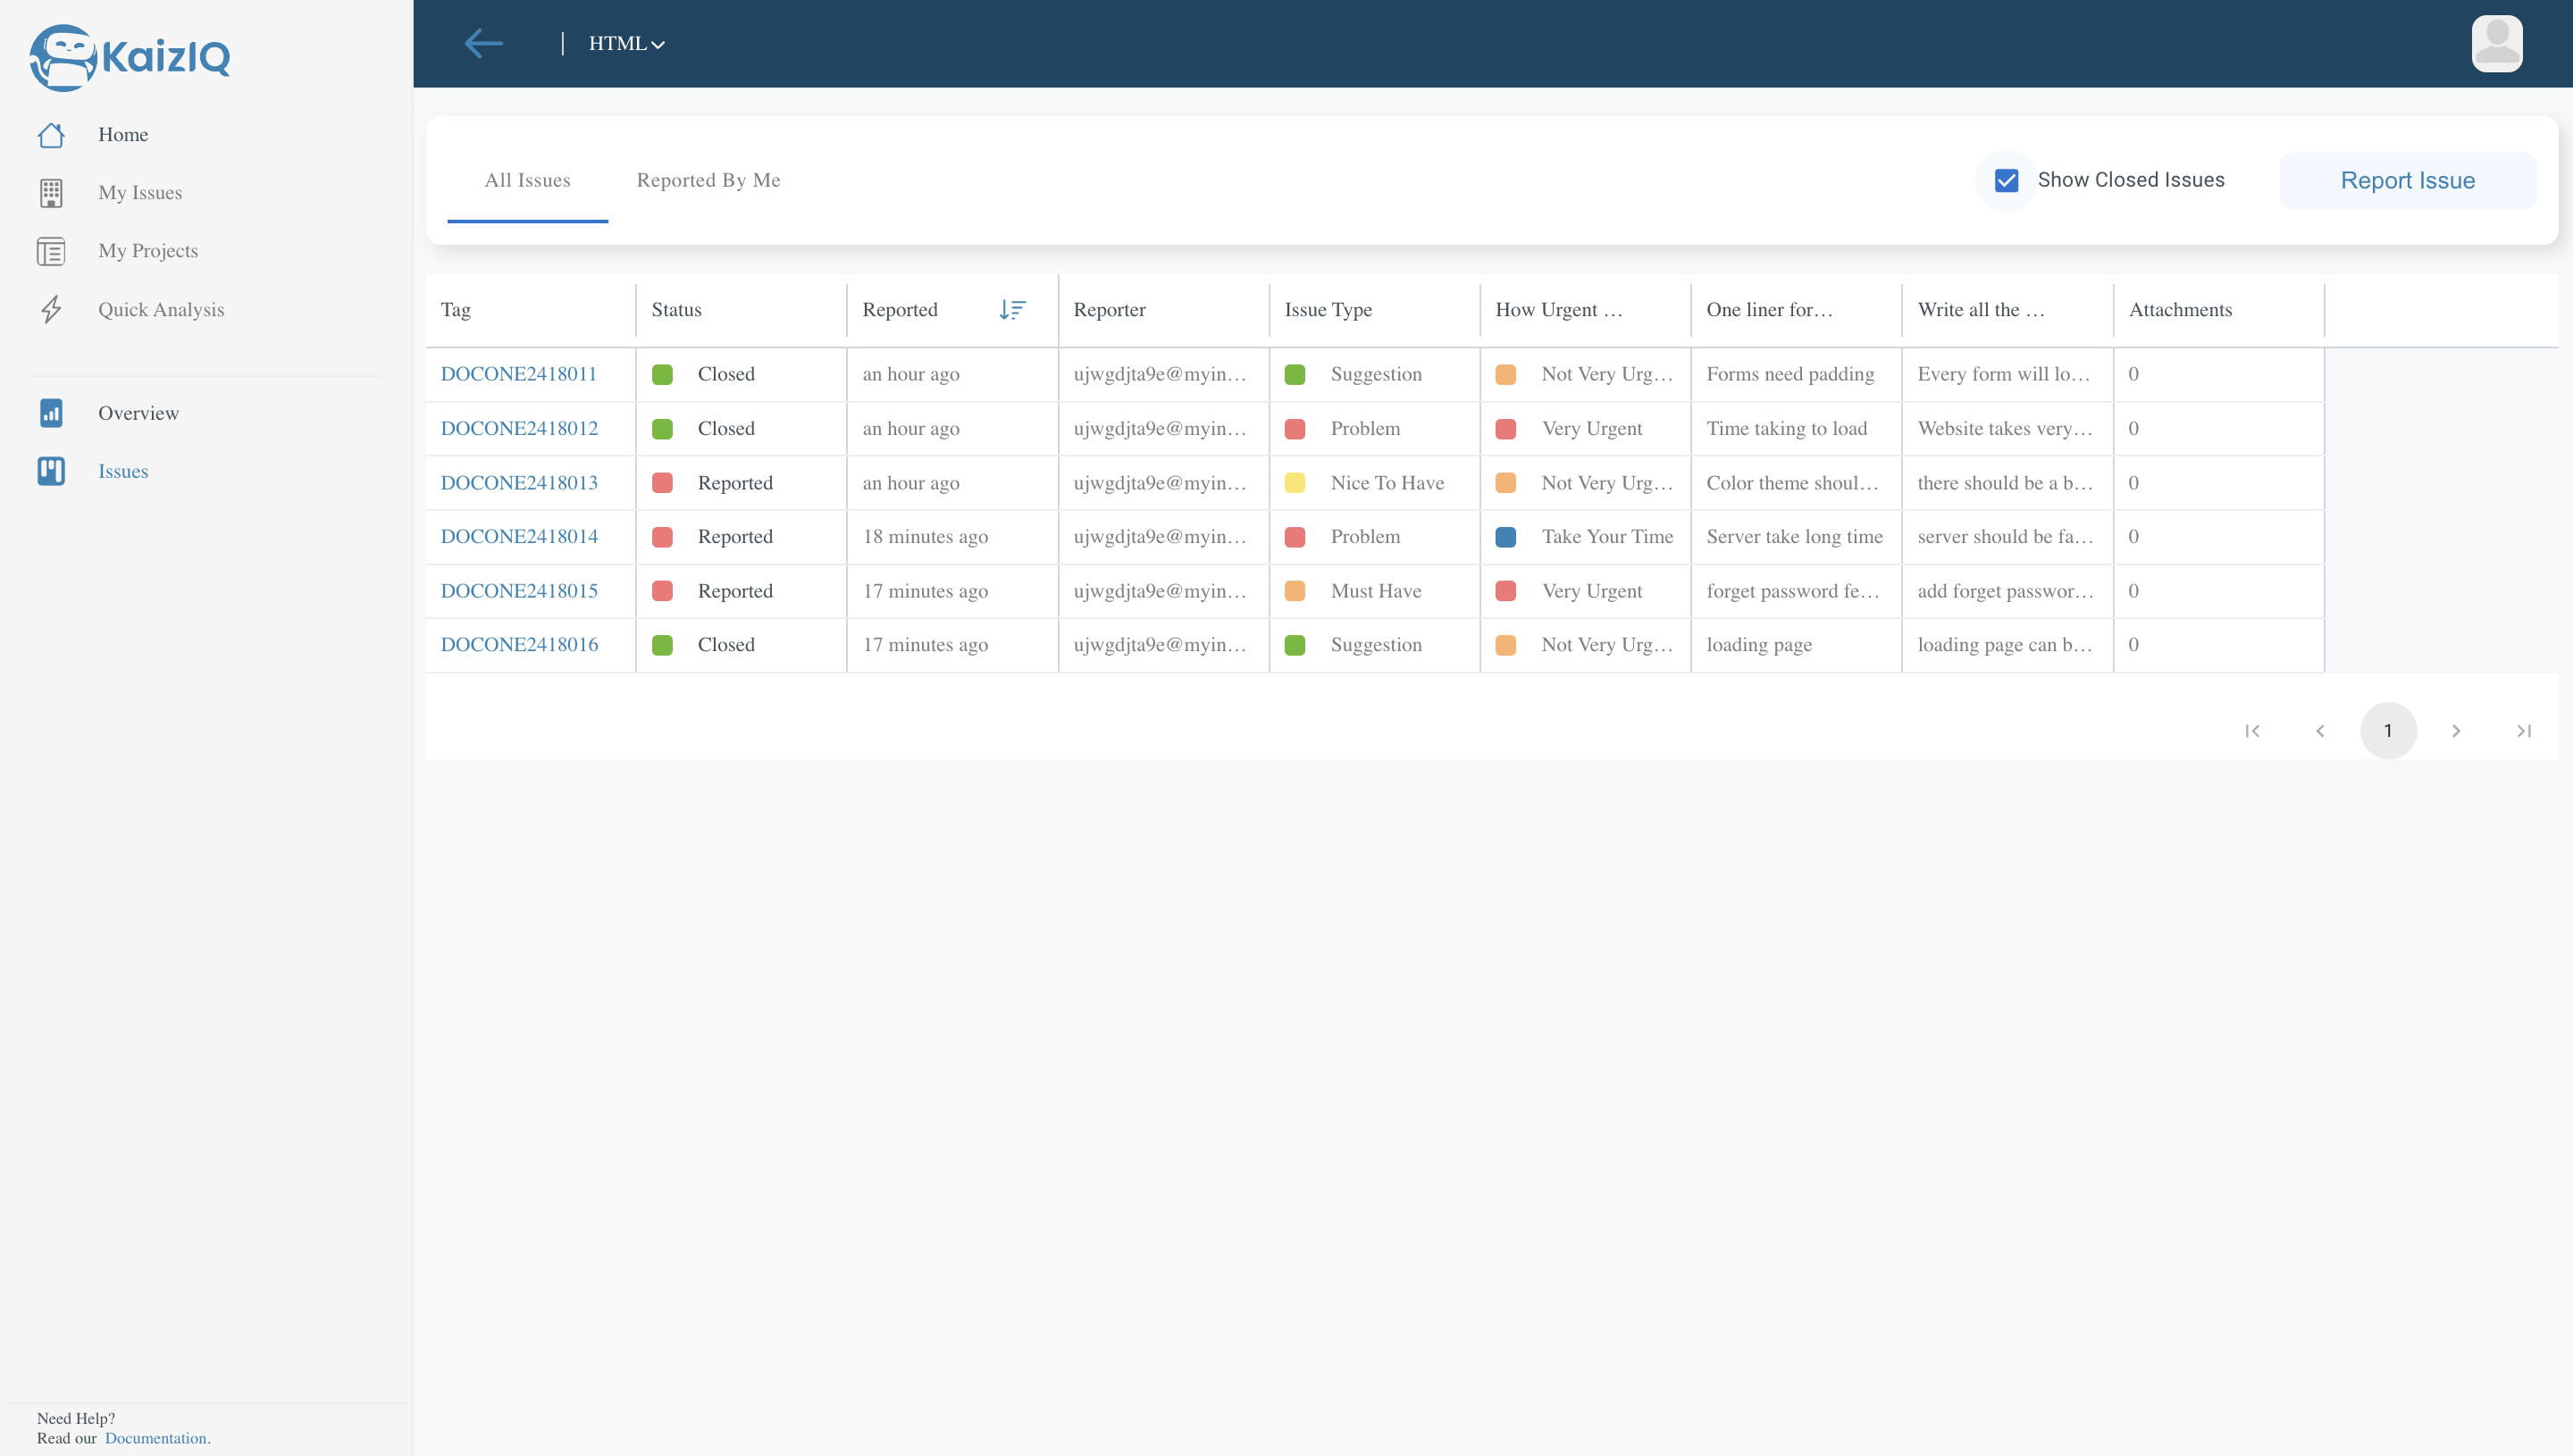
After filling up the form click on the "Report" button. Now, the issue will be added to the issues page. For example, we have reported a suggestion issue with urgency "Not Very Urgent", one liner description being "Forms need padding" and description being, every form will look good if it had some more padding around it. So please add some padding to the forms.
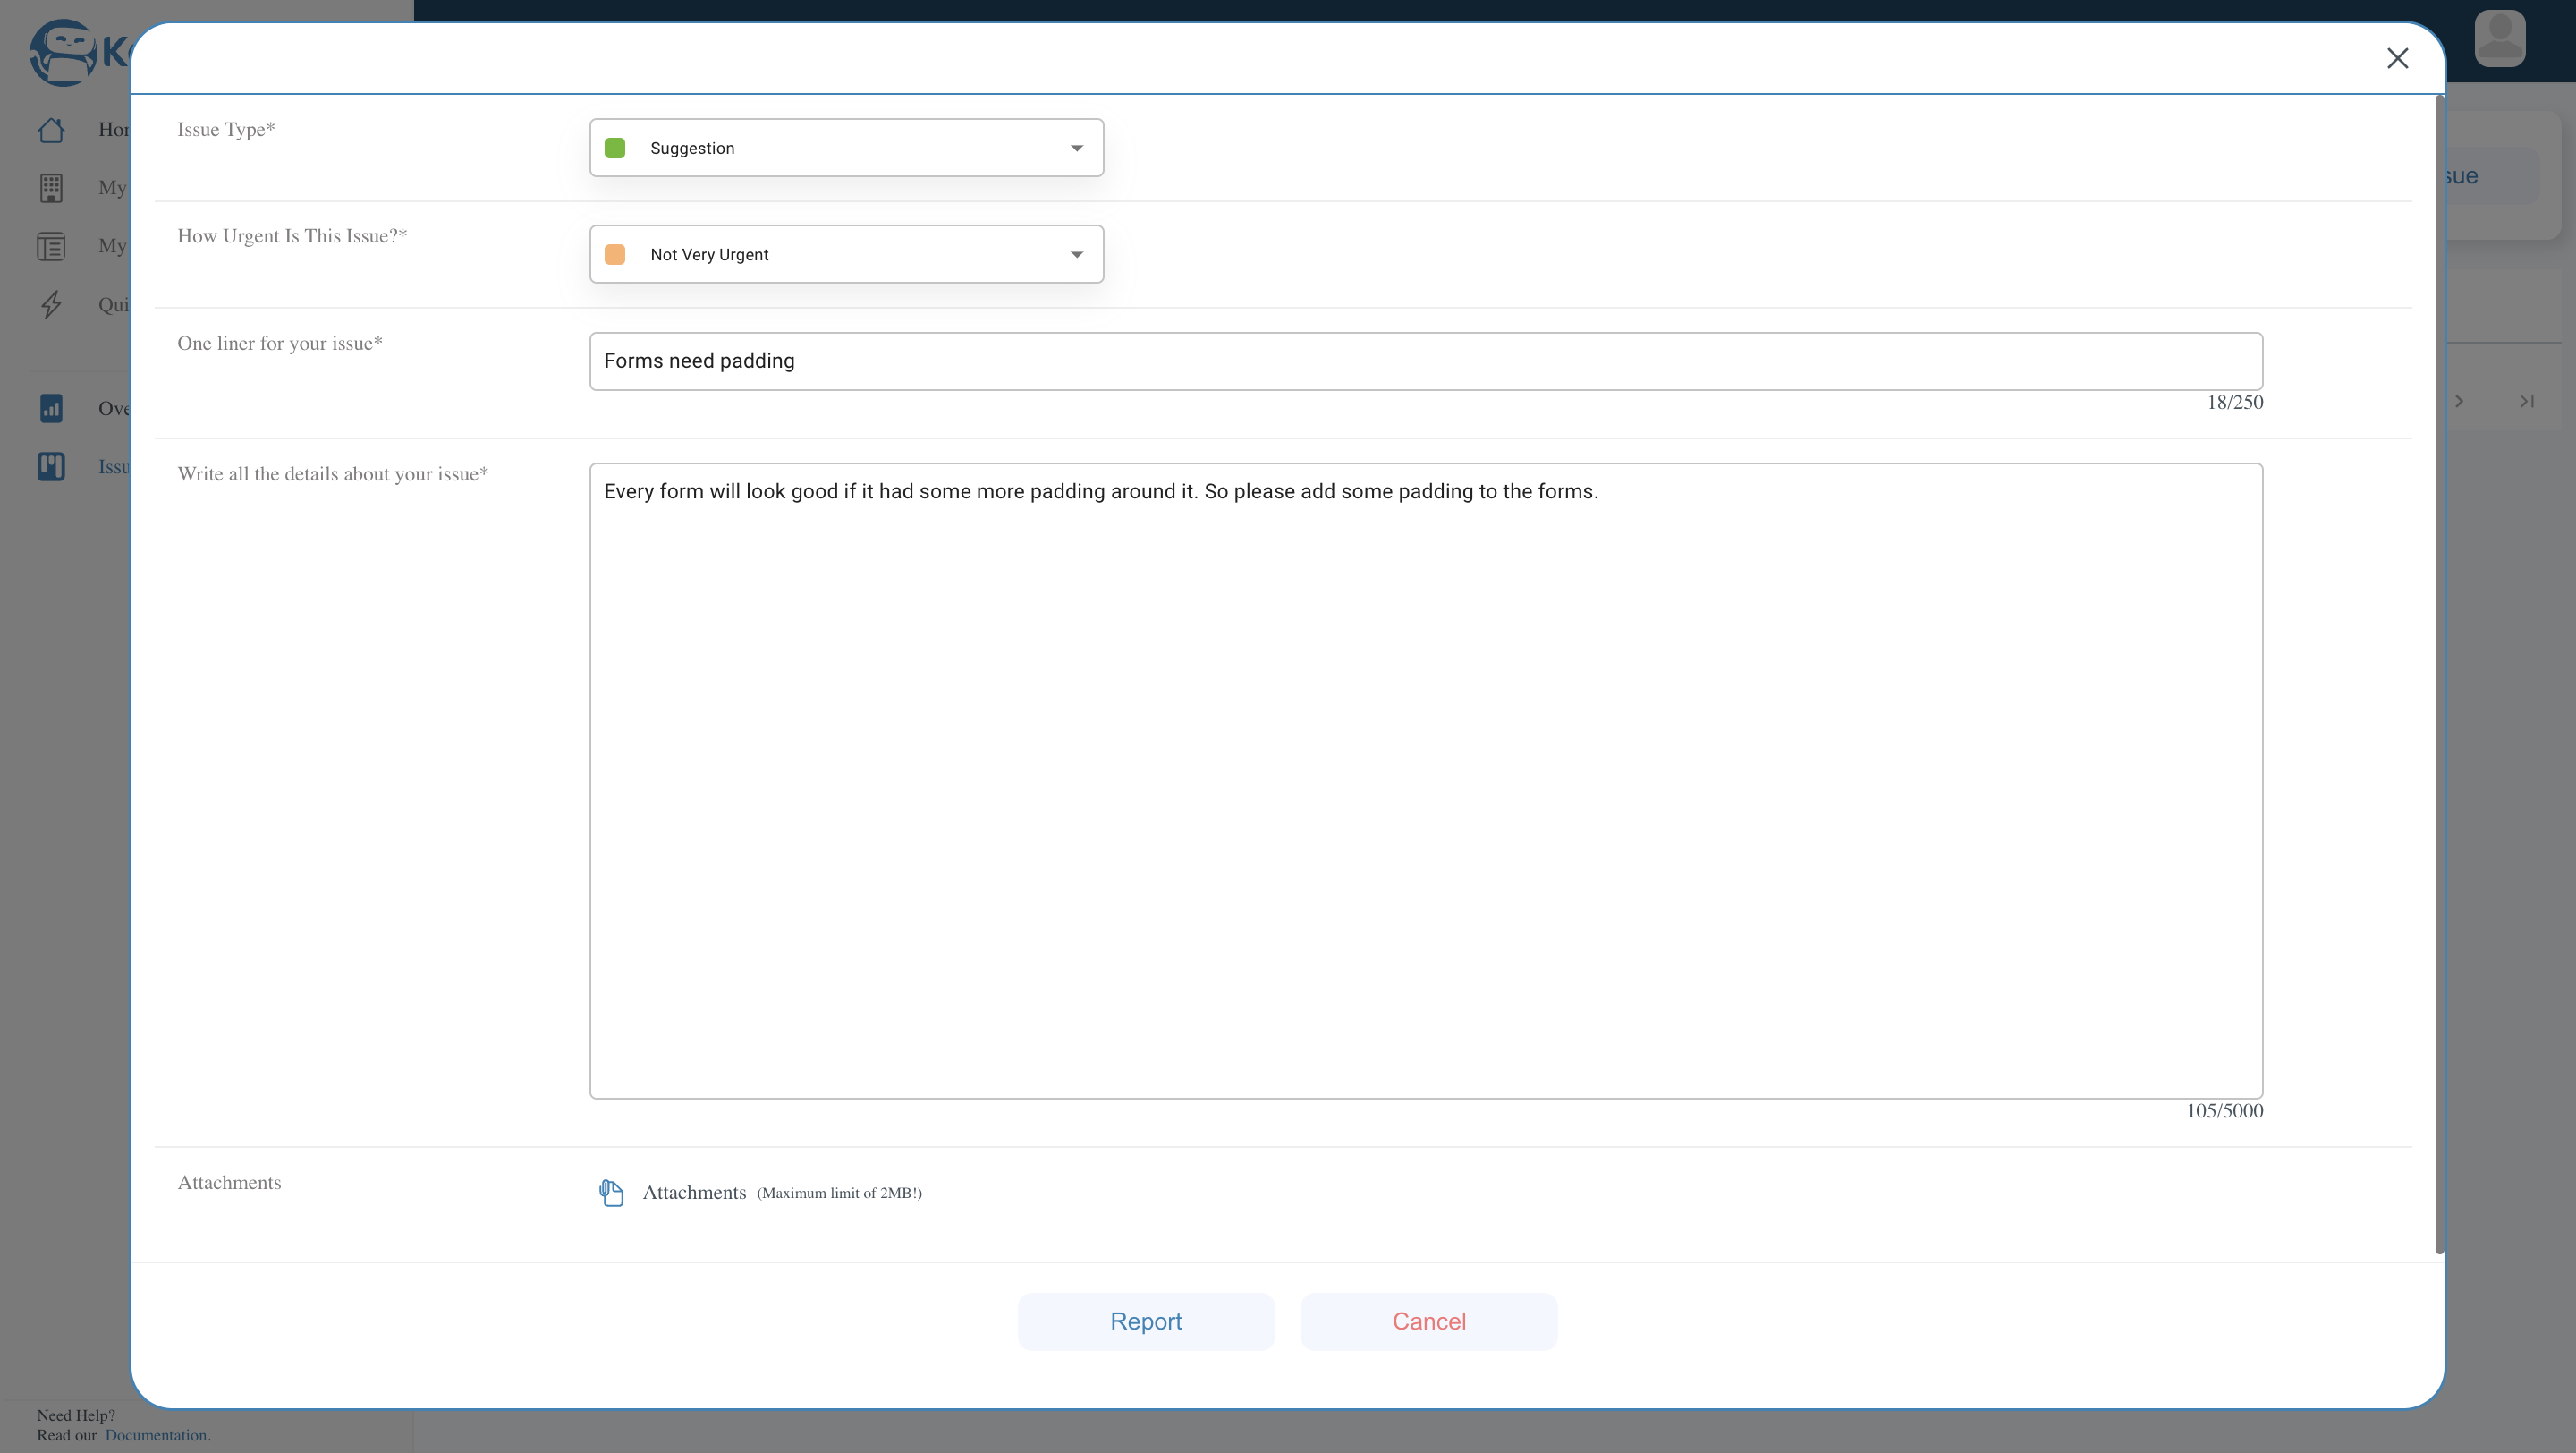
Click on the "Report" button to report the issue, we have reported many other issue regarding the project which can be seen on the issues page. The other fields will be asked to you by your admin and you can fill them up accordingly.
View Issues
If admin has given you the access to view all issues, then you can view all the issues reported by all the users.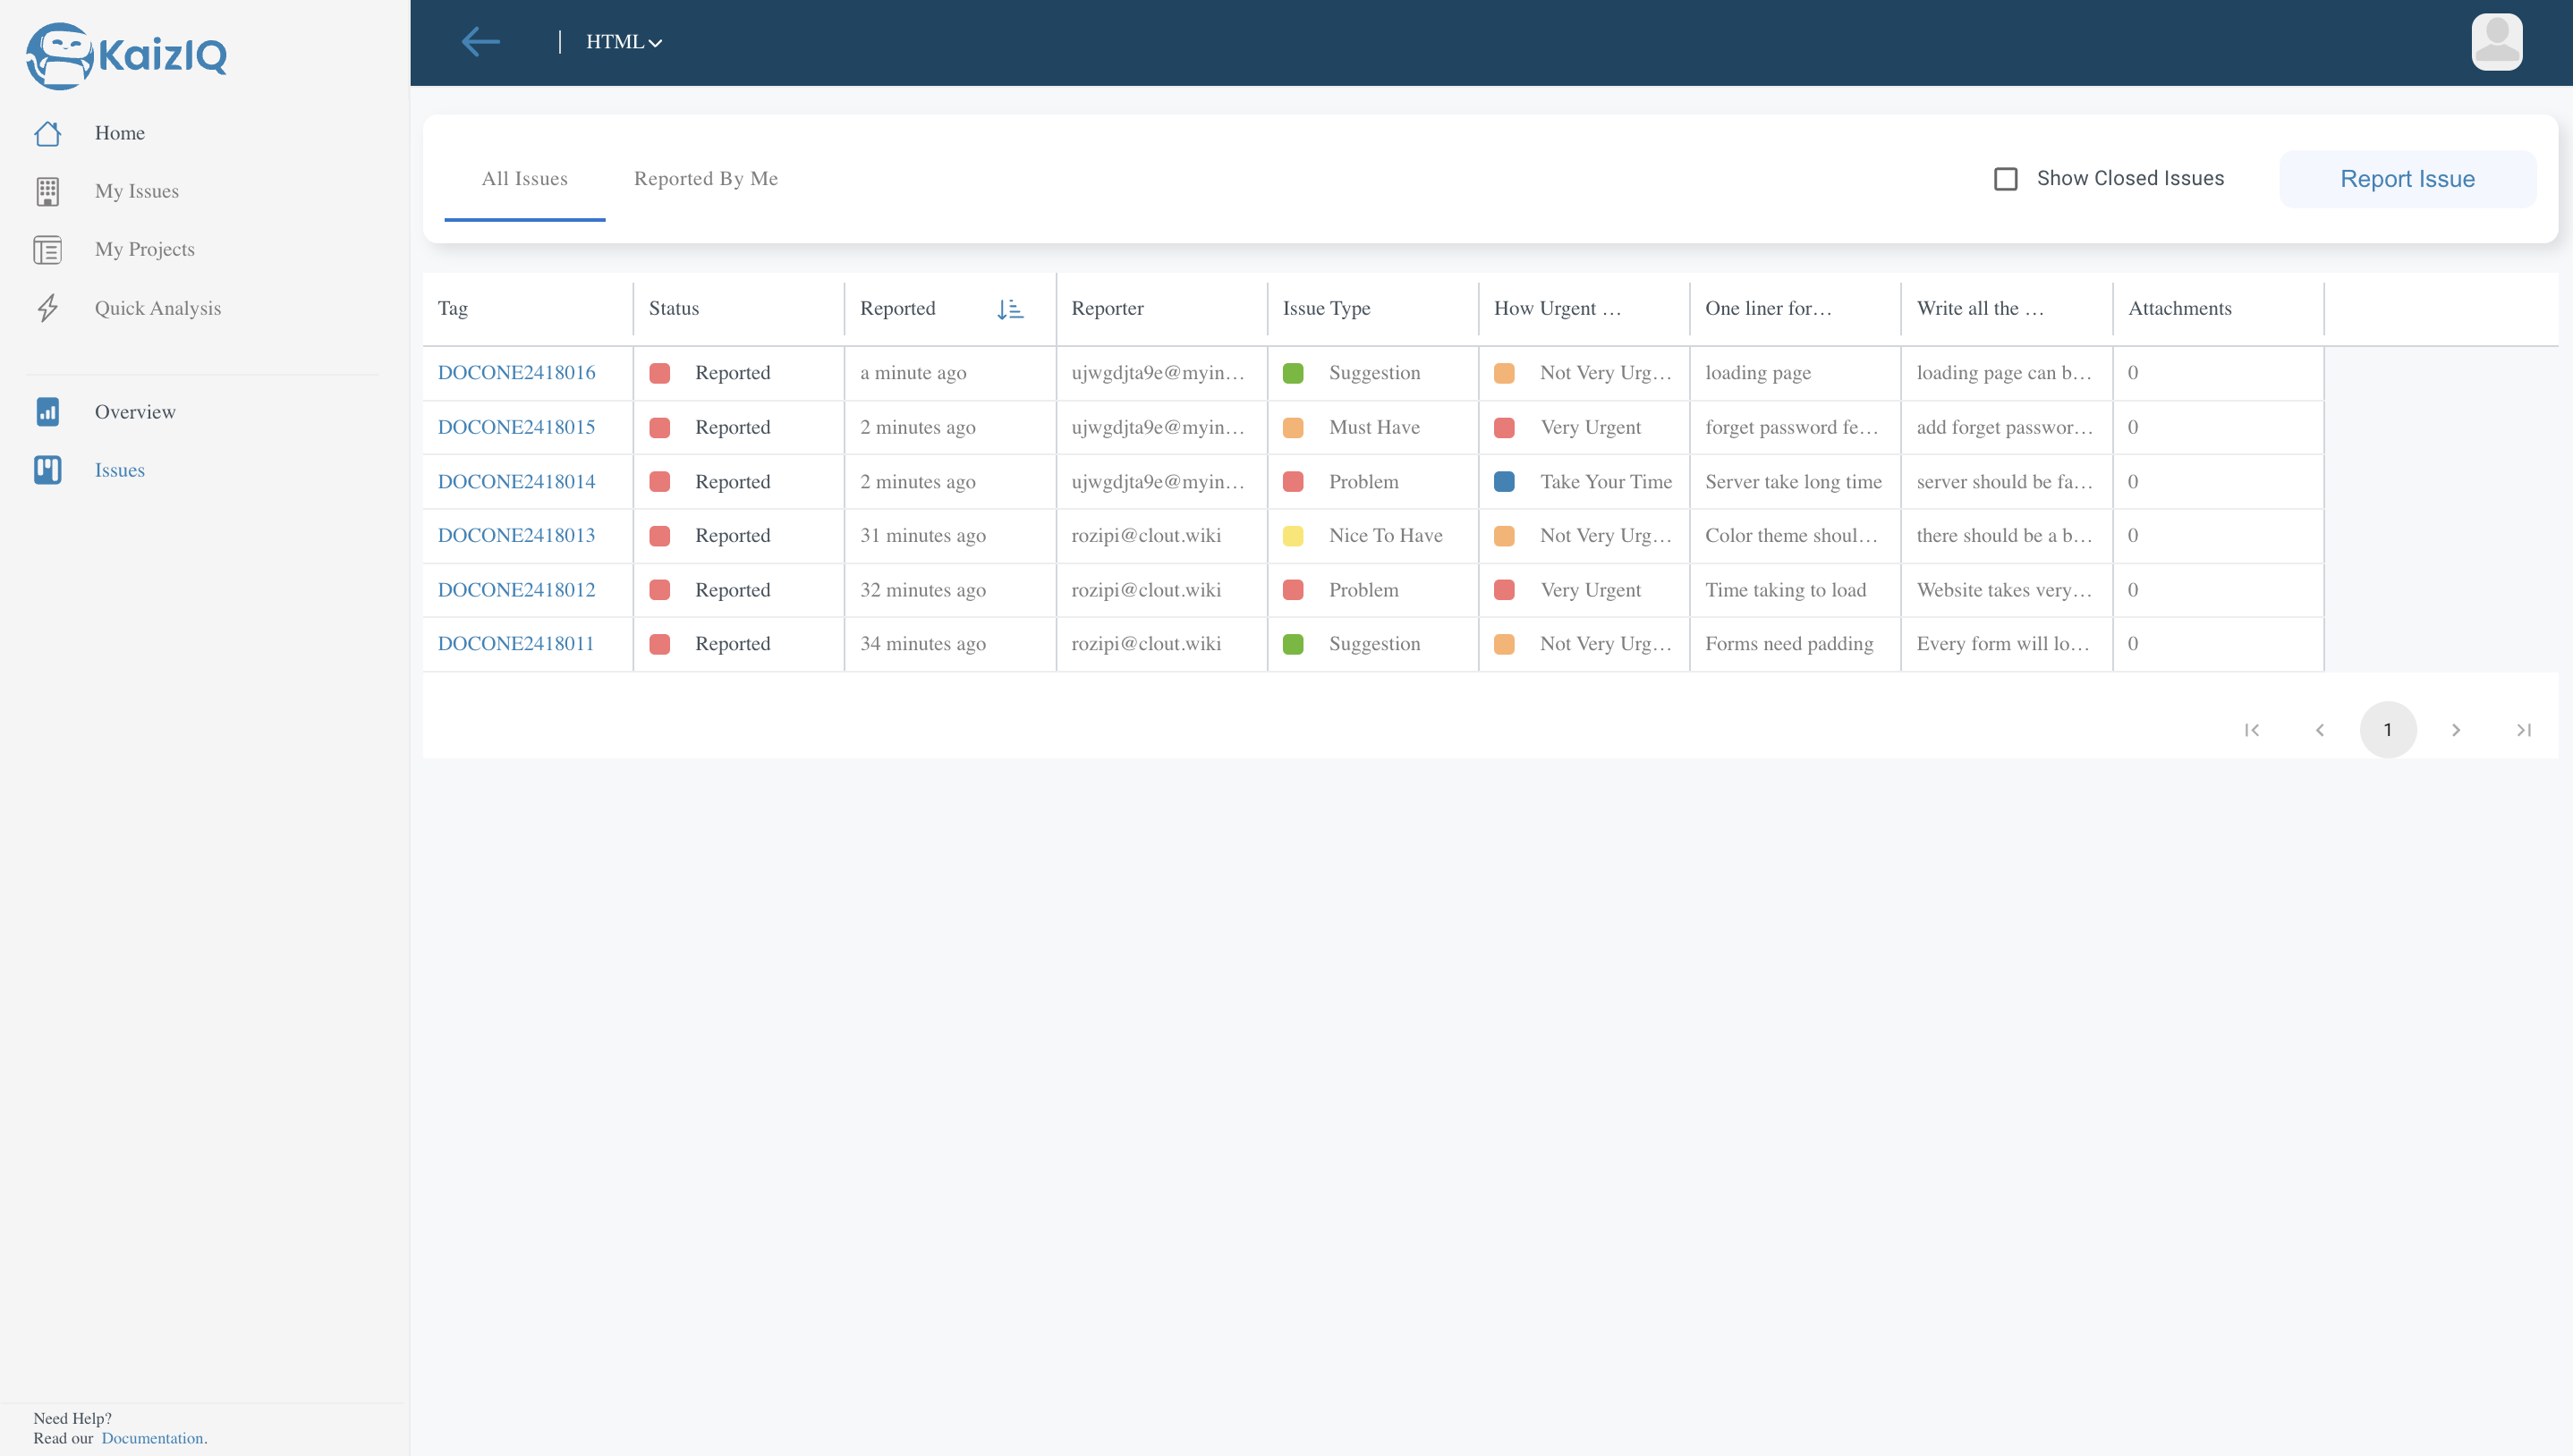
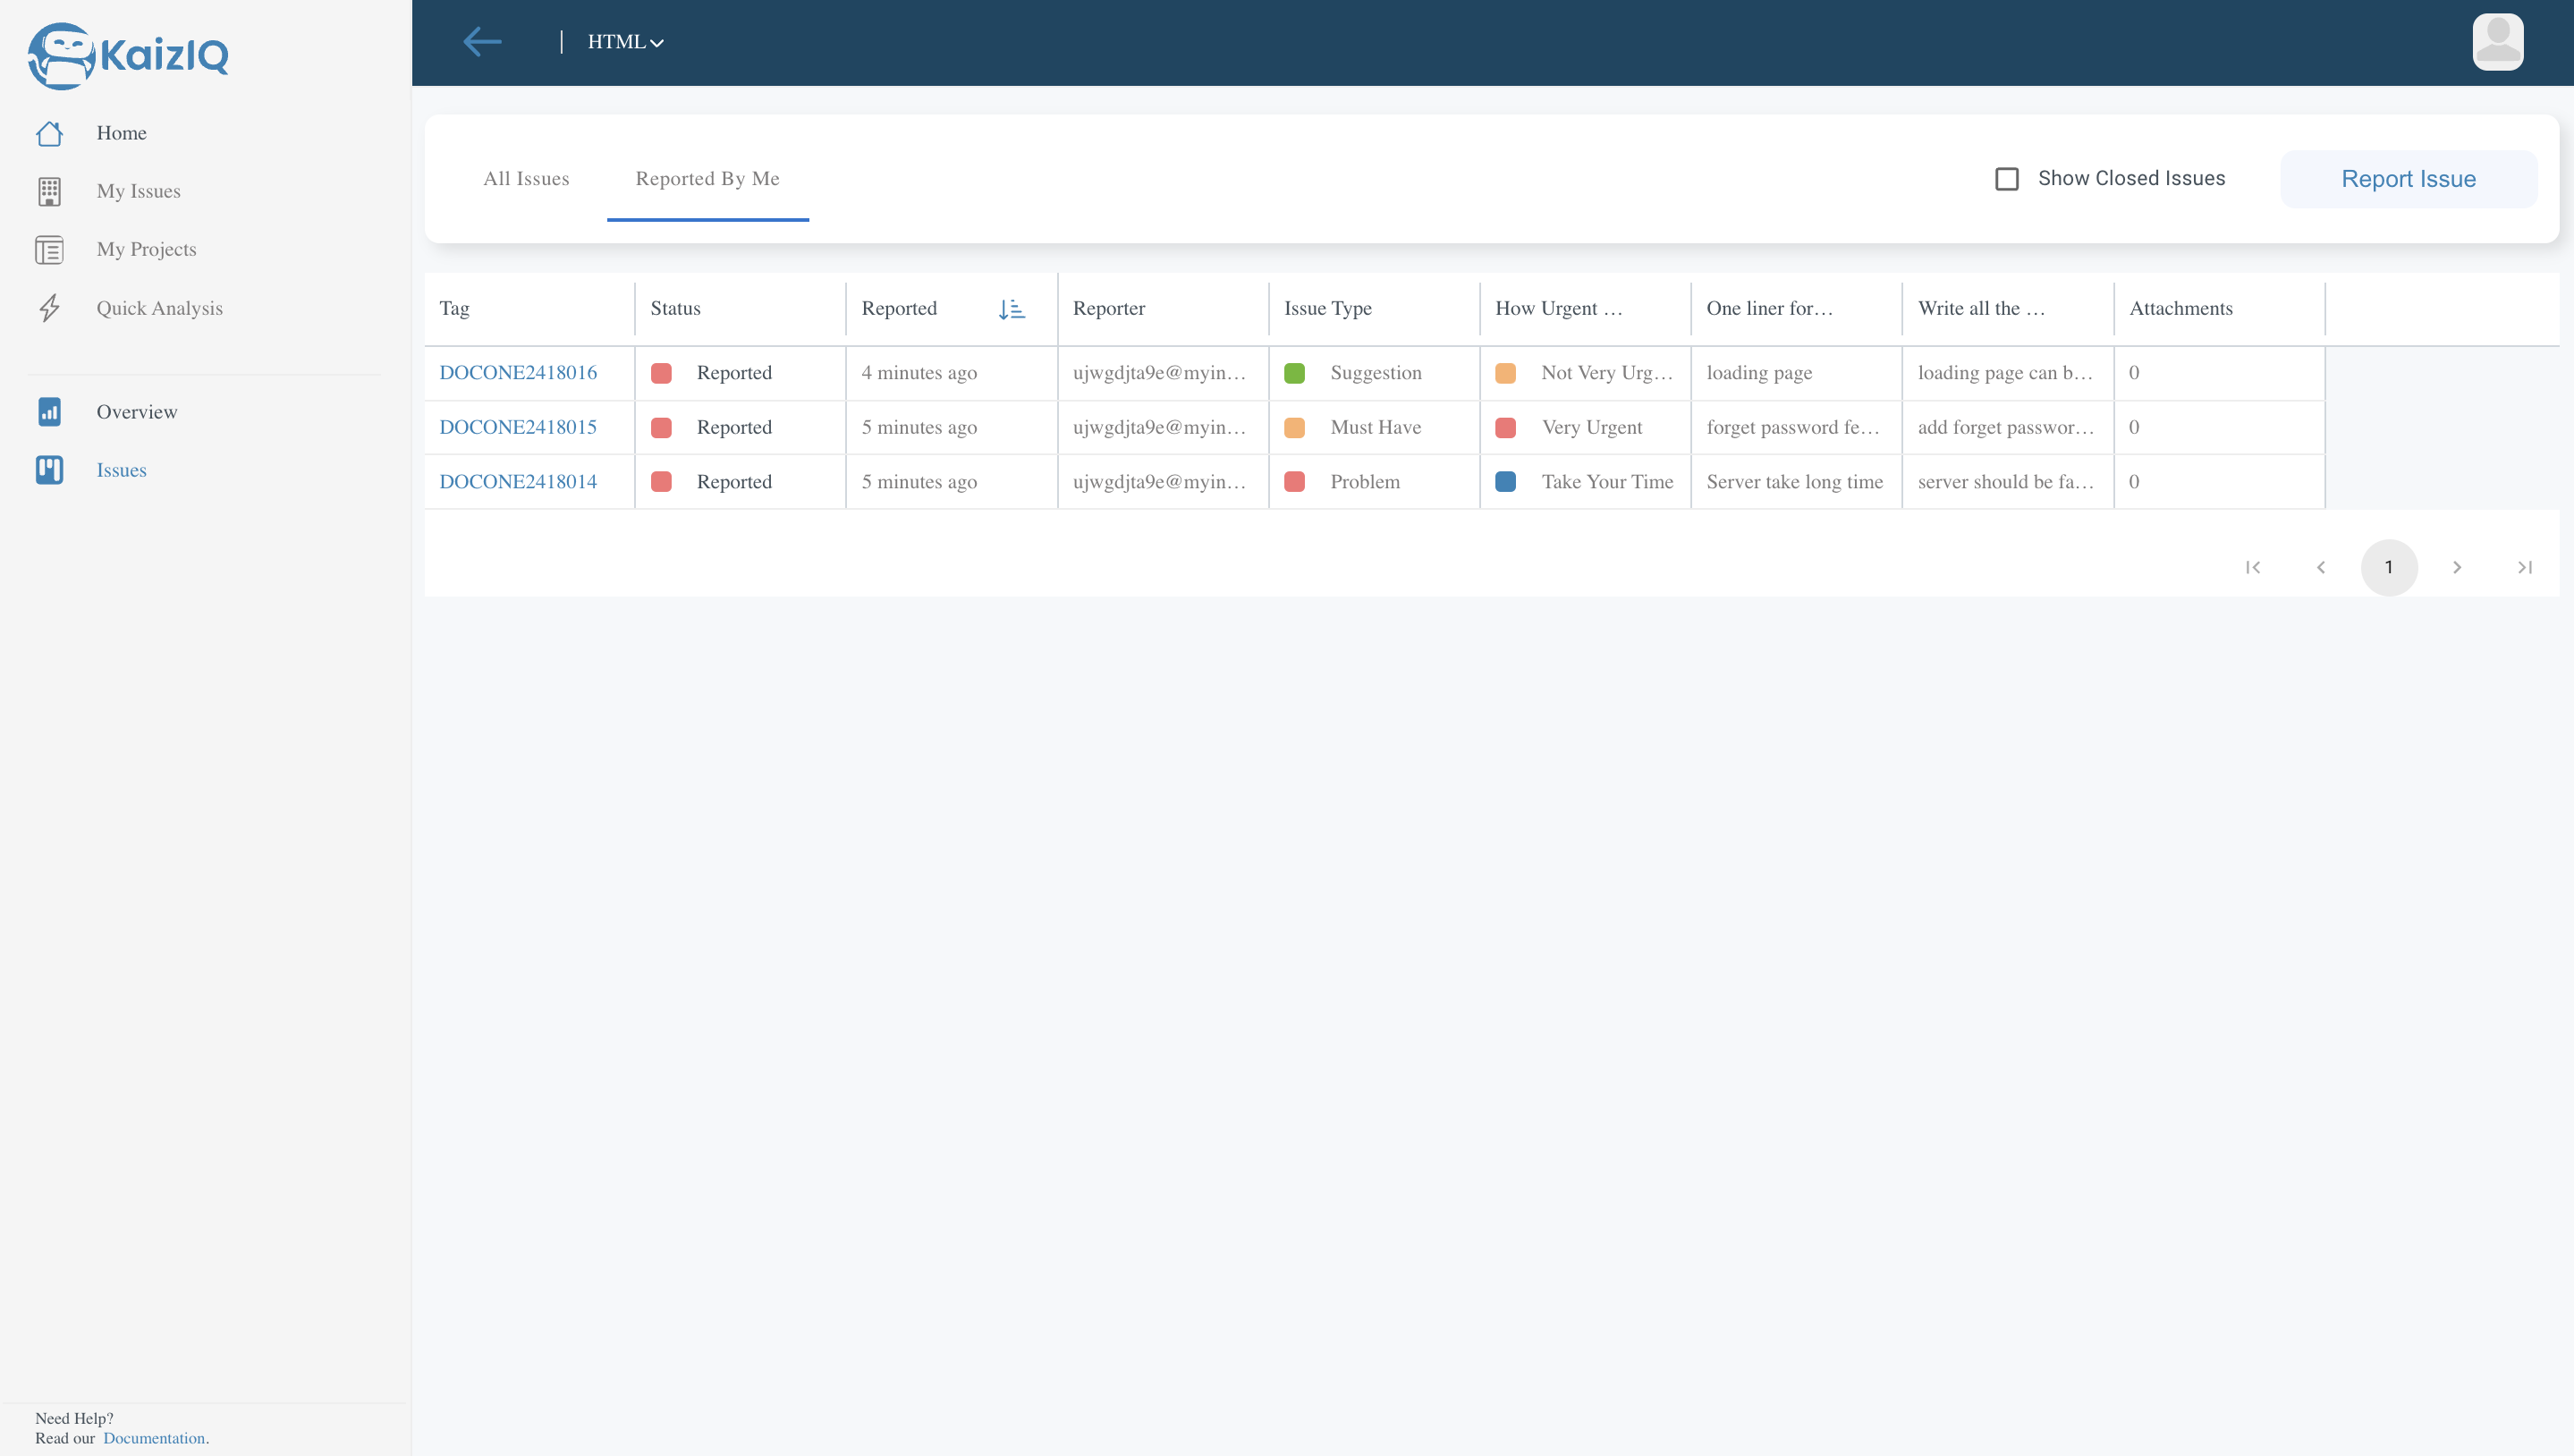
You can also view the issues reported by you by clicking on the "Reported by me".
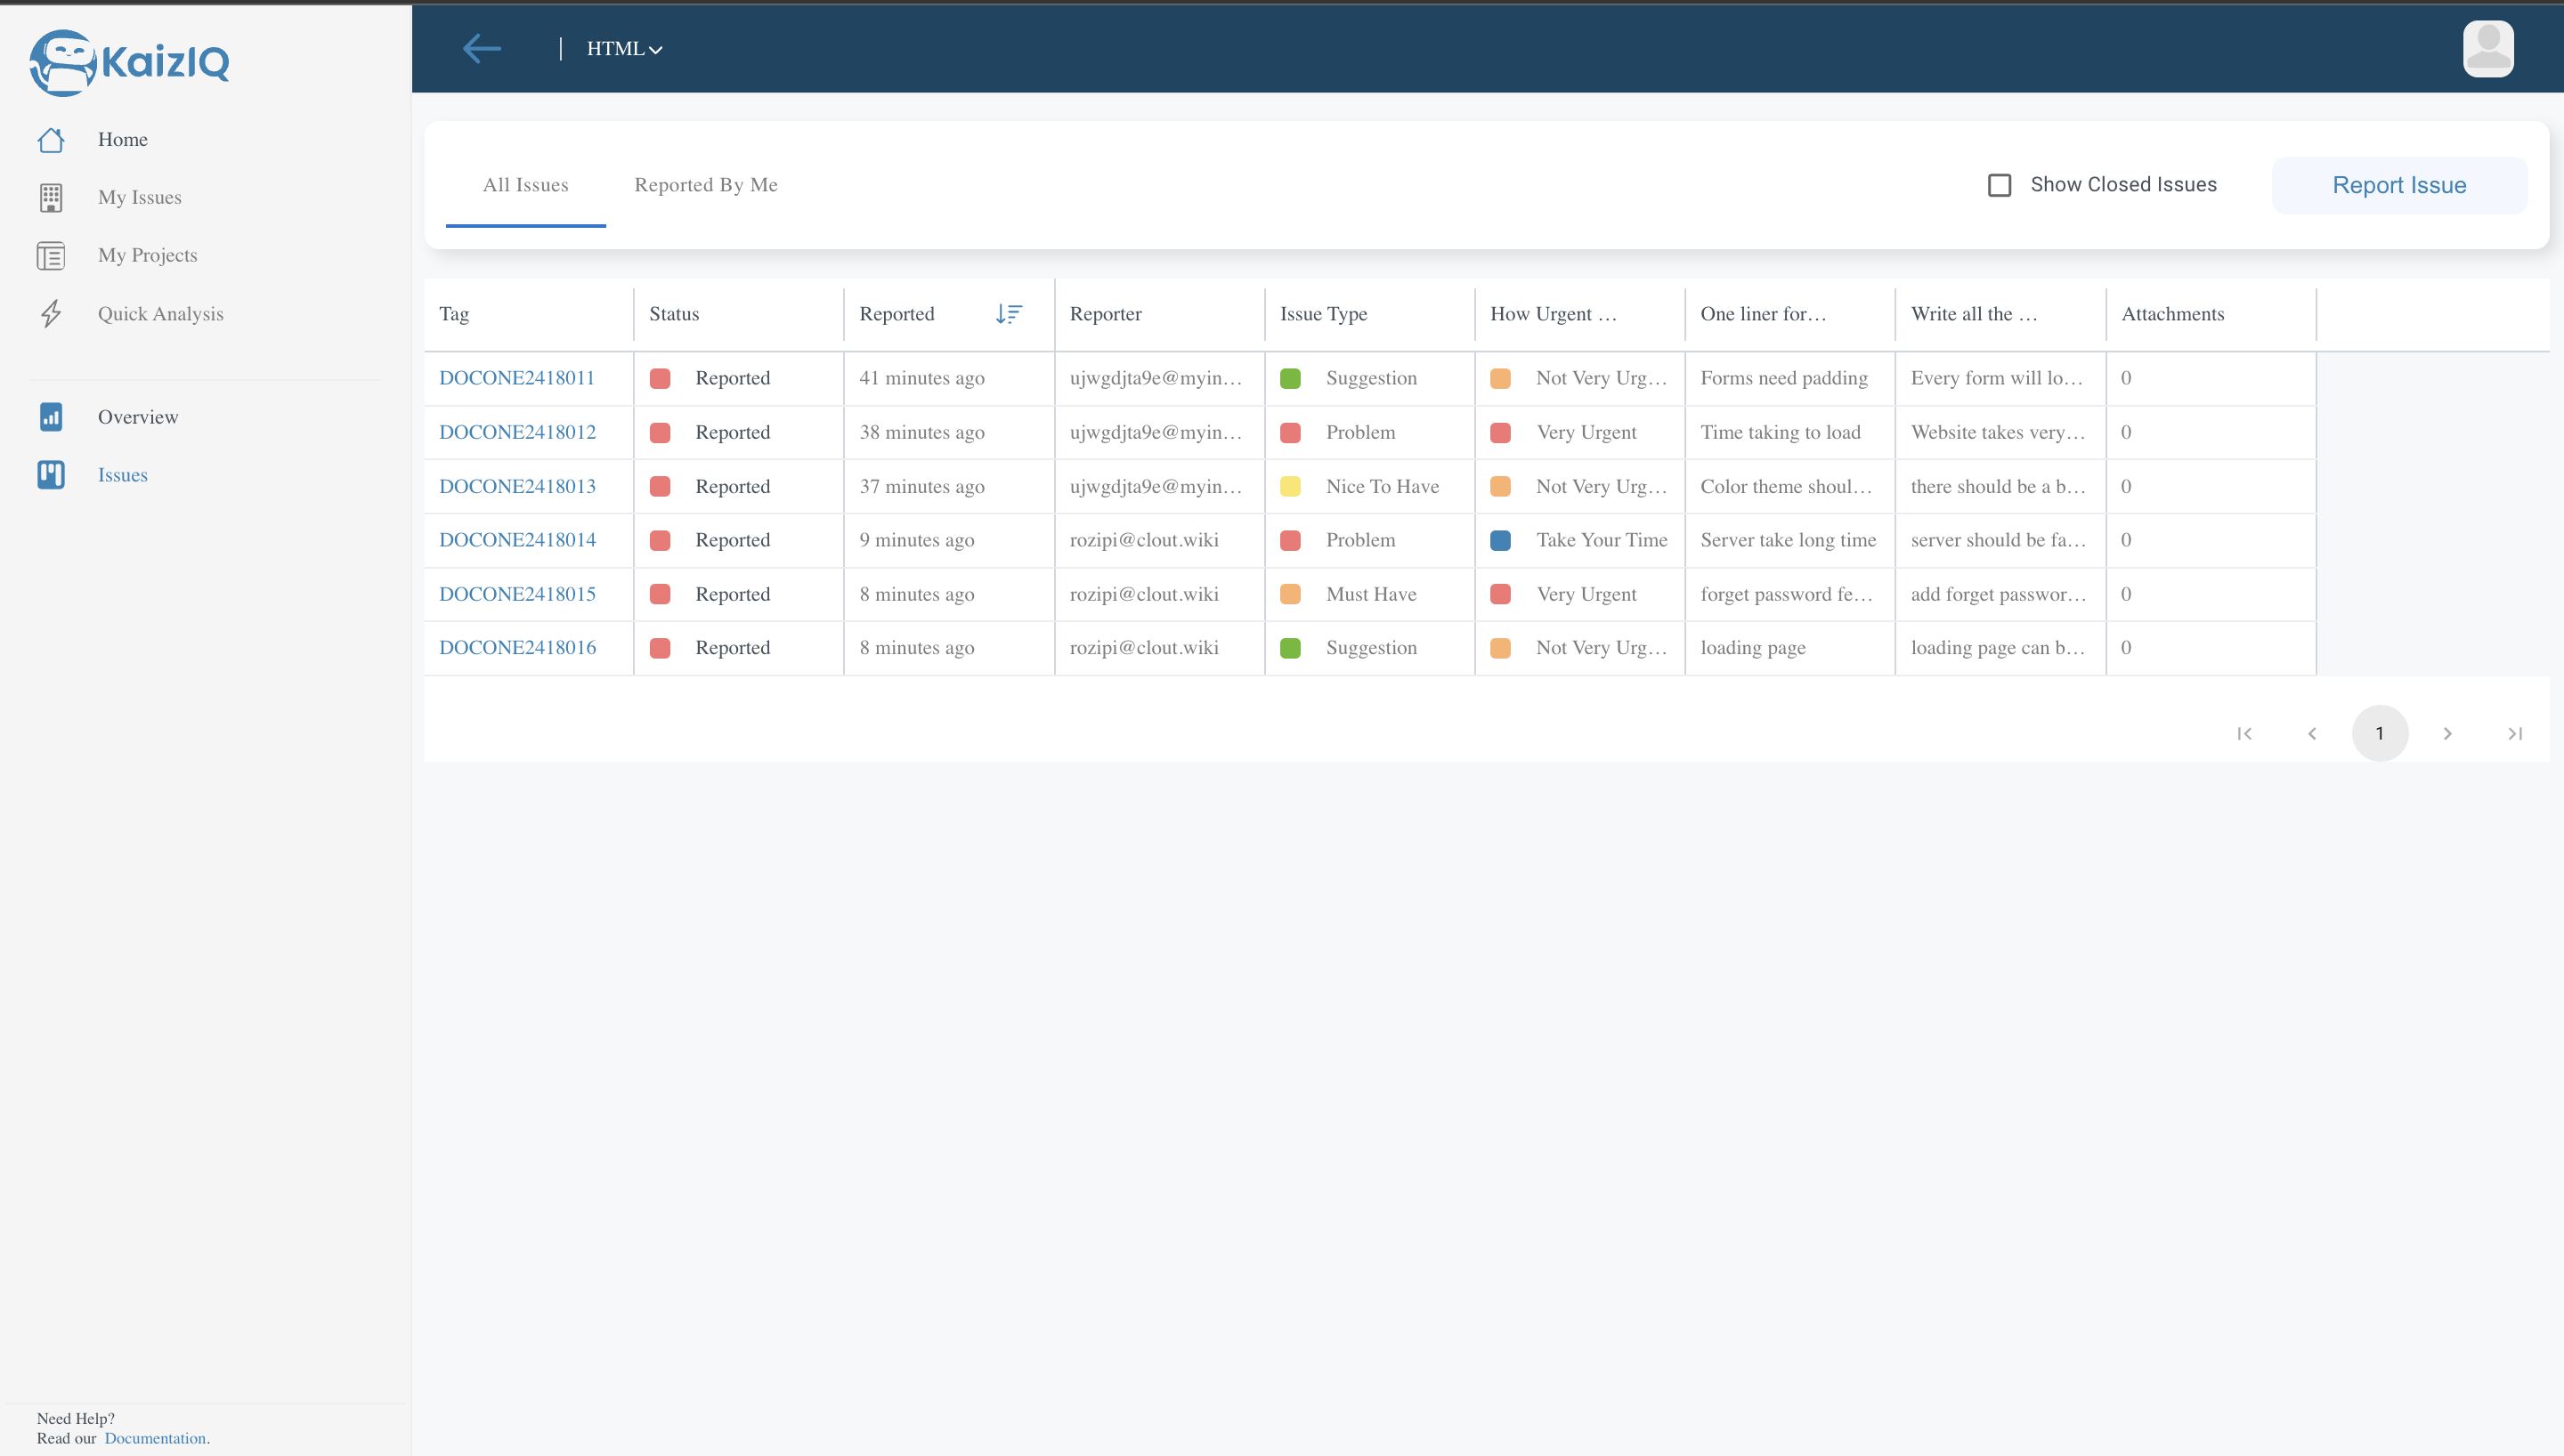
You may sort the issues accrding to the reported time. If you sort them in ascending order, then the issues reported first will be shown first and if you sort them in descending order, then the issues reported last will be shown first.
Add Comments
You can add comments to any issue by clicking on the issue and then writing the comment and click on the "Comment" button.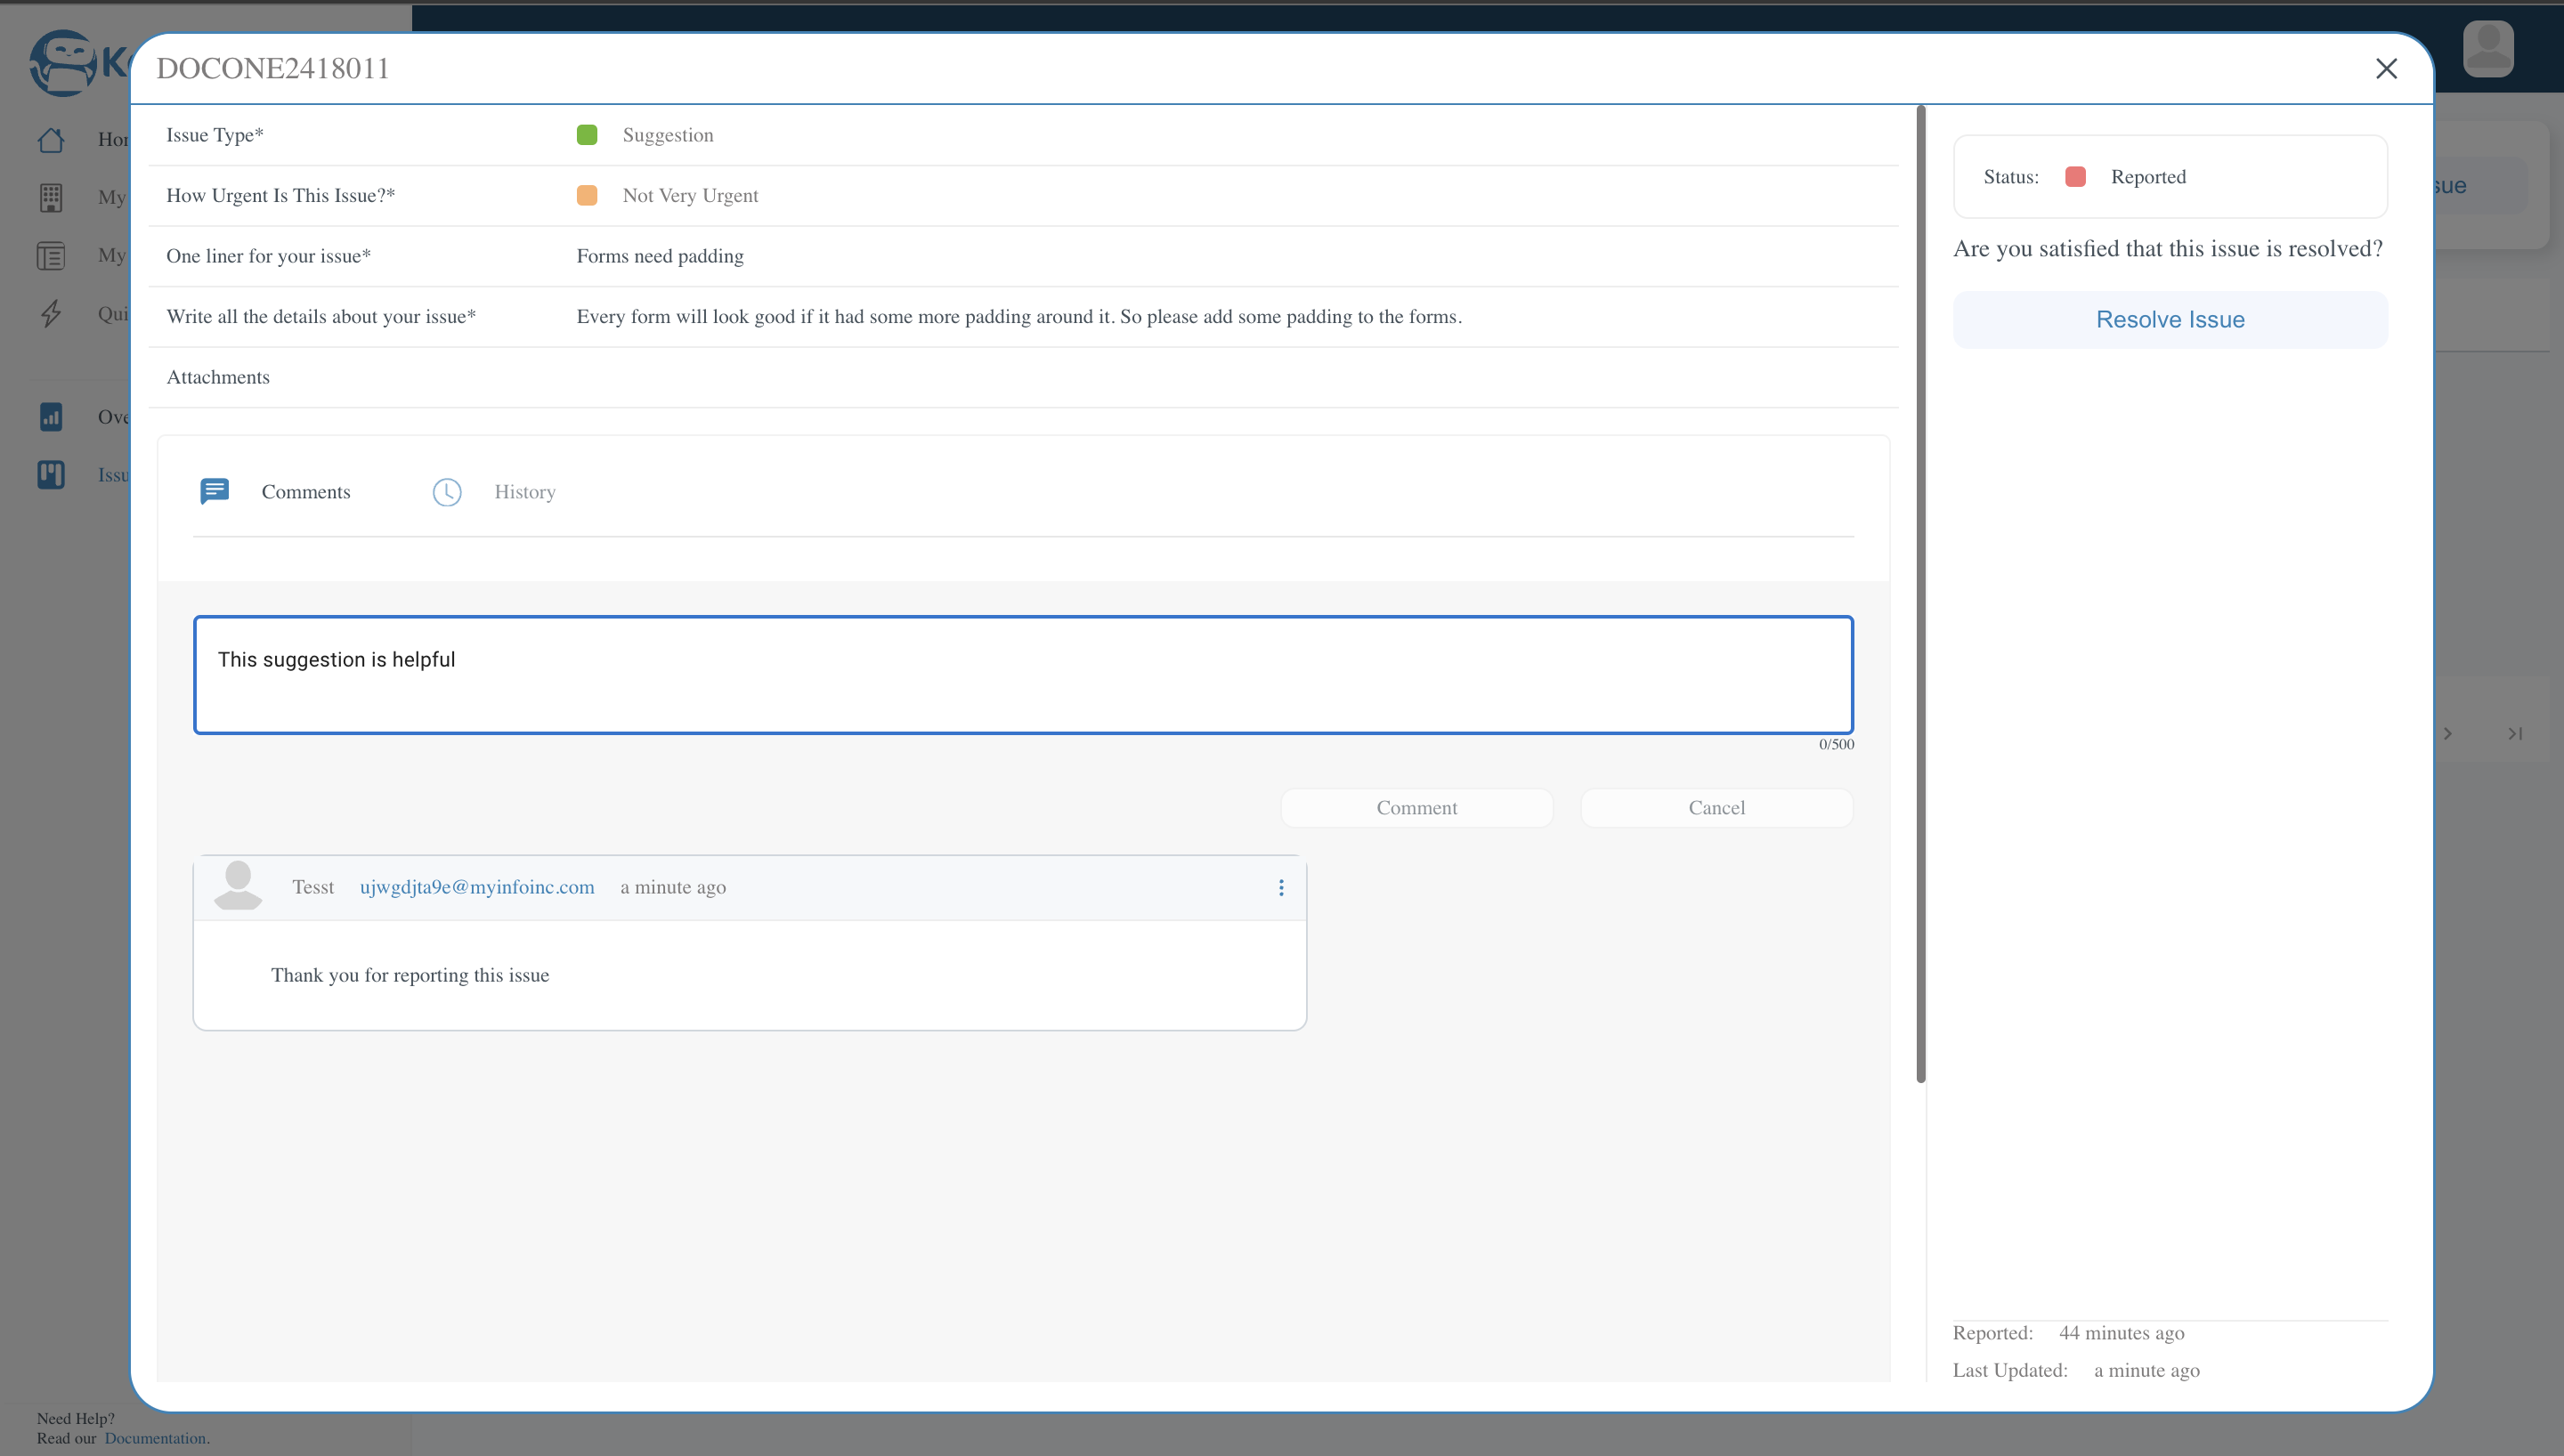
Resolving an Issue
If you think you are satisfied with the solution of the issue, then you can resolve the issue by clicking on the "Resolve Issue" button.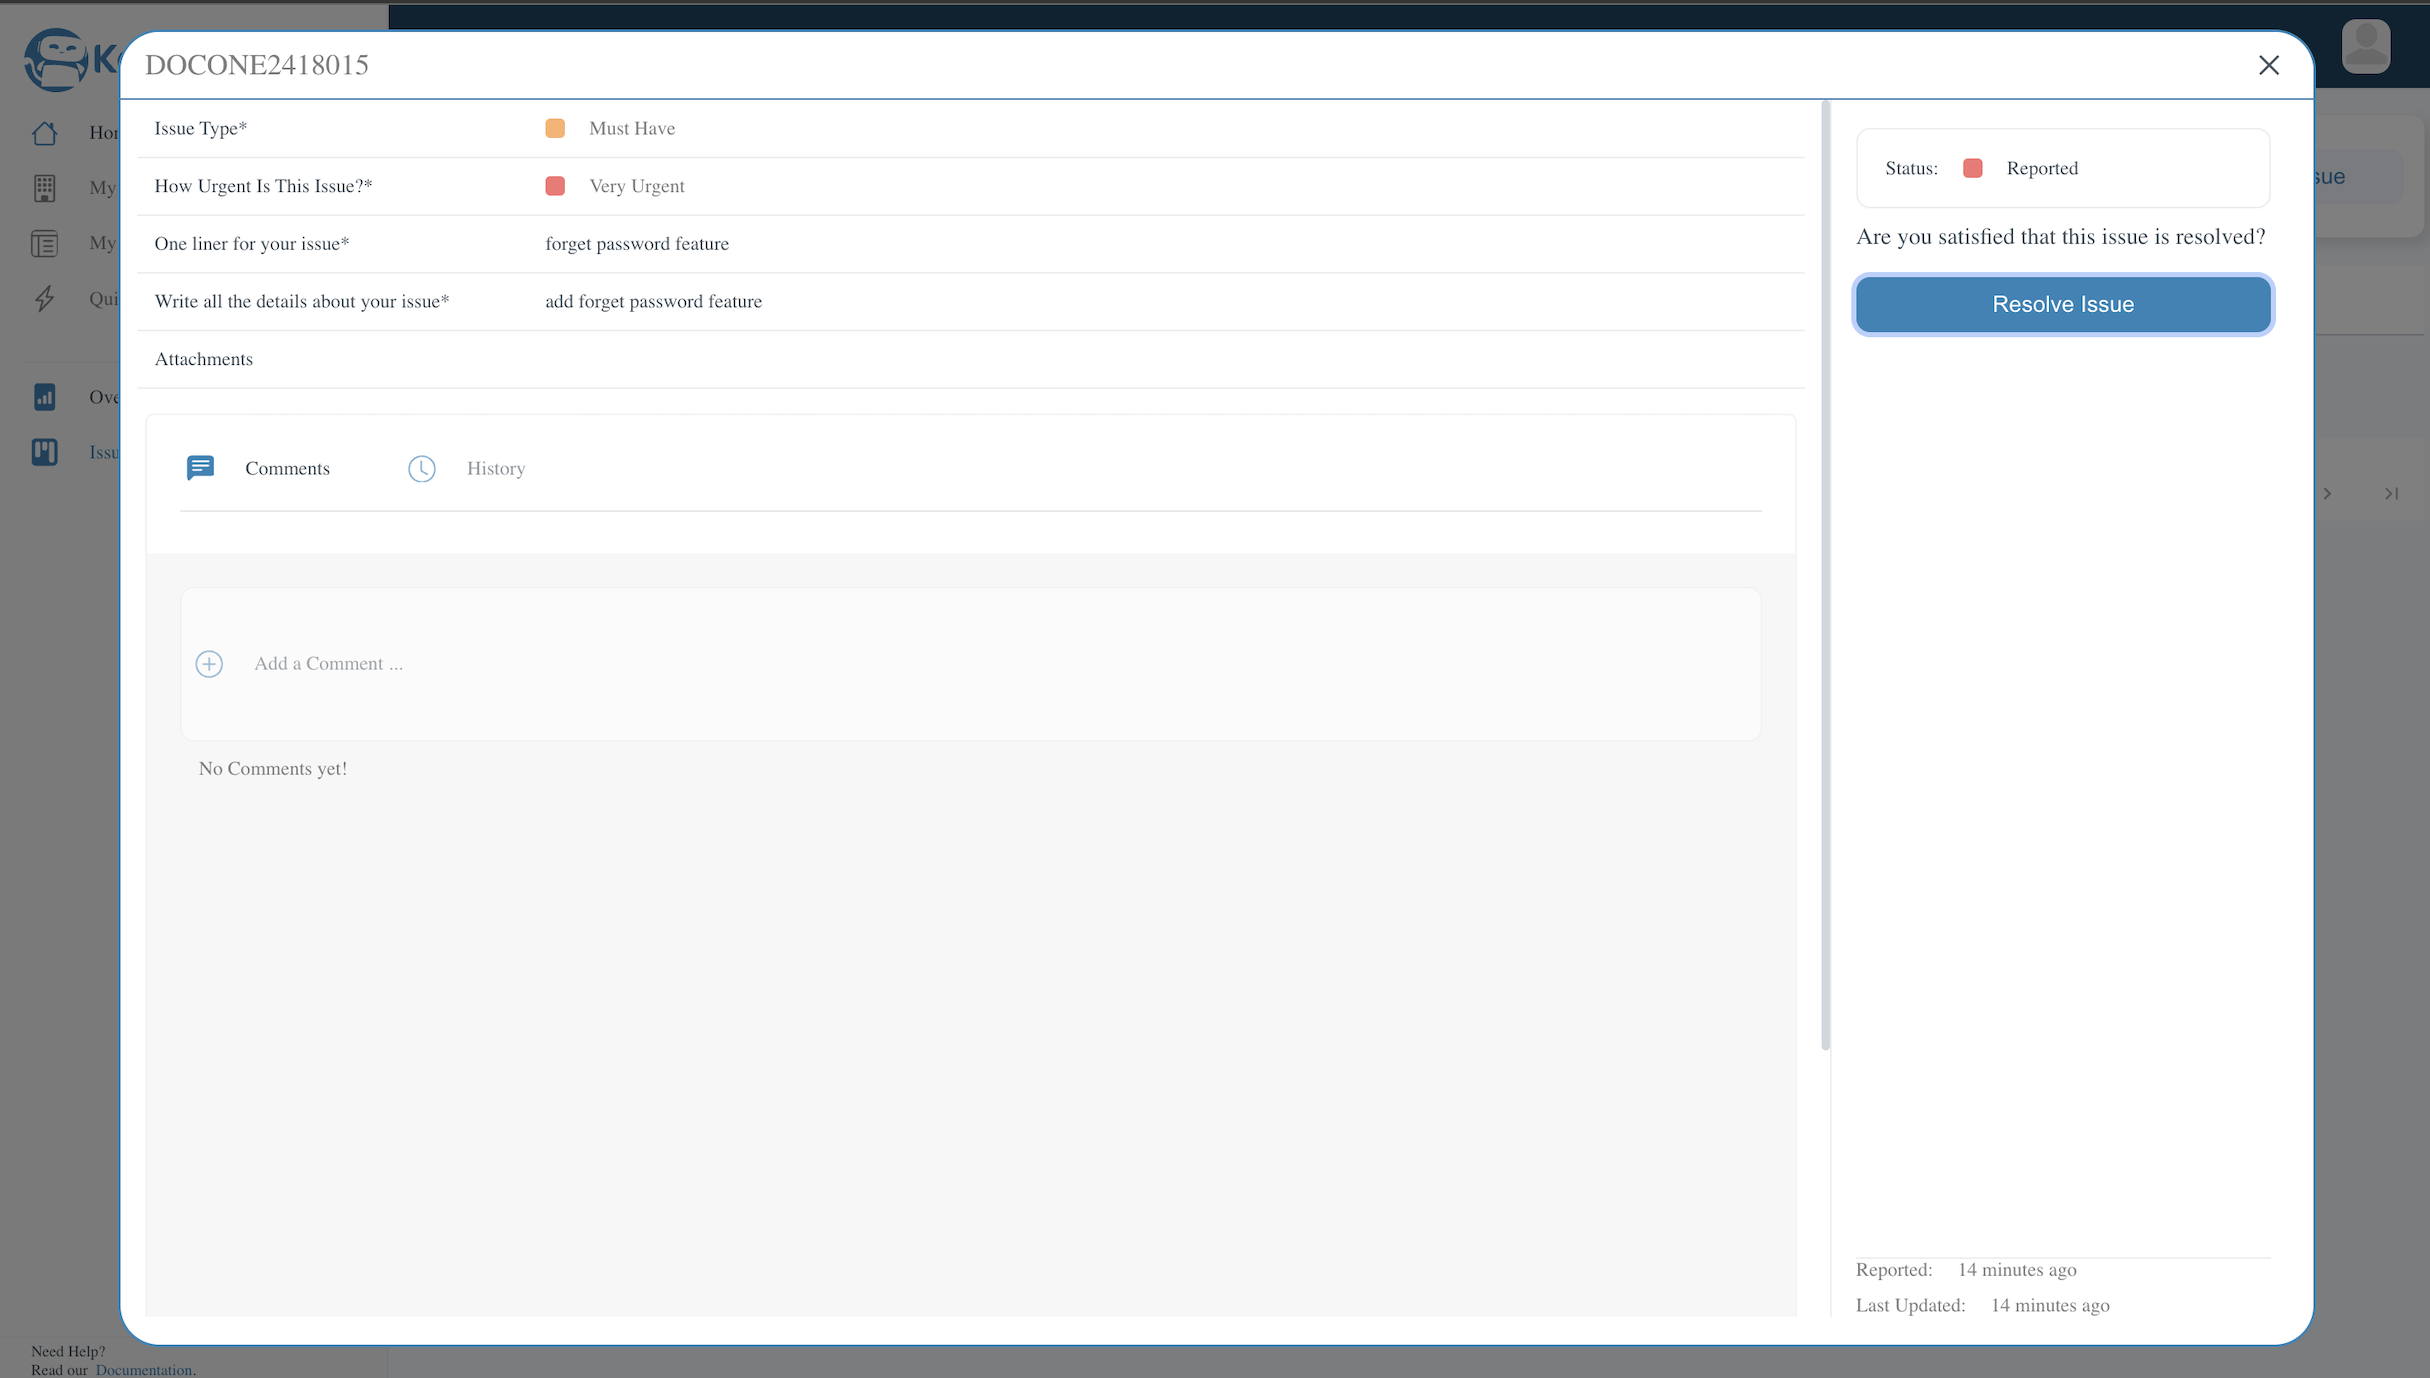
The issue will be resolved and the status of the issue will be changed to "Closed".
Escalating an Issue
If you think you need an issue to be solved urgently, then you can escalate the issue by clicking on the issue and then changing its status to "Escalated" or click on the "Escalate Issue" button.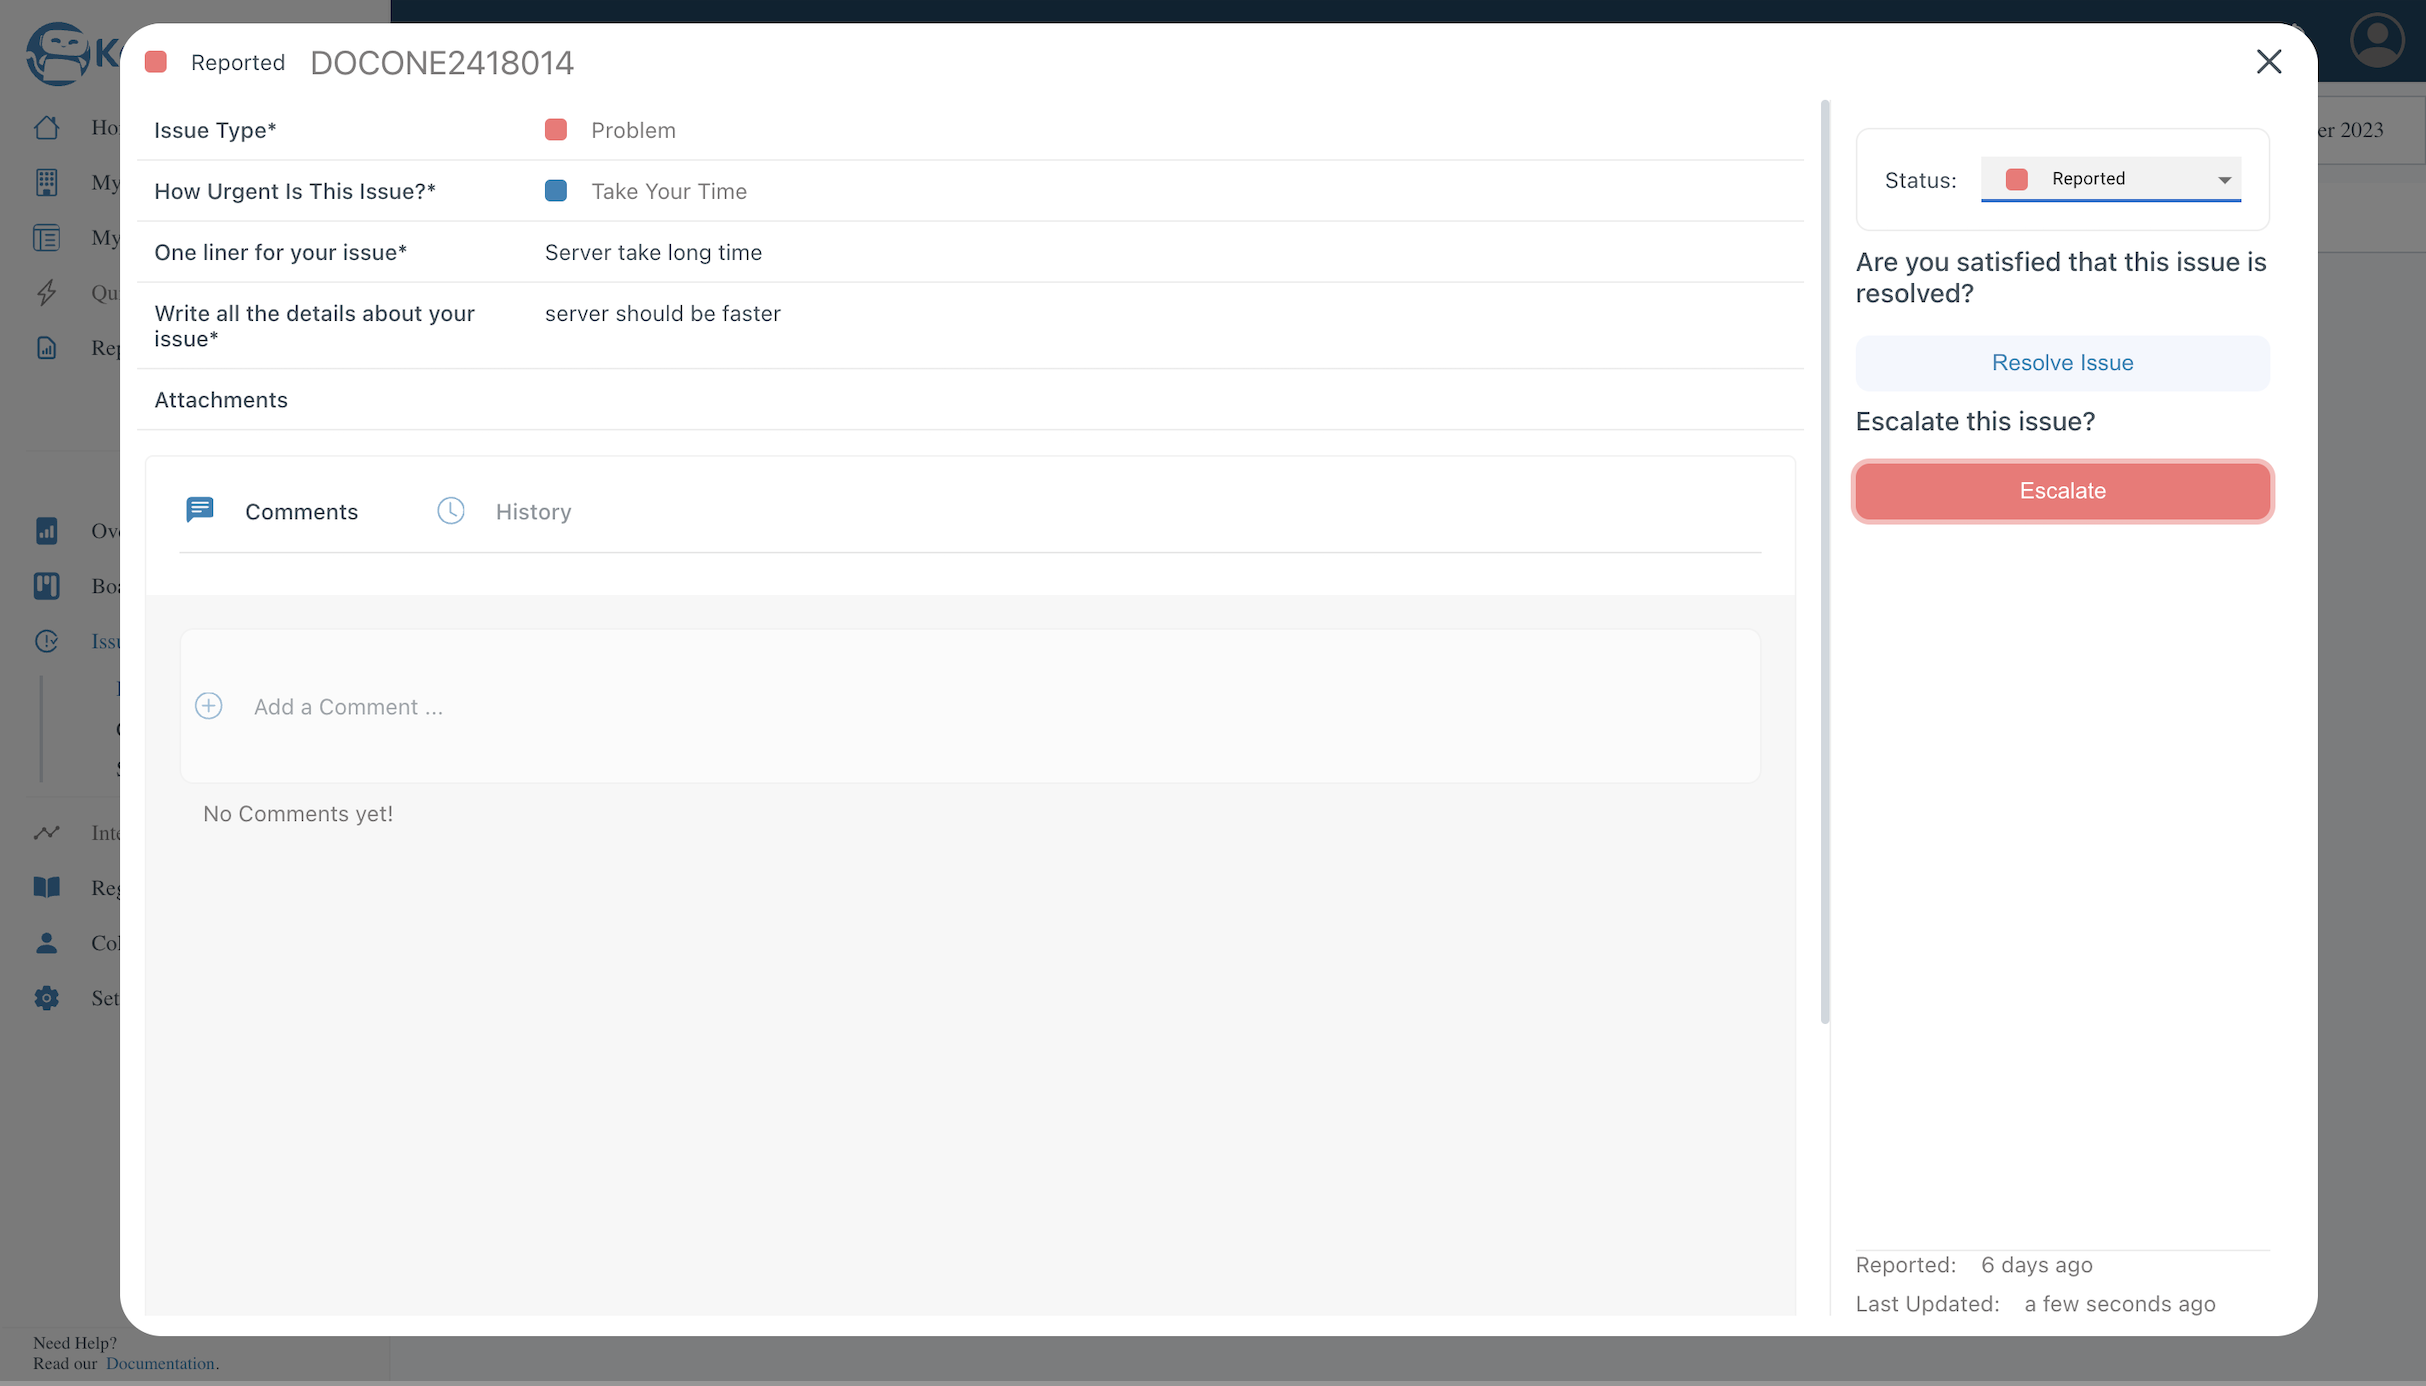
Reopening an Issue
If you think the issue is not resolved properly, then you can reopen the issue by going to the resolved issue and then clicking on the "Reopen Issue" button.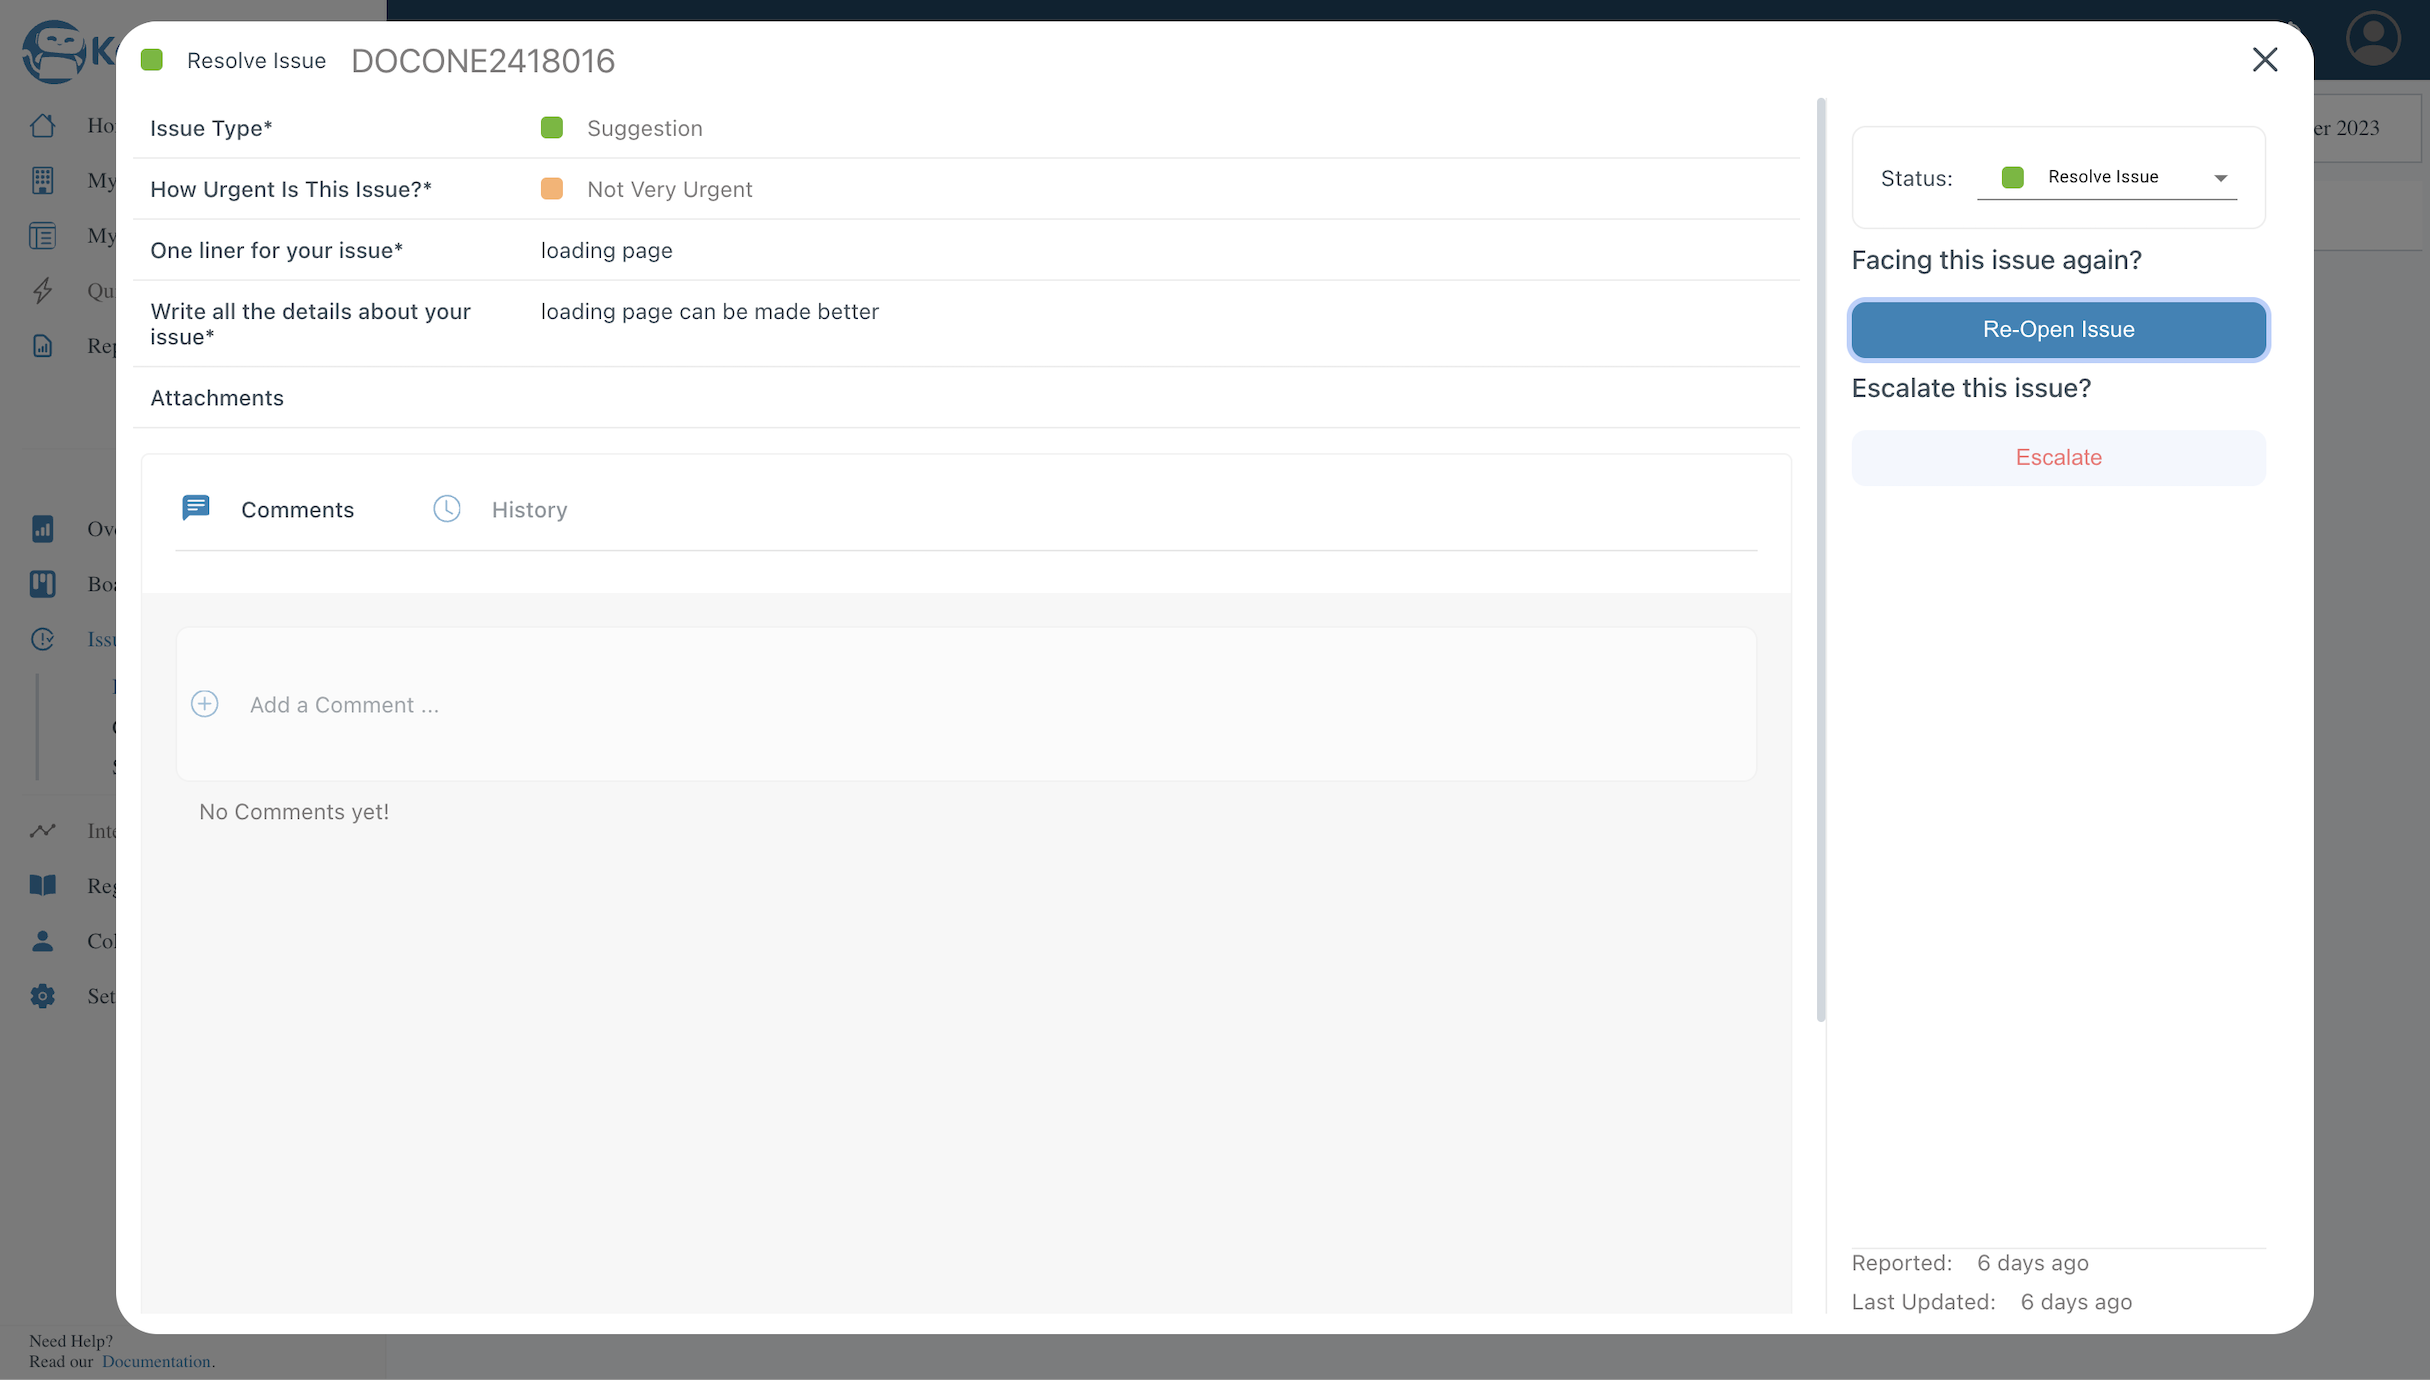
View Closed Issue
If you want to see the closed issue then you can mark a check on the "Show Closed Issues" checkbox. Closed issues will also appear on the issues page.